Terminal Escape Room can make you lose your train of thought—because you’re on a train and need to think. If all this applies, we have a full walkthrough for Chapter Two in this Roblox escape room spin-off.
As someone who’s done their fair share of escape rooms, I know the pain of getting stuck on a puzzle. You think you’re never going to solve it, stagnate and waste time, never advance, and Roblox‘s Terminal Escape Room has this effect.
It doesn’t matter if one puzzle has you stumped or all of them! This walkthrough breaks down each puzzle and the solution for each, and if you haven’t already, make sure you complete Terminal Escape Room Chapter One first.
How to complete Terminal Escape Room chapter 2
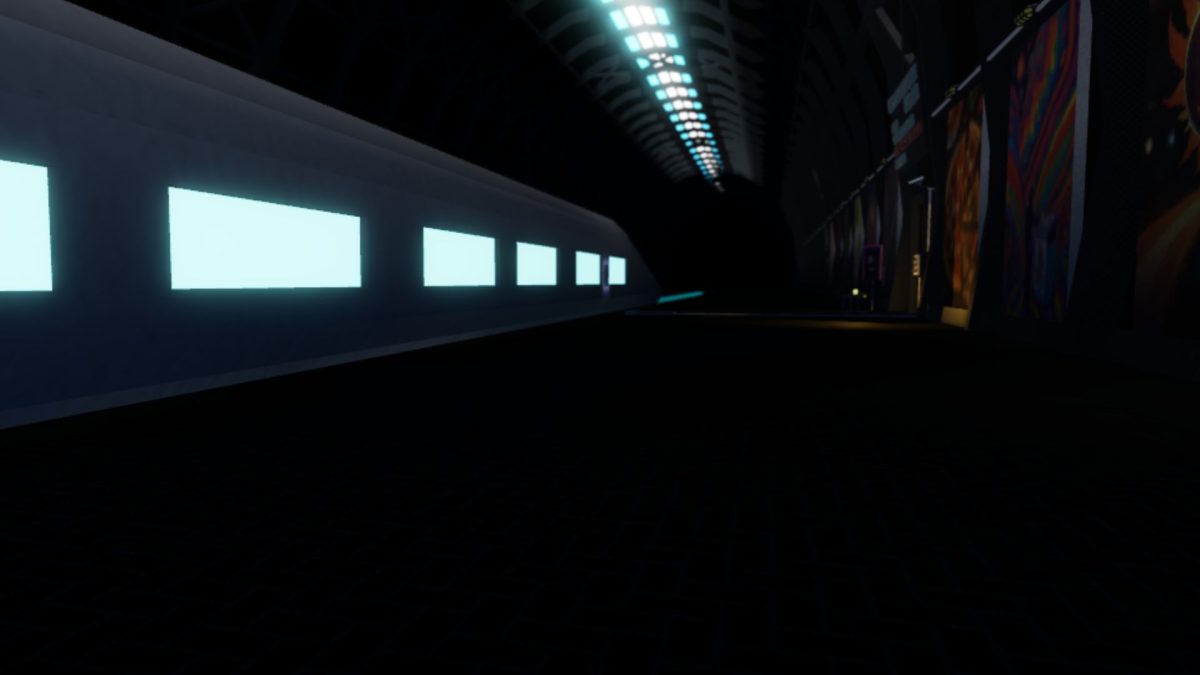
Chapter Two’s “Tunnel” gets us off the speeding train heading for certain disaster in Terminal Escape Room. But a new set of obstacles awaits us this time around. Now we’re stuck in a train tunnel.
This is every puzzle and how to overcome it in Chapter Two of Terminal Escape Room.
Screwdriver puzzle solution
- Find a screwdriver to open the box on the side of the train.
- First thing first, turn your Flashlight on.
- Now, head over to the platform on the opposite side of the train.
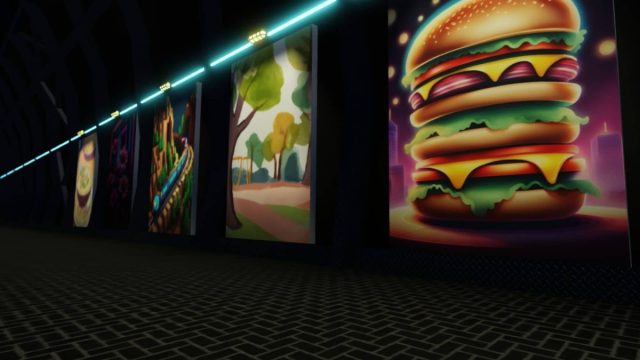
- Check out the posters, and you should see one with a big headline saying, “Lost something? Feeling Screwed?“
- It also says, “Our lost and found is located on the ground to the left of the flowers.”
- Hop back to the opposite platform and walk to the end until you find art on the wall.
- In front of the flower art is the screwdriver for you to pick up.
- Go back to the metal box and unscrew all four screws.
Colored wire puzzle solution
- You need scissors. The clue for this is once again on the platform featuring all the posters.
- On the right side of the posters is one saying, “As per the request of the GZMU, stop leaving sharp objects on the train tracks.”
- From the poster, turn left, go back to the end of the train where you began the chapter, and go onto the tracks—eventually, you find the scissors on the tracks.
- Go back to the electrical box and cut every wire.
- It’s back to the posters, and near the middle is one saying, “A beginner’s guide to standardized electrical rewiring protocol.”
- To save you the trouble, I can tell you the rewiring order is Purple, Brown, Red, Green, Black, Orange, White, Pink, Yellow, Blue.
Keypad code solution
- This one is tricky. To get the code, use the flashing dragon sign, the sign with flashing letters, and the flashing planet sign.
- Firstly, there’s a poster on the opposite side of the train advertising “The Dragon Dimension, the #2 movie on streaming—this is the first number.
- The flashing letters on the sign above the keypad conveniently spell out NINETEEN (19).
- Back at the posters again, and a couple along from the dragon poster is one advertising “The Solstice on 3rd Avenue.”
- Add this together, and you get 2193—enter this into the keypad.
- The computer in the new room has four tasks for us to complete to get the code: Take out trash, Find two pipes and fix plumbing, Track Anita’s location yesterday, and Count sticky notes.
Grate code solution
Take out trash
- The trash has nothing to do with a bin and instead relates to the broken pieces on the ground in the office thanks to a sticky note saying, “Sweep up the broken tile.”
- It says, “4 x Moon x 2 x Sun,” and if you look at one of the walls in the office, there’s a painting with a Moon (with a sticky note saying 4) and a picture of a Sun (with a note saying 7).
- So, 4×4=16 – 2×7=14, gives you 2.
Find 2 pipes
- You now need two pipes, and two sticky notes in the office to tell you where they are: “Get pipe off Train Roof” and “There’s a pipe in the Park.”
- The Park is one of the paintings in the starting area, so grab the pipe stuck to it, and the second pipe is naturally on the train roof to collect.
- Head back to the office, place the pipes into the pipe puzzle, reconfigure the setup through trial and error, and eventually, the pipes resemble a number 5.
Track Anita’s location
- To Track Anita’s location, follow the story through various sticky notes in the office and the 5×7 grid of notes.
- Firstly, one of the sticky notes says, “Anita’s address starts with a 1,” whereas another says, “Anita lives on a lane,” and the only applicable note now is 1534 Archer Ln—in the top-right corner.
- Next, she went to work, and the clues easily tell you she works at The Bakery—top-left corner.
- She got dinner, and you’re told Lydia was her waitress, and she waits at The Diner—sticky note is bottom-left.
- Anita met up with Sam, who spent the whole day at “Pete’s.” With one note telling you Pete’s Pizzaplex was closed, it had to have been Pete’s Arcade—bottom-right corner on the grid.
- You’re now off to a park, and you’re told Anita was spotted in Elderglade Park—two notes up from the last one.
- Finally, Anita ended up at a terminal, and by a process of elimination, it’s West Leisterez Terminal—to the end of the row left.
- Join the notes together in classic dot-to-dot fashion and it spells out 6.
Count sticky notes
- Probably the easiest but most frustrating task is counting how many dozens of sticky notes are in the office.
- To save you the trouble, the office contains 7 dozen sticky notes.
- This is the fourth and final digit.
- Enter 2567.
Controller & Ciphers solution
- Hop down into the pipe, go to the end, turn left, go to the end, and turn right, left, right, go to the end, turn right, and the controller is there waiting for you.
- Retrace your steps and pick up the cipher before you leave the pipe.
- Claim the cipher on the wall in the sticky notes room.
- Find what was the flashing dragon art and take the cipher from it.
- Head back into the underground pipe, go to the end, turn right, left, right, go to the end, turn left, and toward the end of this dark section of the tunnel is a cipher hidden on the wall in the dark to obtain.
- Now, go through the space to the left of where you found the previous cipher, turn left, right, right, and right again to take you to another long straight section, and you emerge in a colorful room with flashing TVs.
- Take the fifth and final cipher and leave it to one side, as you now need to fill in the colored grids with the right coordinates outlined by the televisions.
- You can use the remote to pause TVs and give yourself more time to check out what you need.
- If you do it correctly, you get 2678—enter this into the panel to proceed.
Cipher puzzle solution
- Walk through the opened door and place all five ciphers into the slots on the wall.
- Like any classic cipher, it’s a case of swapping letters for the real letters, and clue one gets you started.
- When completed, the cipher tells you there are 23 TVs, 30 pipes, and 7 beginner guides.
- Using the clues in the room, this is how you calculate the puzzle: 45+23×5+30×100+7×46=3482.
- Type this into the panel and enter the elevator to complete Chapter Two!
With the first two levels in the books, it’s time for you to move to the third entry, and we have guidance courtesy of our Roblox Terminal Escape Room Chapter Three walkthrough.


Published: Jun 19, 2024 06:00 am