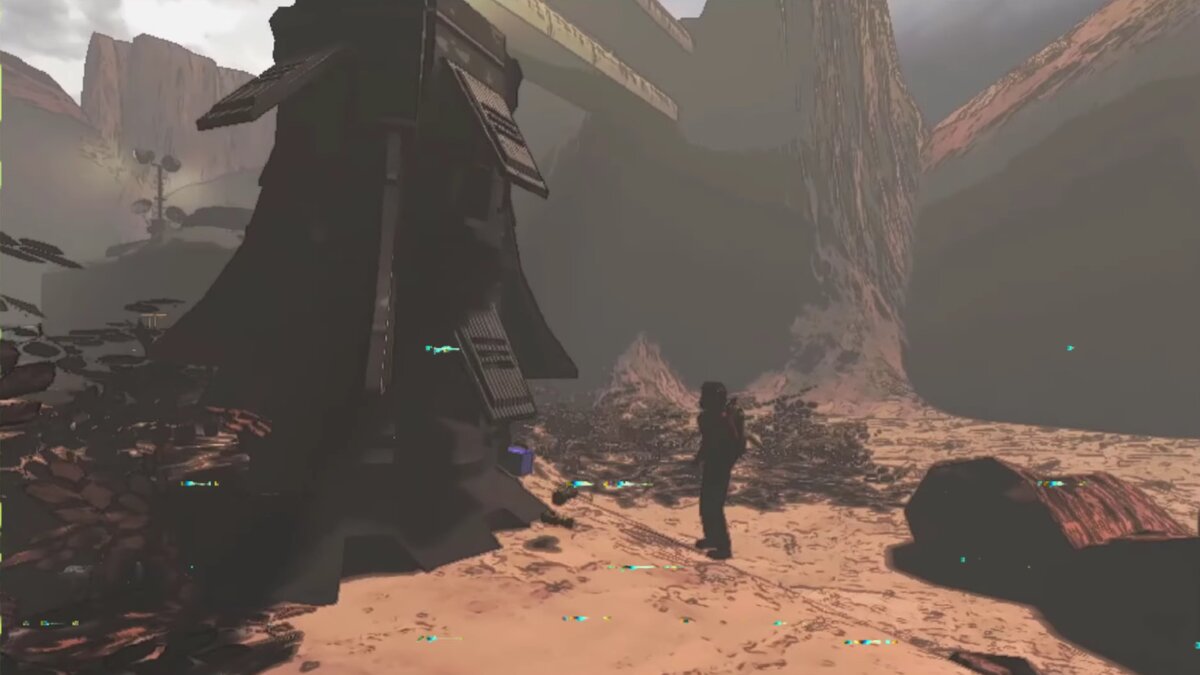
Regardless of whether you are on a scrap run alone or with friends, you’ll need to know what items to buy with your minimal budget in Lethal Company.
Living frugally on a spaceship is as minimal as it gets. You’ll need to know what is best to bring with you and how each item helps in Lethal Company. Before you get too trigger-happy with squeezing air horns or purchasing that romantic table for your friend, make sure you know what you’re buying before you spend those precious credits.
Lethal Company: Item guide
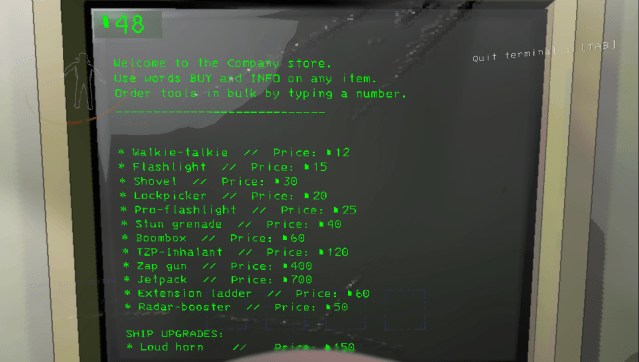
Buy the essentials like Pro-flashlights, Walkie-talkies, and Shovels in bulk for your teammates by entering the amount you want to purchase, followed by the item name as written on the list. Any items you want to purchase can be done on the Terminal inside the Home Base. Simply go up to it and interact with E. Type Store into the command box to see all items available in Lethal Company. E.g. If there are four players in the game, type 4 Pro-flashlights as a command (if you have enough money).
The Store doesn’t include every item. You can pick up unique items like the clown horn and signposts while you explore. While other items, more on the decorative side, are on a rotational and weekly system.
All tools in Lethal Company and how they work
Lethal Company tools are essential for your survival. Although these work best for teams who can strategize and designate players to specific scrap run routes or stay predominantly inside the Home Base, you’ll need to pick the most important tools needed for each Moon as they’re divided into hazard levels and enemies that are more likely to appear depending on the weather report before you leave orbit.
Here are all of the tools available in Lethal Company for you to either purchase or find inside Facilities:
- Flashlight – costs 15 credits
- Pro-flashlight – costs 25 credits
- Walkie-talkie – costs 12 credits
- Lockpicker – costs 20 credits
- Extension ladder – costs 60 credits
- Boombox – costs 60 credits
- Jetpack – costs 700 credits
- Radar Booster – costs 50 credits
- TZP-Inhalant – costs 120 credits
Flashlight
The standard Flashlight has a five-hour battery life, with a dimer light than the Pro version. It is helpful to those who are struggling to find scrap to sell or need it for the first day. However, we recommend the Pro-flashlight over the standard version as it only costs 10 credits more.
Equip the Flashlight to your hand using the mouse scroll wheel. Left-click to turn the Flashlight on. If you use the Flashlight at the beginning of your run (starts at 8am), you’ll have until 1pm before the Flashlight runs out of charge.
Pro-flashlight
The Pro-flashlight is one of the most essential items in Lethal Company. While it has a battery life of just under seven hours, you can recharge it at the Battery Charging Station, next to the door control panel inside the Home Base. The Pro-flashlight is the most important tool for solo players to use. For those playing in a squad, designate the main scrap runners with a Pro-flashlight.
Turn the Pro-flashlight on with left-click when the item is equipped in your hand with the mouse scroll wheel.
Walkie-talkie
You’ll need the Walkie-talkie for those playing with friends using proximity chat. At such a low cost, the Walkie-talkie can be purchased for each member of your four-man squad and last until the end of the scrap run. Be sure to equip it using the scroll wheel, press Q to turn it on and off and left-click to communicate. You can recharge it at the Charging Station inside the Home Base.
The Walkie-talkie is best for the Home Base player who is watching the monitor at all times. Everyone should have a Walkie-talkie on them throughout a scrap run. However, make sure you have the person staying at the Home Base and someone standing at the Facility’s main entrance if you are using the Inverse Teleporter. This way you can communicate with the person at the main entrance in case your teleported teammate cannot find their way back to the Facility’s entrance.
Lockpicker
The Lockpicker unlocks any locked doors that previously required a key to unlock. While keys can be found quite regularly on each Moon, the Lockpicker skips the search and allows you to immediately open any locked doors across the facility. Unlike the keys, the Lockpicker has multiple uses.
Equip the Lockpicker and left-click while pointing at the locked door. You’ll need to wait around or continue exploring the Facilities, staying close to the Lockpicker as it takes 30 seconds for the door to unlock. Make sure to remember the route back to it, however, as this item is permanent throughout your playthrough once you’ve purchased it.
Extension ladder
The Extension ladder is primarily used to bridge across gaps or ascend to higher points of the Moon’s terrain. It is great to fast-travel to and from the Home Base. All you need to do is equip it to your hand with the scroll wheel and left-click to bring it out and place it down.
Boombox
The Boombox lures enemies to its position. If you want to hang out on a Moon past 6pm, place the Boombox far from your Home Base to lure in Eyeless Dogs and Forest Giants. You can also clear your path from the Facility to the Home Base using this or place it on one side of the Facility to keep the monsters at bay as you explore the rest of the area.
Equip the Boombox with the scroll wheel and press G to put it wherever you want. The Boombox is chargeable via the Charging Station beside the Home Base’s door controls.
Jetpack
The Jetpack requires a bit of mastering before you attempt to cross gaps with it. You won’t want to lose this on a scrap run as it costs a ton of credit. It is helpful to get across terrain more easily and skips that long haul of going back and forth from the Facility. However, it can be difficult to use and weighs 52 pounds, rendering you less helpful during a run. The Jetpack is more appropriately used for exploration and finding the best route forward for those on land.
Equip the Jetpack with scroll wheel and left-click to start the thrusters. Hold the spacebar to ascend. Let go of the spacebar to hover in the air and move around. Use left-click when you want to cut off the thrusters and descend back to the ground.
Radar Booster
The Radar Booster has a primary function: to lead your teammates back to the Facility’s entrance. Put the Radar Booster down near the main entrance if you and your friends keep getting lost. Do this by equipping and dropping the radar with G. You need someone inside the Home Base to activate it using the monitor. Use the monitor to find the Radar Booster’s name.
Go to the Terminal, press E, and type in Ping [Radar Booster’s name] to activate a voice line that will guide your teammates to it.
TZP-Inhalant
This Inhalant is a go-to product for those playing solo. It increases your overall speed and ability to carry heavier weights. It is perfect to get away from monsters who will one-shot you like the Forest Giant or Girl in Red Dress.
Use left-click to inhale a single puff of the Inhalant. You can use this multiple times, but its side effects can cause audio and visual problems, rendering you vulnerable to attacks.
How to use weapons in Lethal Company
There are four weapons available in Lethal Company. These are:
- Shovel – costs 30 credits
- Stop-Sign – obtained in Facilities
- Stun grenade – costs 40 credits
- Zap gun – costs 400 credits
Shovel
The Shovel will be your primary weapon in Lethal Company. It is especially useful for those playing as a team and sticking together. Designate someone to hold a Zap gun to stun monsters, and the Shovel wielders can swoop in a kill the monster. Each monster species has a different health bar so they require a different amount of Shovel hits to kill them. The Shovel can kill Hoarding bugs (four hits), Snare fleas (three hits), Bunker spiders (six hits), Bracken (three hits), and Thumpers (six hits).
Hold left-click to aim at a monster. Release left-click to swing the Shovel. Make sure to keep moving as you face off against the creature in front of you. The Shovel is essential for solo players, but you’ll have to make multiple trips in and out of the Facility due to the limited inventory space if you have both a Pro-flashlight and Shovel equipped.
Stop-Sign
The Stop-Sign works exactly the same as the Shovel. It can be picked up during a scrap run rather than purchased via the Terminal, unlike the Shovel. You can use this with left-click (hold) and release to swing the Stop-Sign at monsters. It has the same damage as the Shovel too so it can also kill any Hoarding bug, Snare flea, Bunker spider, Bracken, and Thumper.
Stun grenade
The Stun grenade is useful against monsters that are capable of one-hitting you. These are the Forest Giants, Red Ghost Girl, and Bracken. In most instances, you should avoid these monsters at all costs by retreating to the Home Base and returning to orbit immediately. But if you have a Stun grenade in your inventory, you can temporarily halt the monsters’ movements or save someone about to get eaten or straight-up murdered.
Hold left-click to pull the Stun grenade pin. Aim and release left-click at the monster you wish to stun. You only have five seconds to aim and throw the grenade. Make sure you and your friends look away so you don’t stun yourself.
Zap gun
The Zap gun is great against most enemies. You’ll need this if you want to take on tougher monsters like the Eyeless Dogs and Forest Giants. Make sure you or your friends have the Shovels equipped to get a few good hits in before the effects of the stun wear off. The Zap gun not only saves players from being eaten but it also weakens certain monsters that previously couldn’t be attacked.
Hold left-click and point the beam at the monster you wish to stun. The beam shows that the Zap gun is active. All you need to do is aim at the monster to stun it. Beware that the Zap gun views your teammates as a threat too so don’t aim this towards your friends.
The Zap gun is chargeable via the Charging Station beside the door controls inside the Home Base.
Lethal Company: Ship upgrades
The ship upgrades are very useful tools that, although priced on the higher side of things, each has its own strengths.
- Teleporter – costs 375 credits
- Inverse Teleporter – costs 425 credits
- Loud horn – costs 150 credits
Teleporter
The Teleporter is primarily used to bring back corpses from the Facility and into the Home Base. You’ll need someone to monitor your teammates’ positions. If you see your teammate standing still for far too long, they are most likely dead. Look to the left of the monitor screen and push the button inside the glass case. This will teleport whoever you are looking at on the monitor to the Home Base.
It is a pointless item for solo players as you cannot teleport yourself. But the most important factor if you are using the Teleporter is that any players teleported to the Home Base will lose their inventory. So make sure you only use this if your teammate is in danger.
Inverse Teleporter
The Inverse Teleporter sends players out to a random spot inside the Facility. There is no way to predict where the teleported person will end up. Items are removed from the teleported person, which means that anyone brave enough to go through won’t have a Flashlight or Walkie-talkie.
The Inverse Teleporter can be used via the yellow button in the glass case next to the monitor screen. Get the player to stand inside the Inverse Teleporter for them to teleport to a random location on the Moon, inside the Facility.
Loud horn
The Loud horn should be used as a last resort to guide your team back to the Home Base. You can also label it to mean something in your runs like a threat being directly outside the base or that it’s nearly 6pm and no one has returned yet. Give it a meaning and use it from there. The Loud horn can be used with E from inside the Home Base. All you need to do is go up to it and interact to sound the alarm.
All decor items in Lethal Company
The ship upgrades act as decorative items to make your Home Base truly feel like home. You probably want to spruce up the place as you’ll be spending a lot of time staring at these four walls. Or you can make your friend who is taking the game far too seriously upset by purchasing a luxurious toilet, a romantic table, and cozy lights to truly set the mode as you wine and dine on scrap.
Any decor items (furniture) you purchase on its rotational system can be stored inside the Terminal with X and moved inside the Home Base using B.
- Record player – costs 120 credits
- Cozy lights – costs 140 credits
- Hazard suit – costs 90 credits
- Pajama suit – costs 900 credits
- Green suit – costs 60 credits
- Table – costs 70 credits
- Romantic table – costs 120 credits
- Television – costs 130 credits
- Toilet – costs 150 credits
- Shower – costs 180 credits
- Jack-o-Lantern – costs 50 credits
These items are self-explanatory and act purely as decorative items for your Home Base.
Lethal Company: All cosmetic items
The cosmetic items in Lethal Company are comical tools you can use to jump-scare your friends. They are worthless to solo players as louder tools like the Boombox exist and are more viable to lure away monsters rather than toward you. Each item can be used with left-click.
- Clown horn
- Air horn
- Remote control


Published: Nov 20, 2023 07:06 am