
Ahriman the Destroyer is the first boss you’ll face in Ghostrunner 2, but being first doesn’t mean he is used as a tutorial or introduction to boss fights. This guy can be challenging, especially to newer players.
Up until this point, you may have gotten used to being able to kill everything in one hit, which can lead to some habits that won’t work on Ahriman. Usually, risky plays are rewarded so long as you swing first. What’s dead can’t kill you back, after all. Of course, this is a habit that must be broken for Ahriman, who can tank dozens of hits before he goes down.
This guide will walk you through both phases of Ahriman the Destroyer with a complete breakdown of all the moves this boss uses and how to counter them.
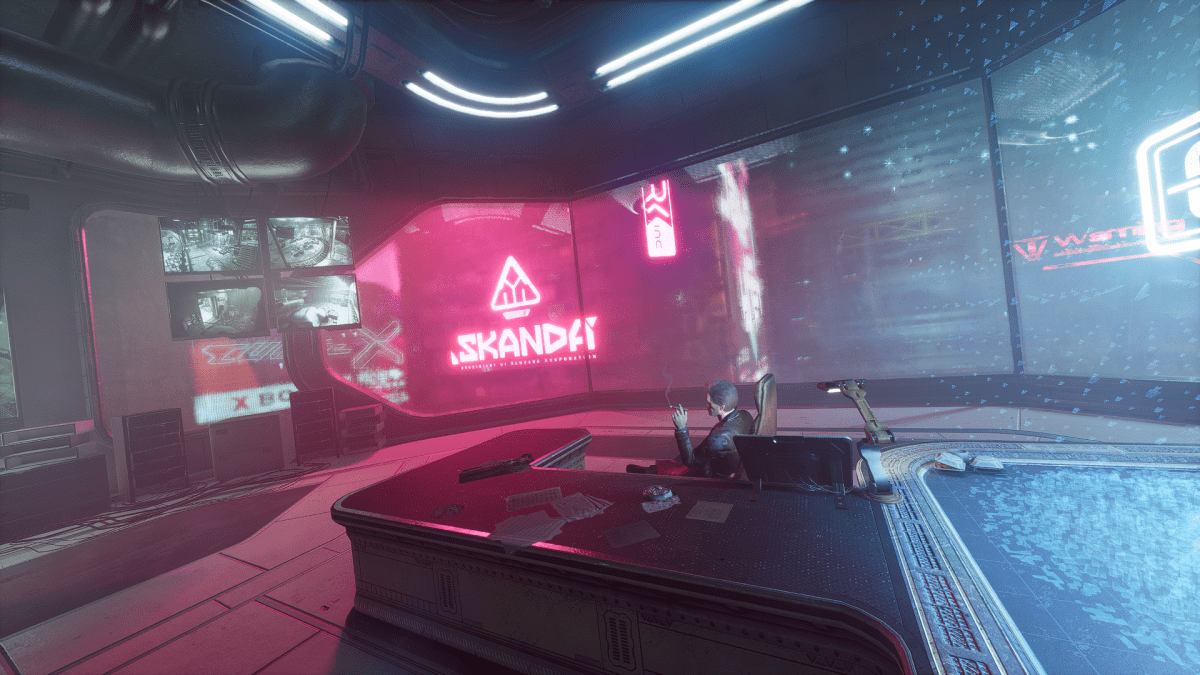
Ghostrunner 2: Ahriman the Destroyer boss guide
There are two phases in this boss fight and one lone checkpoint at the start of phase two. Phase two also comes very early, so your checkpoint comes when Ahriman is still at about 75 percent health.
The two phases are fairly similar, with only a couple new attacks being added in phase two. To begin with, let’s break down the things you need to watch out for in phase one.
Phase one
In phase one, there are only three main attacks that you need to watch out for.
Dash and Swing
- Ahriman loves using this attack where he dashes towards you however many times it takes to reach you and then swings his sword at you. Hey, if it ain’t broken, don’t fix it. When I say “however many times it takes,” I mean it. If you keep moving backward, Ahriman will literally never stop dashing. The swing is coming either way, so you might as well sit there and wait for him to take his swing.
- There are three ways you can deal with this attack. You can dash backward right as he swings, jump over his blade, or block the attack. Of the three, blocking is the safest option. This attack can be parried, so if you’re willing to wait until the last possible second to block, you can dish out some extra damage. Just make sure you don’t wait too long!
- The above video shows a parry—notice how I blocked at the absolute last second. Block earlier if you’re worried about missing the parry and dying.
Ranged Barrage
- In this attack, Ahriman will jump backward and float in the air while he shoots three ranged disks at you. They move pretty slowly, and the attack has a big warm-up time while he jumps backward. There is some space between each disk as well.
- This is probably the easiest attack to evade, especially in phase one. You can simply dash to either side as the disks get close, and all three will miss you.
Ground Pound
- This is the last of three attacks that Ahriman will use in phase one, and it’s definitely the most dangerous. In this attack, Ahriman leaps into the air and smashes his sword down upon landing, sending out a circular ripple that kills everything in its path.
- To avoid this attack, you have to jump over the ripple as it reaches you. You don’t have a lot of time from when Ahriman jumps to when you yourself must jump, so I suggest using Sensory Boost as soon as you see him jump. This way, you buy yourself time to actually find where he is landing and can know when to jump.
Phase one strategy
There are only three attacks during this phase, and all of them have at least some buffer time during which you can assess and react. For this phase, be totally aggressive. You only have to deal 25 percent of his health to reach phase two, and that shouldn’t take very long.
Just make sure you’re respecting his attacks when they come, but take every chance to go on the offensive in the meantime.
Intermission
Between phases one and two, Ahriman will knock you off a platform, and you must reach him again by wall running up a couple of floating platforms.
Oh, and while you’re doing that, he’s launching constant ranged barrages at you.
Even so, this part isn’t too difficult, and you have a checkpoint at the beginning of it. Dying here will not make you repeat phase one. I suggest making an absolute beeline for the platform. If you’re fast enough, you only have to actively evade Ahriman’s ranged barrage one time. If you’re slow, you can easily get stuck playing defense for long enough that your chances of survival become slim.
Phase two
Once you’ve reached the platform, it’s time for phase two. When you get there, you’ll see somebody hovering on a jetpack, and Ahriman will be stunned with a prompt to gap-jam to him. Do so—it’s free damage, and the jetpack man is on your side.
Ahriman will bring out a couple of new tricks, but all said and done, this phase isn’t too different from the first.
Ring of Fire
- This is a modified version of the Ground Pound attack from phase one. Ahriman will jump up and slam his sword down just like before, only this time the ripple is an entire wall.
- What this means is that you must jump and then dash upward while airborne—simply jumping will not give you enough height to survive this attack.
Train-track Smash
I had trouble naming this one, shut up. Anyway:
- Ahriman will use this attack unpredictably. Sometimes it will be right after a Ring of Fire, sometimes right after a Dash and Swing. In this attack, he brings his sword overhead and down like he is chopping wood, and two parallel danger lines radiate out on either side.
- What this means is that you cannot dodge the attack by dashing to a side like you instinctively want to for a top-to-bottom attack. If you move sideways, you will be immediately caught by one of the danger lines.
- What you can do is dash sideways and immediately jump to active Sensory Boost, so that you can dash over the danger line as it approaches. If you do this, do it fast.
- Alternatively, you can dash past Ahriman on a diagonal when he uses this attack, so that you’re getting behind him as you evade his sword. In my opinion, this is the better option.
Honing Barrage
- This is a modified version of the phase one Ranged Barrage attack. This time, the barrage will fire four disks instead of three, they will move faster, and most importantly—they will follow you.
- You don’t have to greatly change up your evasion strategy, just be prepared to dodge multiple times. Instead of one horizontal dash, use several—dashing again each time a new disk is close to you.
Phase two strategy
That’s all of the new attacks for phase two. Here’s what I suggest to finish this fight and bring down Ahriman the Destroyer:
- Call For Help—this is the main thing to utilize in phase two. After a cooldown, you can Call For Help from Bakunin, the man on the jet-pack whose name is not supposed to be known yet, but is revealed in a tip popup at the start of phase two. Calling for help causes Bakunin to stun Ahriman, interrupting whatever attack he was in the middle of and allowing you to gap-jam to him for free damage.
- Grapple to Bakunin—whether it is to evade an attack or close distance, you can use your gap-jammer on Bakunin. This can be especially helpful for evading Ring of Fire, as Bakunin is high enough to go over the wall. That said, you cannot predict where Bakunin will be when Ahriman uses Ring of Fire, and you definitely don’t have time to look around for him. The jump-dash method is a more consistent solution.
- Stay mobile—a lot of Ahriman’s attacks can be countered or evaded by getting around him. If you are constantly trying to run circles around Ahriman as you attack, you can sometimes evade attacks like the Train-track Smash without even having to change what you were doing.
Reward for defeating Ahriman the Destroyer in Ghostrunner 2
By following this guide, you should be able to take down Ahriman in no time. Once you do, you will be rewarded with a new Sword called The Undoer. Missed opportunity to name it The Destroyer? Maybe, but the sword looks great either way.
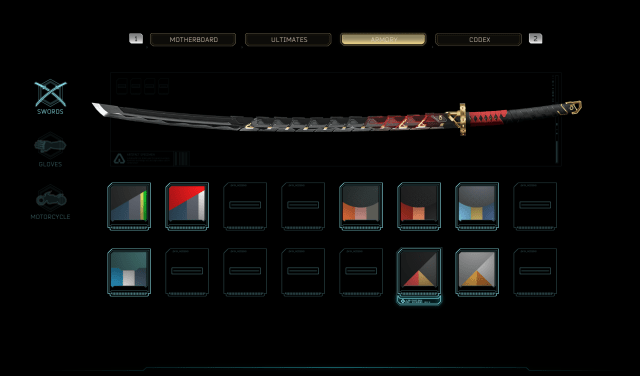
This is one of the more classic-looking katanas in Ghostrunner 2 and is one of my personal favorites when I’m feeling a sleek and understated design.
You should also know—there are no other hidden collectibles during the Ahriman fight. This Sword that you receive for defeating Ahriman is the only collectible that can be earned during the level “Will Bushido Allow It?”


Published: Oct 24, 2023 11:07 am