If you want Mike and Sulley to join your village in Disney Dreamlight Valley, there are a couple of quests you have to work through first. Escape Claws is one of the earliest and most important ones.
Some parts of this quest are fairly straightforward, but others get quite tricky, which might leave you stuck and unable to progress closer to befriending Mike and Sulley. Here’s how to complete Escape Claws in Disney Dreamlight Valley.
Escape Claws quest walkthrough in Disney Dreamlight Valley
To complete the Escape Claws quest, there are five main goals you need to work through, with your overall objective being to help Mike and Sulley out. The specific parts of this quest you need to tackle are as follows.
- Open the Monsters, Inc. Realm
- Reach the Laugh Floor
- Clean up the Laugh Floor
- Brew coffee
- Rescue Mike
Unlock the Monsters, Inc. Realm
Before anything else, you need to open the Monsters, Inc. Realm. This Realm costs 15,000 Dreamlight and is located on the third floor to the left of the Beauty and the Beast Realm. Once you have the Dreamlight to do so, head inside.

Open the door to the Laugh Floor
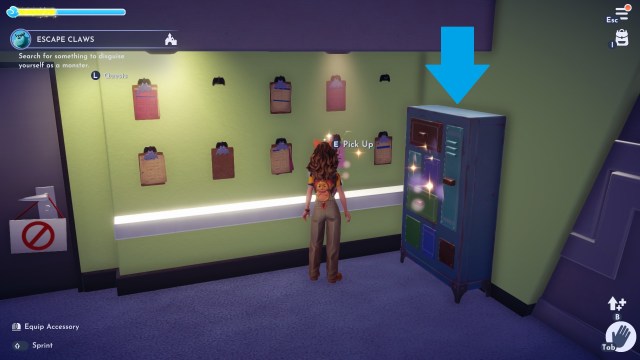
Now that you’re inside, you need to open the Laugh Floor door to gain access to the main area in this Realm. You can do so by donning a monster-based disguise, which can be found in the multicolored cabinet right by the spawn point in this Realm.
Inside the colorful cabinet, you can pick up a blue pouch that has two sets of ears and a hat you can wear. Equip one of the monster ears along with the cap and you can now proceed through the door onto the Laugh Floor.
Clear the Laugh Floor
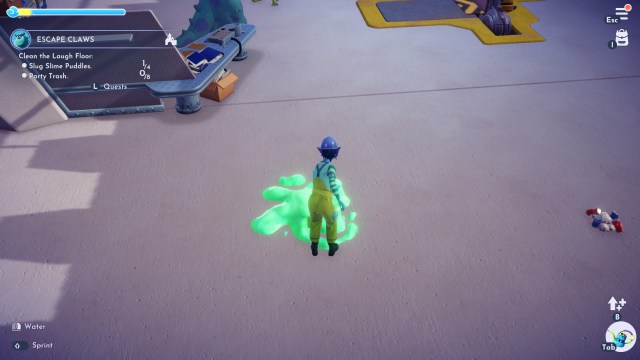
Once you’re officially on the Laugh Floor, chat with Sulley. He thinks you’re a new monster intern and asks you to clean up the Laugh Floor, which can be done by clearing away eight piles of party trash and four puddles of slug slime puddles.
- The party trash piles can be cleared away by directly interacting with and stepping on them.
- The slug slime puddles can be cleared away using your Royal Watering Can.
Both the trash piles and slime puddles can be found all around the Laugh Floor, so just circle around the area to clear them all away before returning to talk with Sulley once again.
Make coffee
Your next job as an unofficial intern is to brew some coffee for Mike and Sulley to help get their day started. They both have very specific orders and although Sulley will tell them to you right away, you can also just check the sticky note by the coffee machine to recall what ingredients you need if you end up forgetting.
Head to the coffee machine in the lobby right outside of the Laugh Floor door. There will be three ingredients sitting along the counter here, which are Coffee Beans, Non-Dairy Screamer, and Sugar.
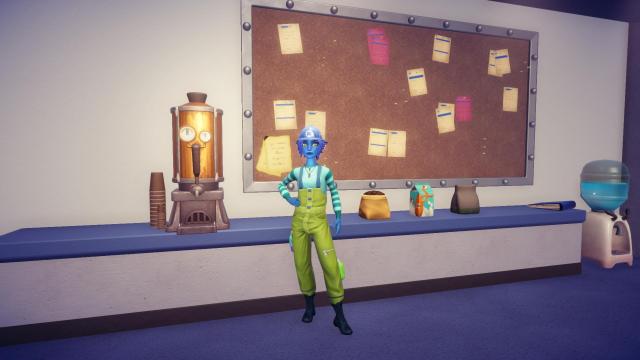
Start by grabbing the ingredients for Mike’s drink, which includes One Coffee Bean, one Non-Dairy Screamer, and three Sugar. Approach the machine to the left of the ingredients and add them all together to create The Wazowski Special for Mike.
Next up, return to the ingredients and collect five Coffee Beans so you can make Sulley’s drink. He likes his super strong, so mix all five Coffee Beans together to achieve Sulley’s Coffee.
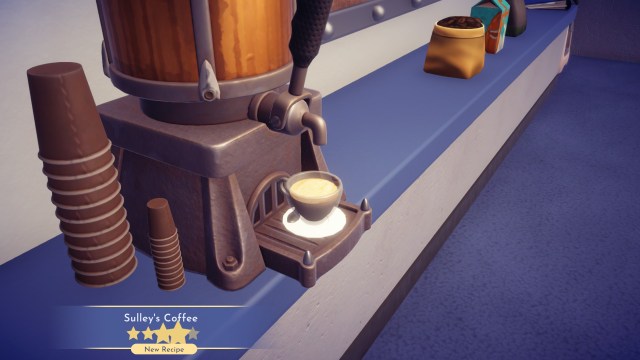
With both drinks made, head back to Mike and Sulley on the Laugh Floor. Deliver the drinks to Mike and you can officially move on to the next part of the Escape Claws quest.
Save Mike
Mike sets off to make some kids laugh, but something goes wrong with the door and the power, which means you now need to work with Sulley to save Mike. Start by grabbing the Emergency Manual for Sulley, which is located on the second desk over from the Laugh Floor door.
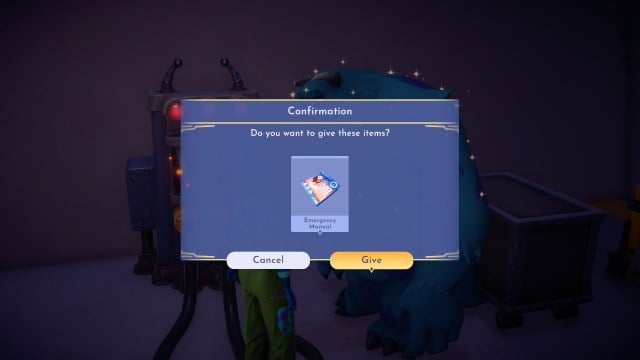
After bringing the manual to Sulley, you need to collect three fuses for the electrical panels and fix 10 power lines. This is the trickiest part of the Escape Claws quest since it’s a combination of a scavenger hunt and a bit of a puzzle.
Collect the fuses
To start, set out to find the three missing Fuses. All three are located around the main Laugh Floor room and aren’t too tough to find. But since the power is out, it’s a bit dark, which can make spotting them tricky.
- The first fuse is sitting on top of a red workbench in the very top left corner region of the Laugh Floor. It’s right next to a bright yellow television.
- The second fuse is sitting on the second to last desk in the Laugh Floor room or the fourth desk down if you start at the Laugh Floor door.
- The third fuse is at the desk right by the Laugh Floor door.
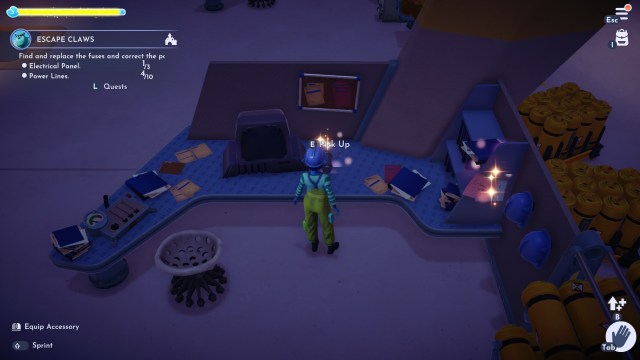
Take the fuses back to the fuse box, which is where Sulley is standing, and place the first one in. You have to insert them one at a time and then repair the power lines to go with them.
Fix the power lines
From where you inserted the fuses, follow the black and yellow wires on the ground. Along the way, reconnect any broken pieces and push the battery carts out of the way as needed to ensure all 10 power lines are properly connected.
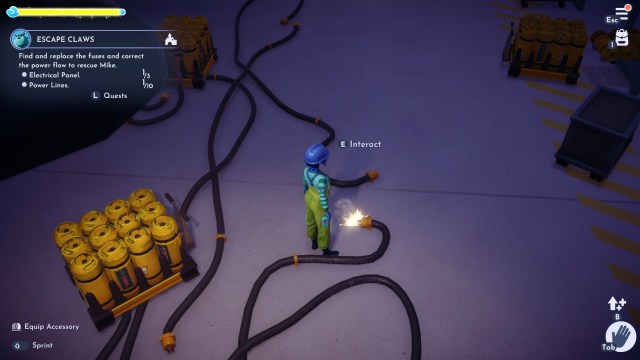
You also need to plug in any wires that aren’t connected to the wall sockets. There were two of these for me, and the other disconnected power lines were all spread around across the ground along the twisted black and yellow wires.
Fixing the 10 power lines might seem like a bit of a puzzle at first, but all you need to do is just move the battery carts and interact with any separated lines you see. It’s a lot easier than it looks, so just start by the spot where you entered the fuses and follow the line downward until you see that all 10 are fixed. Once you fix all 10 power lines, a cutscene will play to let you know that power has been restored.
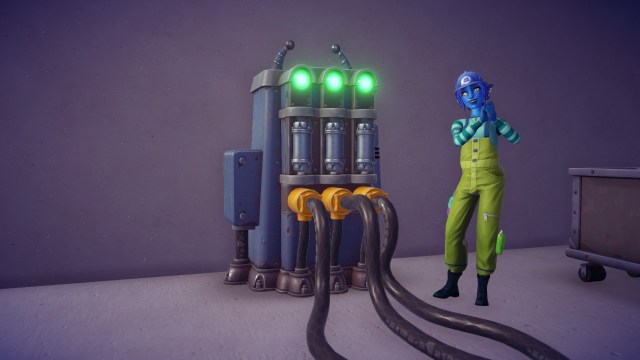
Talk with Sulley one more time and the Escape Claws quest will officially conclude. Sulley will be ready to join the valley, but he won’t go until you also convince Mike, so there’s a bit more work to be done before you can officially unlock Mike and Sulley in Disney Dreamlight Valley.
Others Asked
How much Dreamlight is required to unlock the new realm for Simba and Nala in Disney Dreamlight Valley?
Players need 10,000 Dreamlight to unlock the new realm.
How much Dreamlight is needed to unlock the Forgotten Lands biome in Disney Dreamlight Valley?
To unlock the Forgotten Lands biome in Disney Dreamlight Valley, players need 15,000 Dreamlight.
How can players obtain Dreamlight in Disney Dreamlight Valley?
Players can obtain Dreamlight by completing friendship quests with different characters and performing daily activities like harvesting vegetables, selling meals, and feeding critters.














Published: Feb 28, 2024 02:38 pm