DMZ’s collection of faction missions acts as a great way to build up XP and your Contraband weapon stash with some premium-grade rifles that you can use for future DMZ runs.
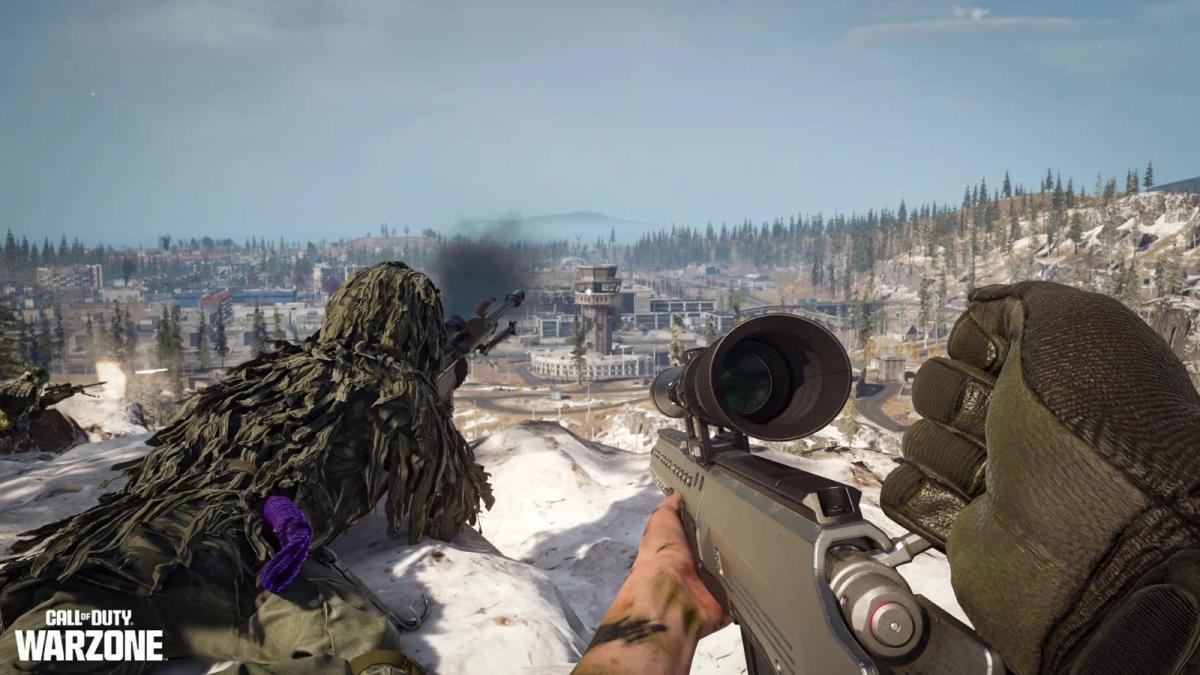
An SP-R 208 sniper awaits you after completing Shadow Company’s tier four mission Seasoned Commander. This mission sees you take on the toughest AI units in DMZ, and if you go down fighting, you’ll have to start all over again.
Completing the Seasoned Commander mission in DMZ
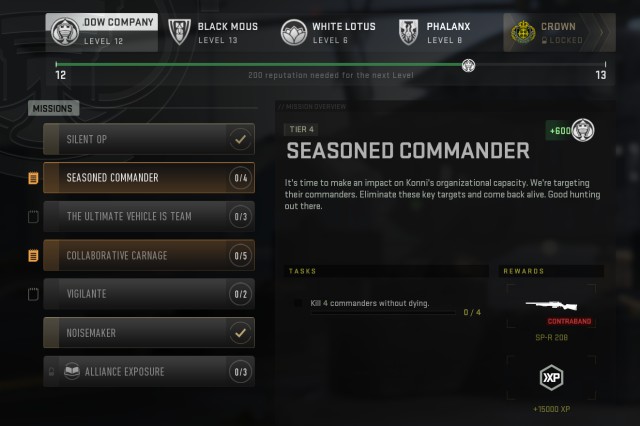
Seasoned Commander is a tier four Shadow Company mission, meaning you’ll need to earn enough reputation to complete tier three’s story mission first before attempting this. There is a single task you’ll need to complete to land some sweet XP and a Contraband sniper rifle:
- Kill four commanders without dying.
That’s it, easy right? Not so, unfortunately. Commanders in DMZ are some of the hardest units to kill outside of enemy operators, and in many cases, you won’t know where they are on the map.
Fortunately, there are a few hints and tips for finding these armored units across DMZ.
You won’t have to complete this mission in one session, by the way. It is possible to bring down one commander, then exfil out and drop in again, keeping your progress. But die just once and you’ll need to start all over again.
Which DMZ map is best to complete Seasoned Commander?
Each map in DMZ possesses a number of commander units, including the Pyro, Commander Helo, Scavenger, and more. Some are easier to kill than others, while some are locked so far away that they wouldn’t be ideal for this mission.
Ultimately, Al Mazrah proved the best location for this mission, given the abundance of commanders and the size of the map allowing relatively free movement. Ashika Island and Vondel simply don’t have enough commanders and are too small, meaning you’re more likely to run into enemy operators.
How to find and kill commanders in DMZ
Before dropping into Al Mazrah, I grabbed some key equipment for this mission:
- A gas mask
- A lock-on rocket launcher (JOKR or PILA)
- A Munitions Box
Drop into Al Mazrah and head straight for the gas, as this is the first giveaway for the first commander to kill: the Chemist.
The Chemist is always found in the radiation zone on Al Mazrah and is pretty easy to bring down with a sniper rifle or rocket launcher from range.
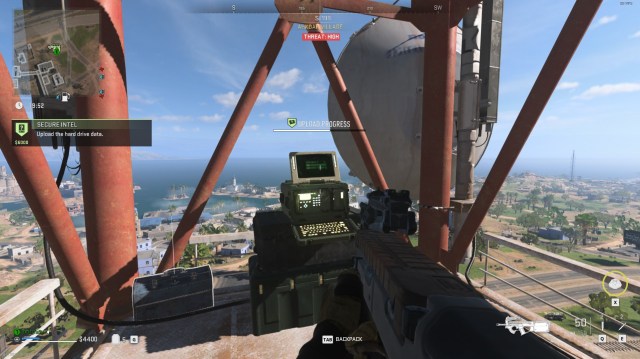
Then, find a Secure Intel contract. These appear on the map as green icons with a grey folder. You’ll be sent to a specific location to find a laptop, grab a hard drive, and then climb a nearby radio tower to transmit the data. Once complete, a random commander will appear on your tactical map.
In most cases, you’ll be given the Juggernaut or Commander Helo’s location, both of which are easy to kill with the rocket launcher. The Helo will take a few shots, hence the need for the munitions box. Like the Chemist, the Juggernaut cannot shoot back if you are outside his range, so keep your distance and bring him down.
If you’ve managed to kill all three so far, you’ve got a choice: Proceed to the weapon case location (marked on your map with a yellow briefcase) to kill the Pyro, or exfil and try your luck at killing any other in the next run. The Pyro will likely be locked behind a point of interest, meaning you’ll need the location’s key (or a Skeleton Key) to get in.
I chose the latter. I finished my session then dropped straight back in and headed to the Chemist while picking up a Secure Intel contract to find another commander should the Chemist be dead already. He was alive, however, so bringing him down finished my mission.
Two more commanders reside in the Factory Wing of Koschei Complex—the Rhinoceros and the Sniper—but given how inaccessible the area is later into a session and how difficult it is to bring them down, I wouldn’t recommend this at all.
If you jump in with a squad, Ashika Island can yield results. The Wheelson guarding the Tsuki Castle counts as a commander and dies in one shot. Throw on the Bombmaker and the Commander Helo and you’ll be at three in no time, but you’re more than likely alerting other squads to your location.


Published: Sep 4, 2023 10:04 pm