
Puzzles are one of the fun side adventures you can enjoy in Wuthering Waves. However, one puzzle, the Guide Crystals puzzle, is confusing to players, and for a good reason: It’s a three-part puzzle, meaning there’s a few stages to solving this one.
You must solve two different puzzles at two separate locations, claim a Guide Crystal for solving each puzzle, and then place them in devices at another location to claim a premium chest. It’s a lot of work, but it’s easy to solve once you know what to do and where to go. Here’s how to solve the Guide Crystal puzzles in Wuthering Waves.
How to solve the Guide Crystal puzzle in Wuthering Waves, explained
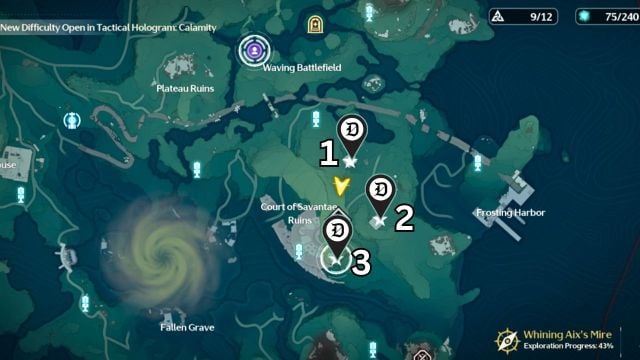
The Guide Crystal puzzle located in the Whining Aix’s Mire in Wuthering Waves can be solved by breaking it down into the following three steps:
- Solving the Pressure Plate puzzle at Location One and claiming the Guide Crystal.
- Solving the Energy Matrix puzzle Location Two and claiming another Guide Crystal.
- Placing a Guide Crystal in each device at Location Three.
Then, all you need to do is claim your rewards. But if puzzles aren’t for you, we’ve broken each step into more precise steps below.
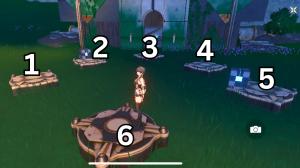
How to solve the Guide Crystal Pressure Plate puzzle
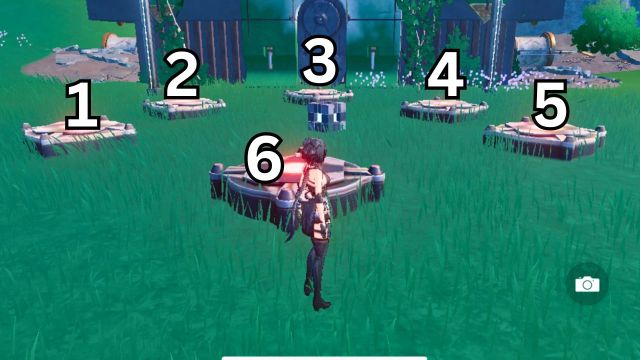
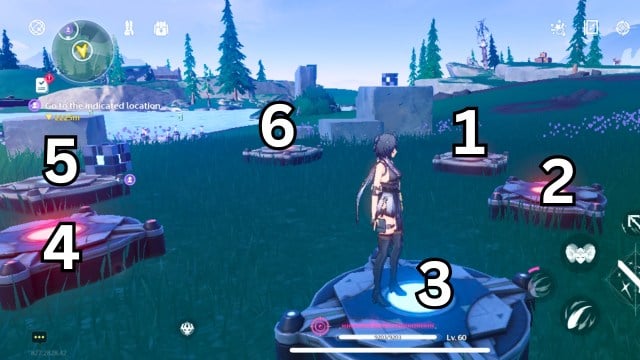
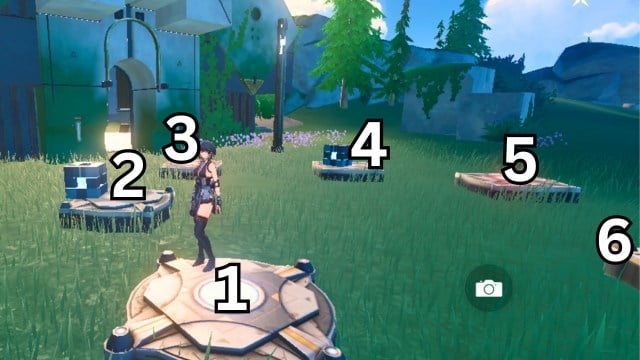
To solve this first Pressure Plate puzzle, you must free the imprisoned block and then open the door to enter the building. I’ve numbered each Pressure Plate in the image above so you can easily follow along.
How to free the imprisoned block
To free the imprisoned block, you need to:
- Place the free block on Pressure Plate Five.
- Stand on Pressure Plate Three. This frees the imprisoned block, and you can now solve the puzzle to open the building door.
How to open the building door
Now, to open the building door, follow these steps:
- Place the now-free block on Pressure Plate Two.
- Move the other block to Pressure Plate Four.
- Stand on Pressure Plate One.
This will open the door to the building. Inside, you can claim your Guide Crystal and open the chest containing Astrite and a few other goodies.
From here, you can head to location two or solve another puzzle and claim a premium chest.
How to claim the first premium chest
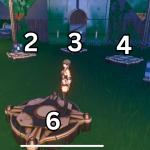

To claim the first premium chest, follow these steps:
- Move one block to Pressure Plate Two.
- Move the other block to Pressure Plate Five.
- Stand on Pressure Plate Six.
You will see a premium chest in the center of the dirt patch on your left. Once you’ve claimed your chest, which contains Union experience, Astrite, Shell Credits, and Sealed Tubes, you can solve the second puzzle.
How to solve the Guide Crystal Energy Matrix puzzle
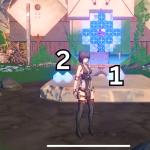


To solve the Energy Matrix puzzle, you need to find all four puzzle pieces and place them on the board to cover all the dark blue squares.
- The first piece (L-shaped) is on the platform in front of the board.
- The second piece (Square-shaped) is on the platform in front of the board.
- The third piece (L-shaped) is leaning against a rock behind you.
- The fourth piece (Z-shaped) is encased in sharp vines to the left of the building.
- To get rid of the vines, you can use a flower bomb on the right side of the building. Throw it at the vines on the right side of the building to set them on fire, and once the vines are gone, you can collect the third piece.
Once you have removed puzzle piece three, you can start assembling them on the board in the following order:
- Puzzle Piece Three (Z-shaped): This piece doesn’t need to be rotated. It covers the top right corner of the dark blue square.
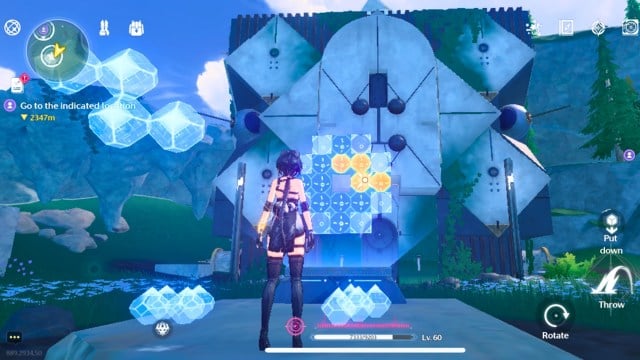
- Puzzle Piece Two (Square-shaped): This piece doesn’t need to be rotated. It covers the bottom right corner’s dark blue squares.
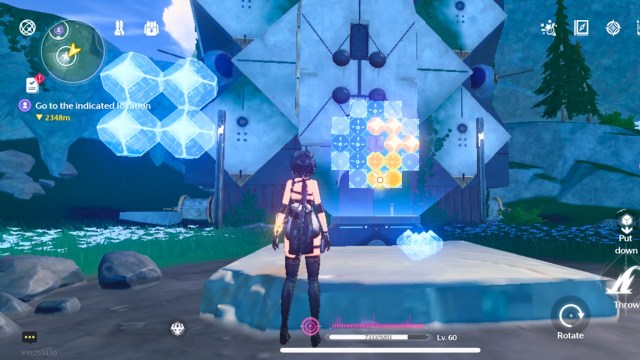
- Puzzle Piece One (L-shaped): This piece may need to be rotated to look like an upside-down and reversed “L” shape. Or a “7” if that’s easier. Place it on the board to cover the left side’s dark blue squares.
- Puzzle Piece Four (L-shaped): This piece needs to be rotated so the longest length of the “L” is horizontal. Place it so it covers the last two dark blue squares at the top.

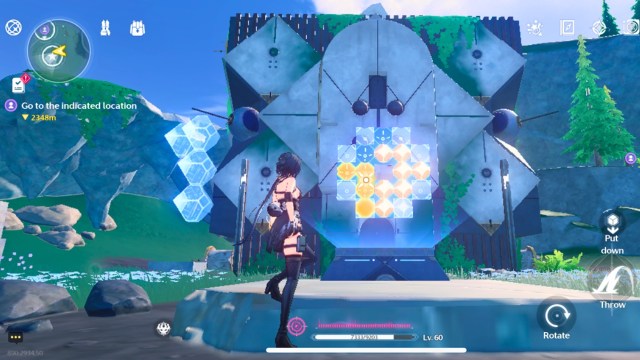
Once all the dark blue squares are covered, the Energy matrix puzzle will be solved, and the door to the building behind the puzzle will open. Inside, you’ll find another chest and another Guide Crystal. Now, you can head to the third location and finish solving the puzzle.
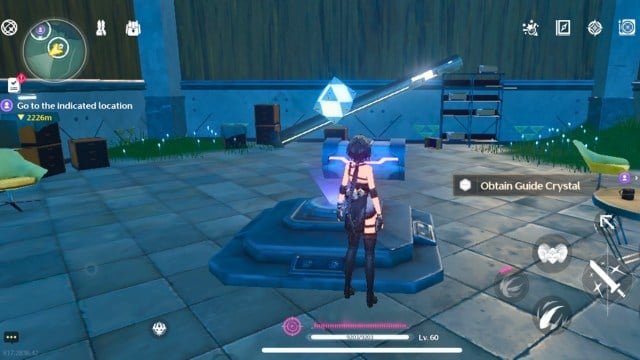
Where to place the Guide Crystals to solve the puzzle
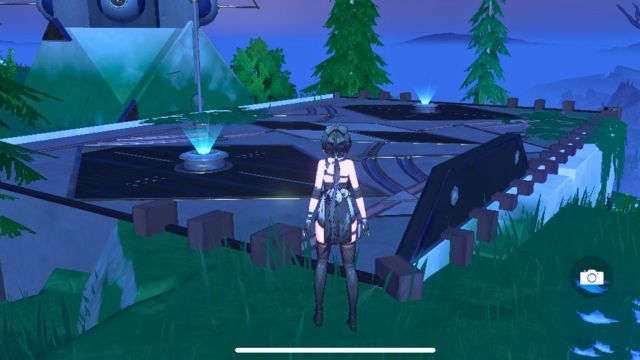
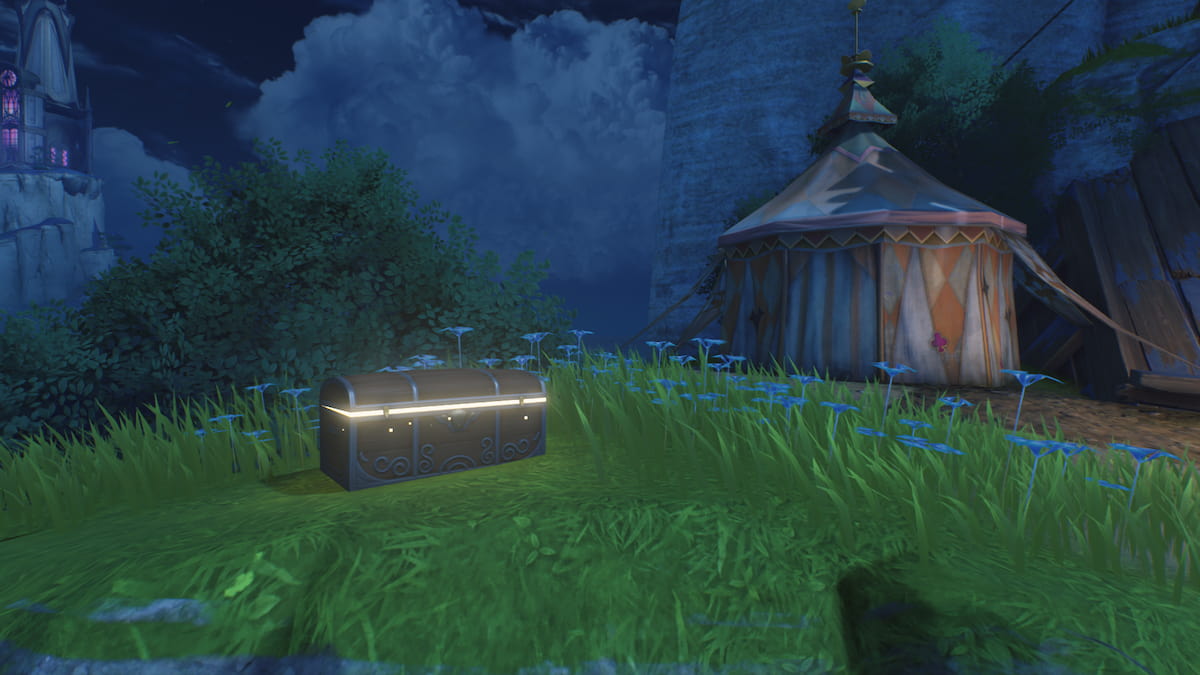
At the third location on top of the hill behind the two puzzles, there are two glowing devices where you can place the Guide Crystals. Once you’ve inserted a Guide Crystal in each of the devices, a premium chest will appear with Union Level experience, Astrite, Shell Credits, and Sealed Tubes for you.
That’s it; this is everything you need to know about how to solve the Guide Crystal puzzle (including all three parts) in Wuthering Waves.


Published: Jun 6, 2024 12:41 am