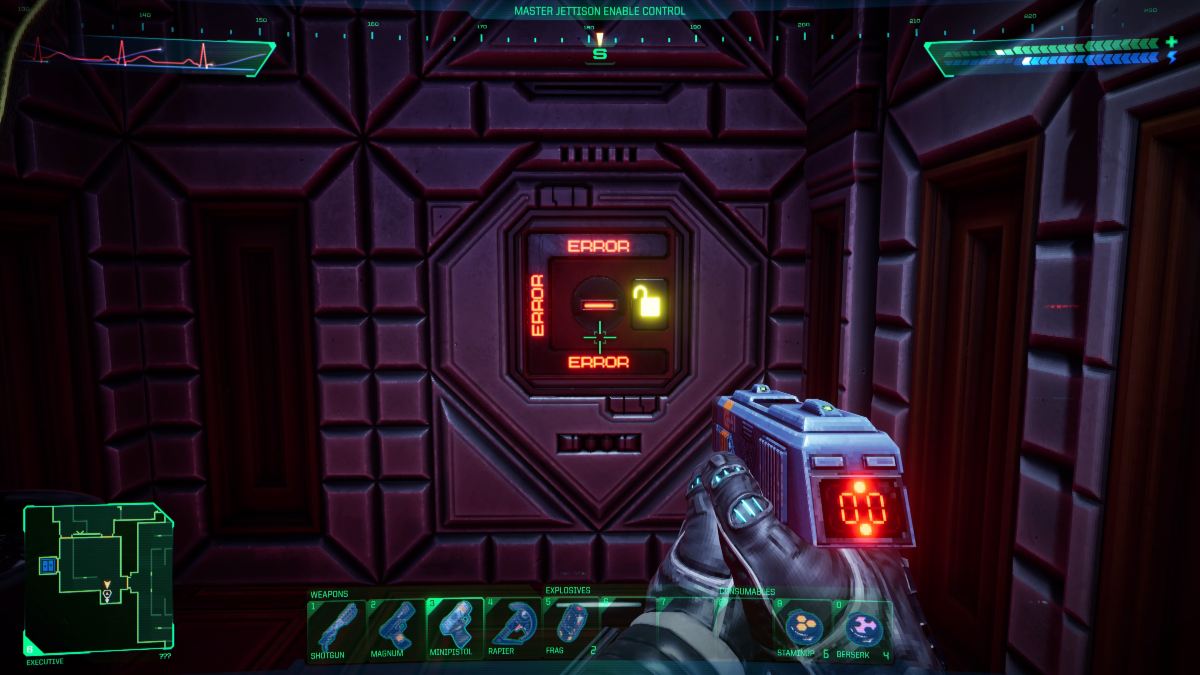
Be prepared for the longest journey of your life as you slowly unlock the Master Jettison switch to power the Beta Jettison in System Shock remake.
The road to pulling the Beta Jettison switch in System Shock remake is so unbelievably long, filled with so much backtracking and elevator music that you’ll probably expect credits to roll once you finally flip the switch. However, this is only one part of System Shock‘s story. This giant objective is split into multiple smaller objectives, with optional side quests you should complete as you explore the Citadel Station’s Executive level in its entirety.
Let’s break down everything you need to do to enable the Master Jettison in System Shock remake.
System Shock remake: How to enable Master Jettison
Enabling the Master Jettison objective focuses on pulling as many switches as you can in a single sitting. SHODAN actually gives us a rundown in an audio log located beside the Beta Grove entrance on what you need to do to enable the Master Jettison. There are three main objectives for the Master Jettison. These are:
- Turn on the Jettison switch at Alpha, Beta, and Delta Groves.
- Find and activate the Master Jettison Enable in Gamma Quadrant.
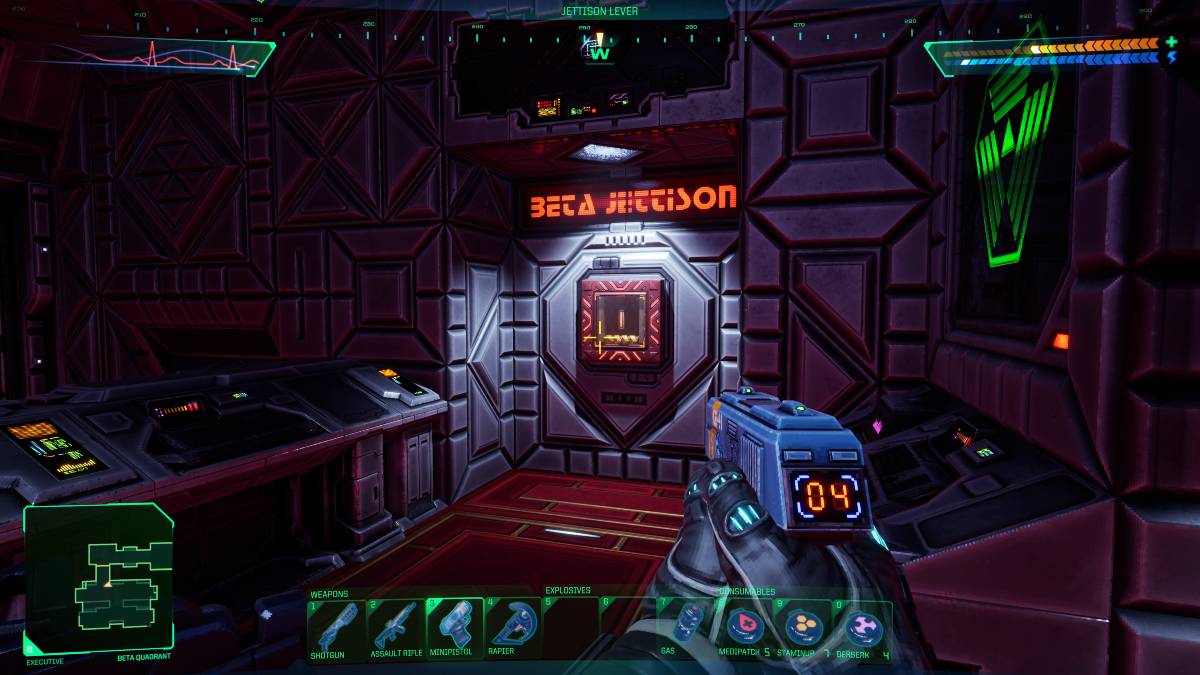
- Pull the Beta Jettison switch to launch the Grove.
The steps are in place, but it won’t be so simple to complete the objectives SHODAN accidentally laid out for us. We highly recommend getting the Turbo-Motion Boots V2 from Flight Deck West by completing the bridge lever puzzle. Now, let’s get into how to complete each step for the Master Jettison.
Where to find the Safety Interlock in the Groves
Alpha Grove
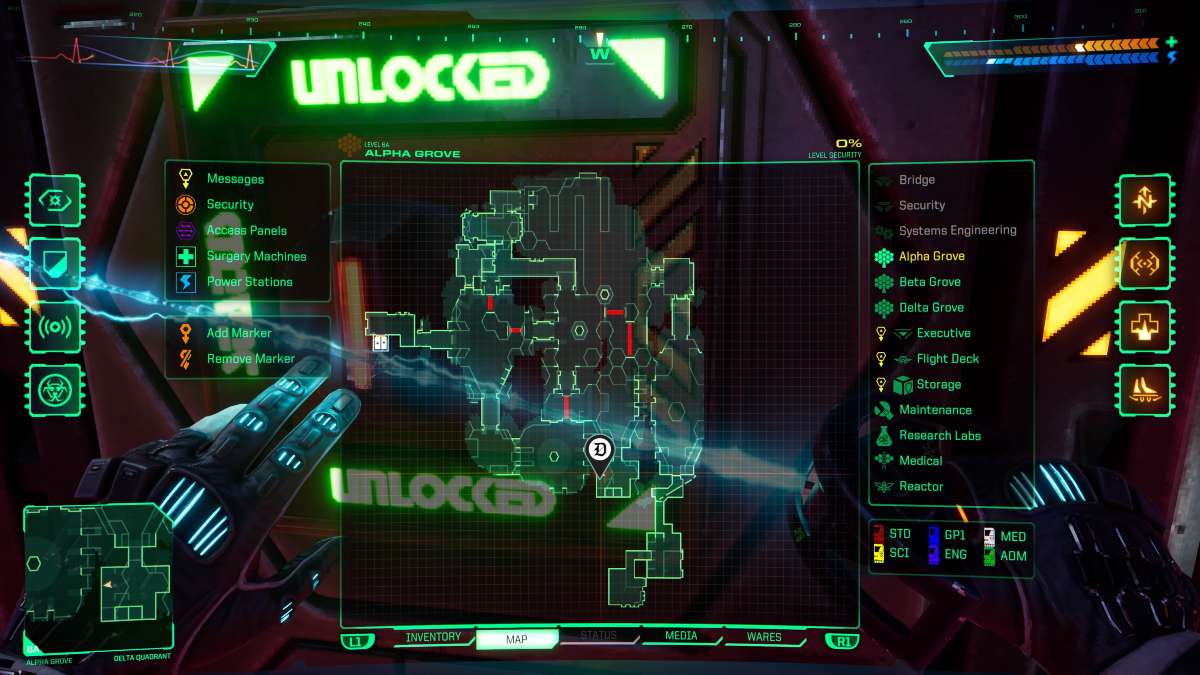
The first Grove is relatively easy to navigate through and find the Safety Interlock for the first part of the puzzle. Enemies fill this area, but won’t overwhelm you as much as those that reside in the contaminated Beta Grove.
Beta Grove
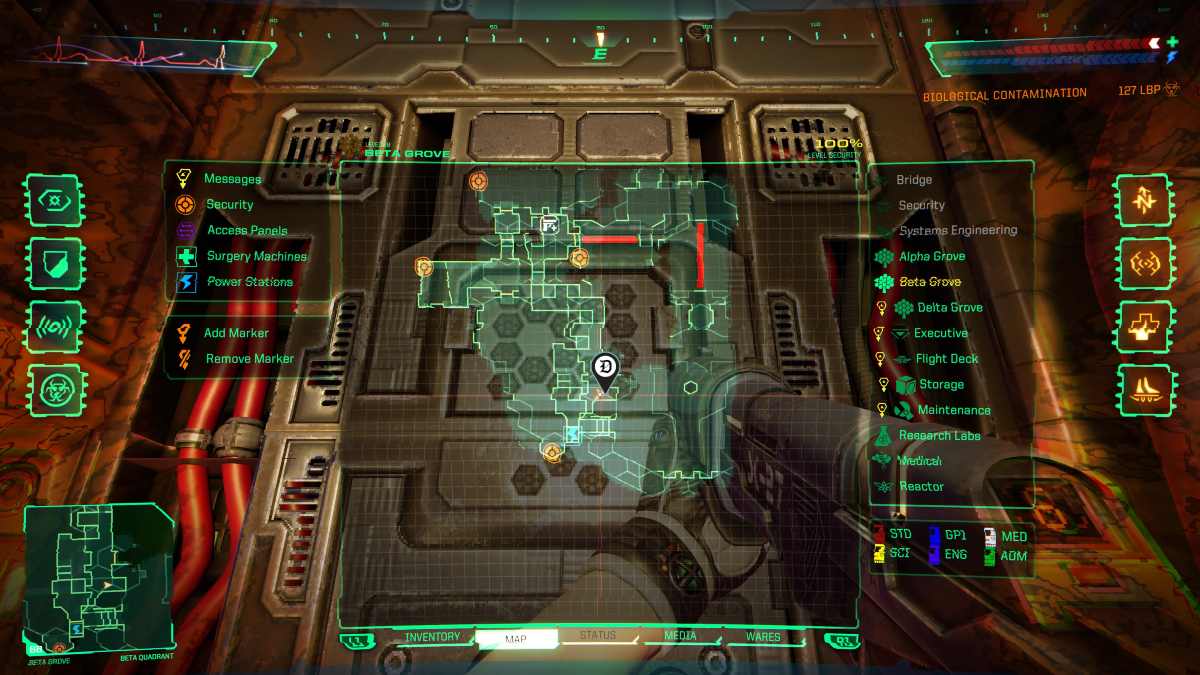
Beta Grove is the most frustrating area in System Shock due to the overwhelming biological contamination plaguing the entire Grove, dealing continual ticking damage to anyone who dares enter. You cannot escape this area without dying at least 10 times (or at least, that’s what happened to me anyways).
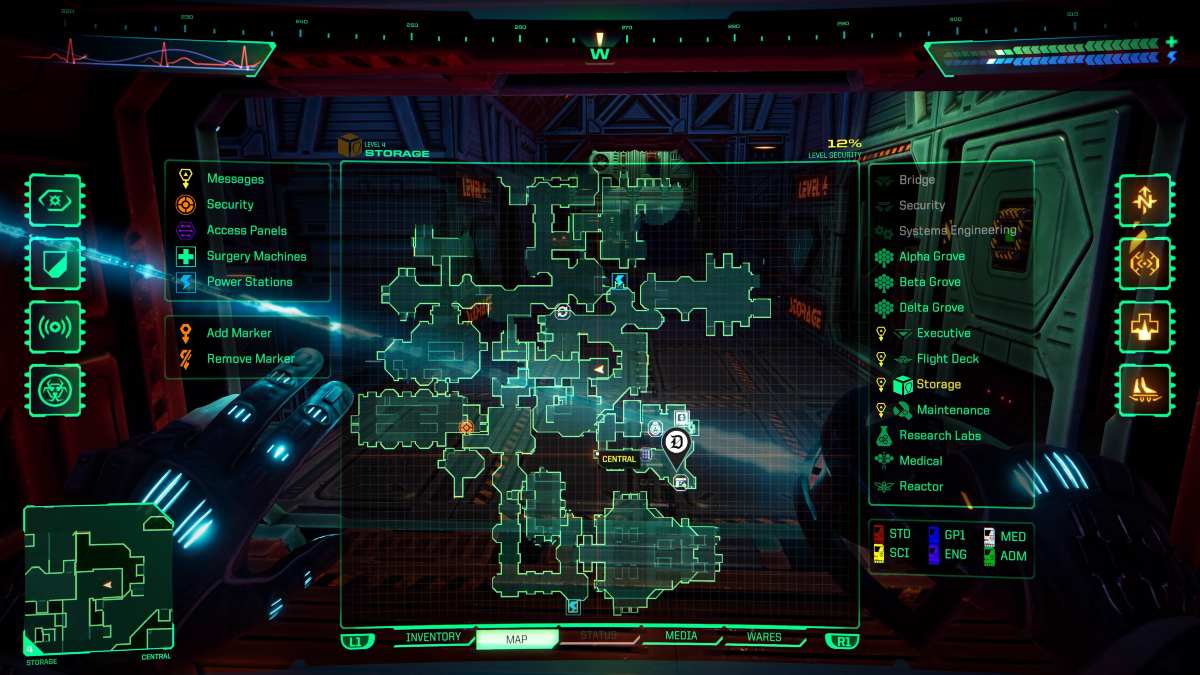
You need the Radiation Suit if you want a chance at surviving and making it to the Beta Grove Safety Interlock. You can pick up the suit over at Storage level. Exit the Storage freight elevator and circle around, following the right pathway. Check the map for the gold line to indicate there is a door nearby. This is on the very edge of the lower section in Central Storage, and can be hard to spot.
Kill the Tiger Gorilla protecting Storage 9‘s door and input the code 838 to unlock this room. The Radiation Suit is on the desk. Activating this and other equipment on the left-hand side of your Inventory menu quickly exhausts your stored energy, so don’t equip anything unless it’s absolutely necessary. Return to Beta Grove, activate the suit when you load into the area, and brace yourself for a world of pain. Make sure you have at least six Medipatches, three First Aid Kits, and as much ammo as you can carry to survive this area.
Delta Grove
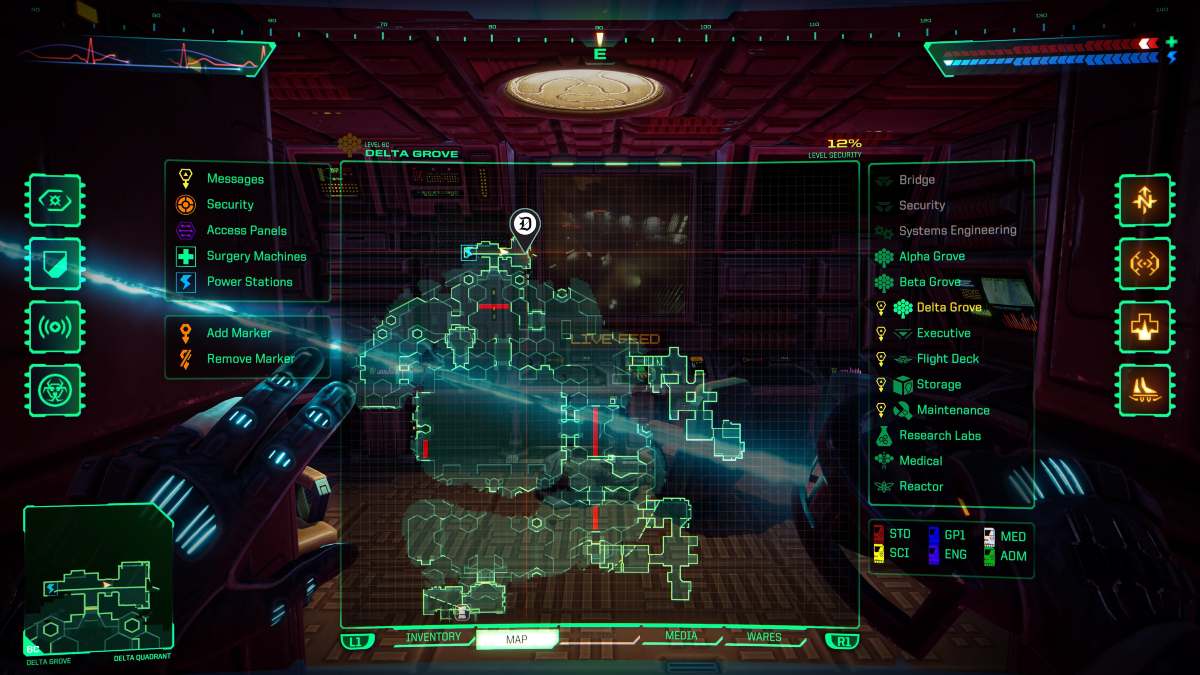
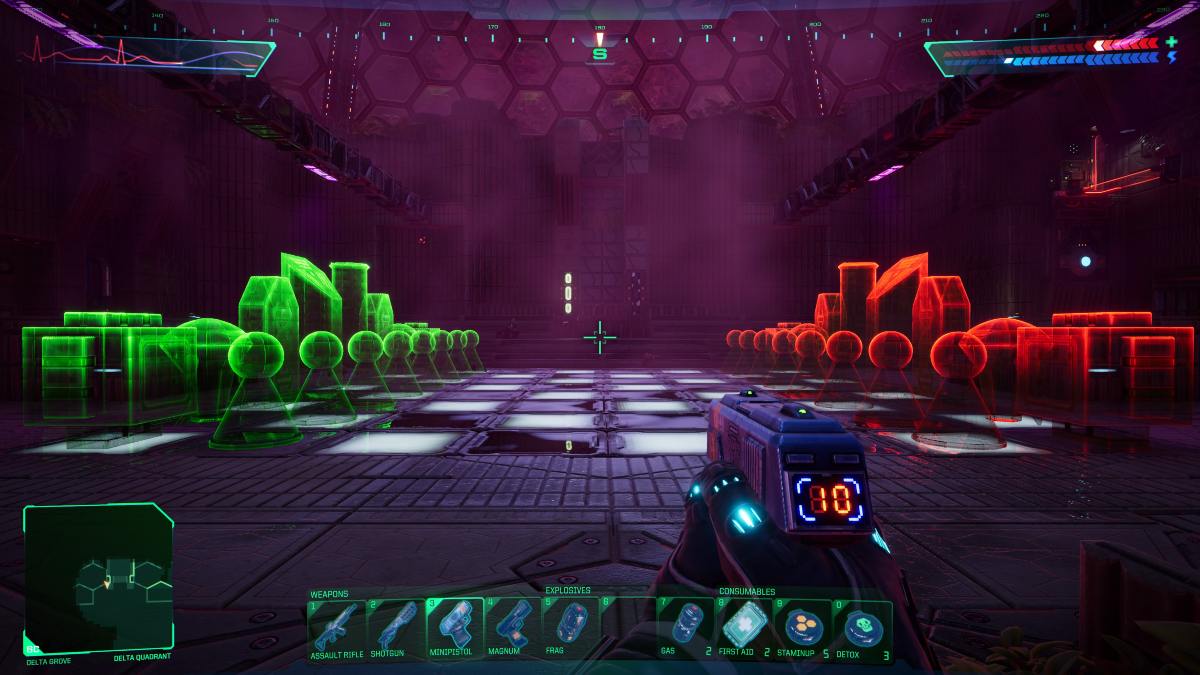
Delta Grove is the easiest Grove to explore and invites the Hacker to a game of chess. While this is completely optional, you need to visit the small room north of the chessboard to activate the bridge elevator west of the board. This brings you to the Safety Interlock.
Even after successfully pulling every Safety Interlock switch for all three Groves, you cannot rush to the Master Jettison location without first fixing the Relay 428. What’s worse, this objective isn’t given to you until you try to activate the Master Jettison Enable, and are instead hit with the cold hard truth. You need to go back to Maintenance, hit the Diagnostic Log of the Repair Bay, and input the code 428 into the Relay Analyzer in the northwestern corner of this level.
You cannot input this code before learning about the broken Relay from the Master Jettison switch. After inputting the code, Delta Maintenance will unlock, giving you access to a compact maze-like area where you need the Interface Demodulator System to fix Relay 428.
Insert the Interface Demodulator and return to Executive via Flight Deck. Head all the way back to the Master Jettison. Here is where you can find it.
System Shock remake: Master Jettison location
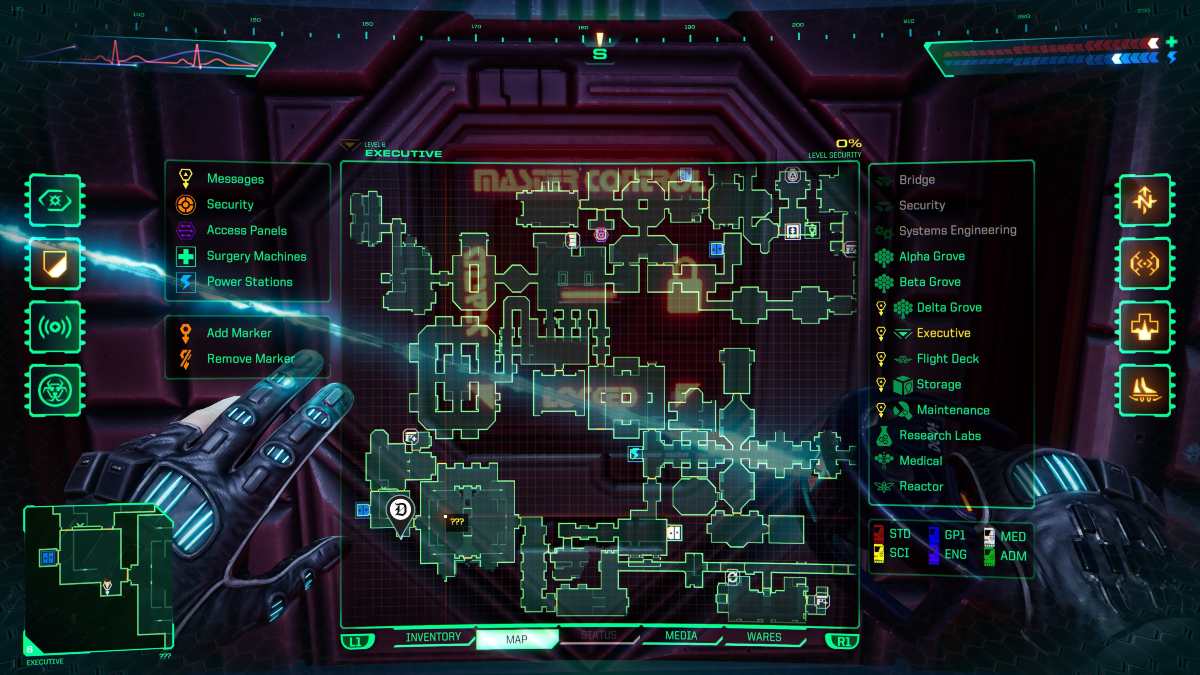
The Master Jettison is in the southwestern corner of Executive. You need to pass through Delta and Gamma Quadrant, into Central Hub, go to the far east of Beta Quadrant, and circle all the way around, into the Maintenance Conduit that leads to ???. You can only get into this area by inputting one of the codes that flash sporadically on the broadcast monitors right outside the Executive entrance elevator (leads back to Maintenance). The second code for my playthrough was 711 and this worked as the Maintenance Conduit door code.
We recommend using the gravitational lift inside the CPU Node room immediately after opening the barrier protecting the Nodes from your bullets. This is to protect you from the enemy that spawns the moment you push the button. Use the high ground for cover and rain bullets from above, utilizing the explosive barrels on the ground floor before the enemy does.
Destroying the CPU Nodes of the Maintenance Conduit is crucial to unlocking the ??? area where your first fight with Diego ensues. The Master Jettison is in the room directly behind Diego’s boss fight arena. You must visit this location, beat Diego, and interact with the Jettison switch to start the broken Subsystem Relay objective back on Maintenance.
System Shock remake: Beta Jettison switch location
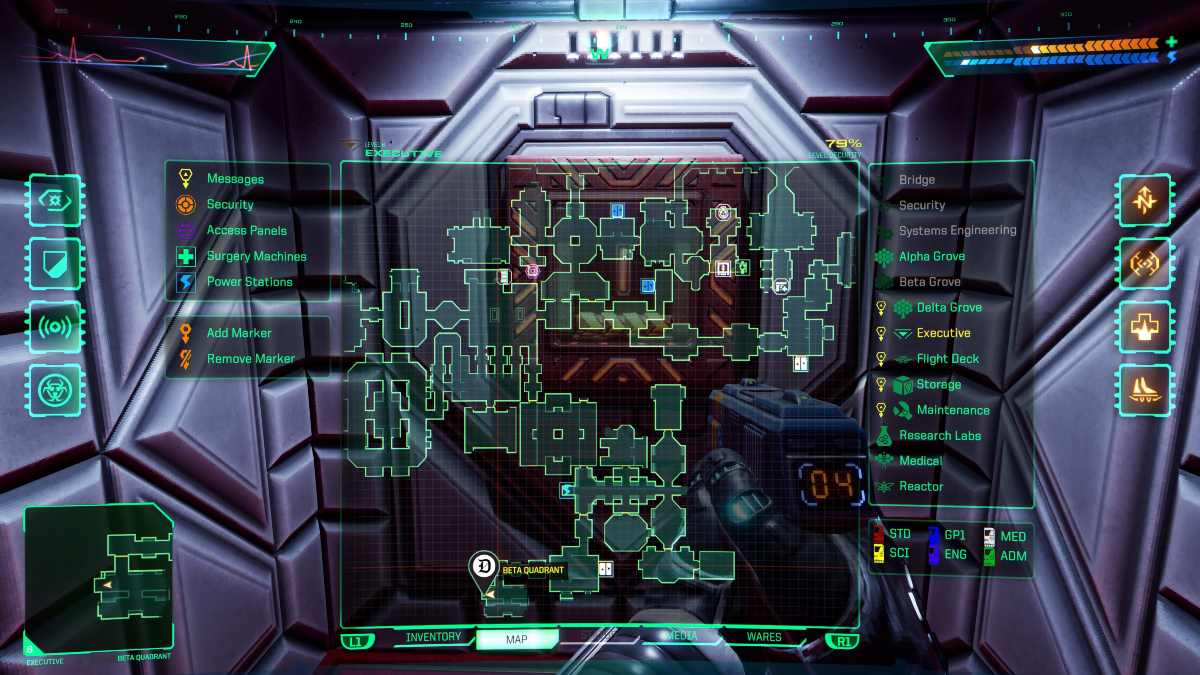
The Beta Jettison switch is in the furthest southern point of Executive level. This is the final objective in this multi-step journey to jettison the Grove. Starting from the Delta Quadrant (Executive entrance elevator), you need to go to Delta and Gamma Quadrant, then Central Hub, and into Beta Quadrant.
The elevator in this area is inaccessible due to containment failure, being the next objective you need to worry about as you ascend the Citadel Station. For now though, head south and into the Beta Quadrant to activate the Beta Jettison switch.

Published: May 21, 2024 02:53 am