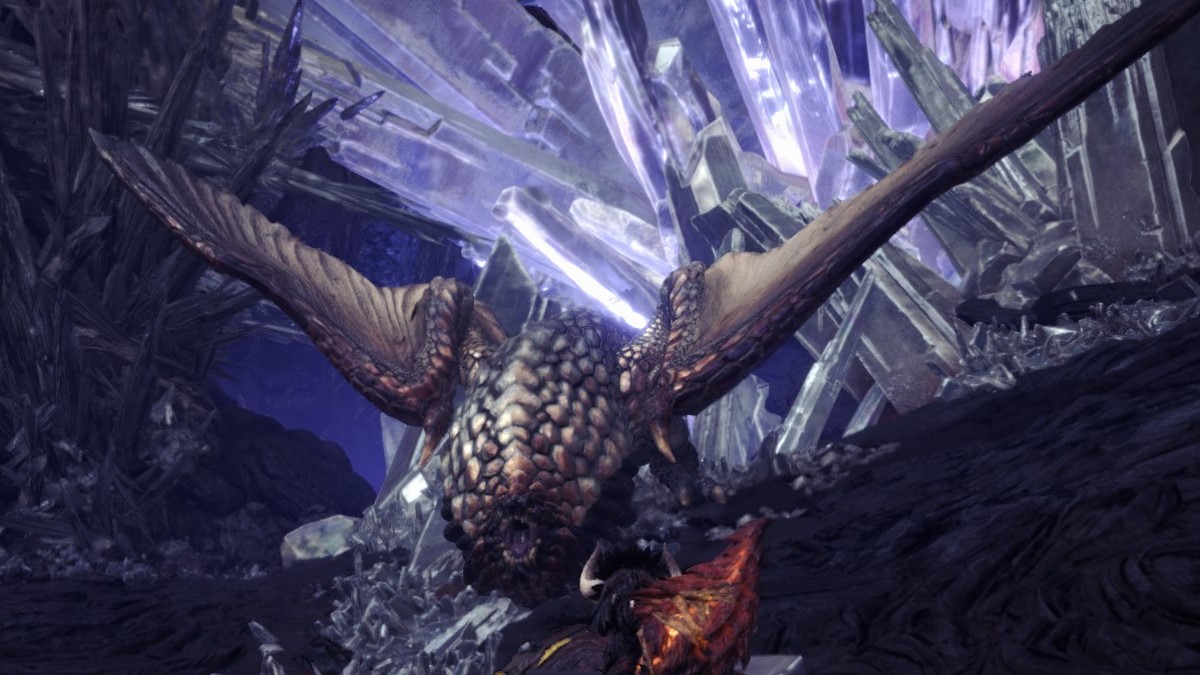
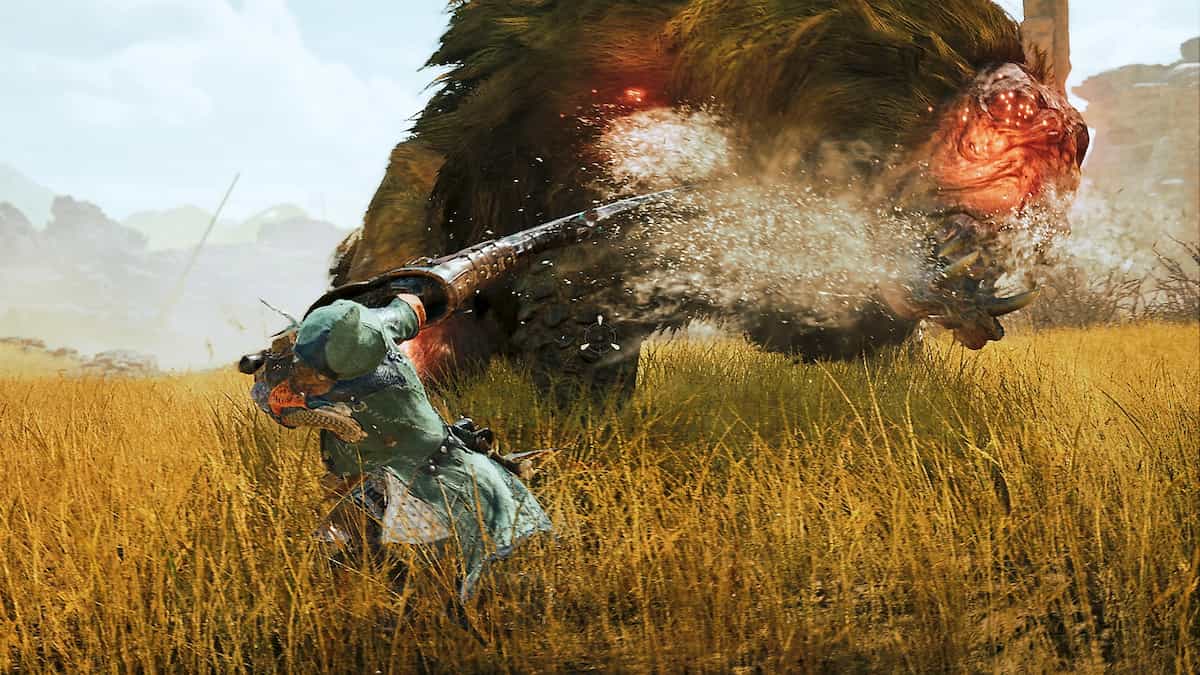
Anyone who has gotten to high rank in Monster Hunter World is intimately familiar with the living bomber, Bazelgeuse. One of the most threatening and aggressive monsters in the game, Bazelgeuse can be an intimidating menace for sure. However, once you know how to kill one, they become child’s play.
Bazelgeuse is a high-rank exclusive monster in Monster Hunter World. It is well-known for divebombing in fights that aren’t its own and dealing massive damage to unprepared hunters. Once you fight one straight on, though, you’ll recognize some of its big, fundamental weaknesses.
What are a Bazelgeuse’s weaknesses in MHW?
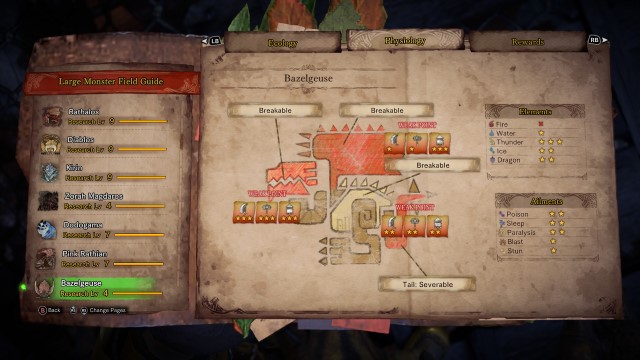
As a monster, Bazelgeuse’s head is the weakest spot on its body, taking significant damage from all weapon damage types in Monster Hunter World. It’s tail is relatively weak to all weapon types as well, and its wings take massive damage from the Shot damage type but miniscule damage from melee options. As for elements, Bazelgeuse takes the most damage from Thunder weapons and is almost entirely immune to the Fire element. The monster takes normal amounts of Poison, Sleep, and Paralysis build-up, but takes lower blast and stun build-up.
The first time you actively hunt a Bazelgeuse, you will be surprised at the amount of damage its head takes. Bazelgeuse’s head is one of the squishiest parts of any monster in MHW, taking increased damage from all sources—especially while enraged. Despite being shown as two stars in the Hunter’s Notes, Bazelgeuse’s tail doesn’t exactly win any durability awards, either. The tip of the tail takes great damage when its scales are heated up, causing severs to come very easily.
Thunder weapons are the best to use against Bazelgeuse, though it takes average damage from Ice and Dragon elemental weapons. The only ineffective elements against the living bomber are Fire and Water, with Water only being one star and Fire having an “X.” This doesn’t mean Bazelgeuse is fully immune to the element, but expect Flaming Ammo to not hit for more than double digits in best-case scenarios.
As for afflictions, Bazelgeuse isn’t particularly resistant to anything. Bringing a Blast weapon isn’t going to net you many explosions at all, but most other affliction types work fine. While the Notes show a single star of Stun, Bazelgeuse takes so much damage that you’ll probably land a stun or two with Hammer, Hunting Horn, or any other traditional stun method during a standard fight.
How to hunt a Bazelgeuse quickly
Bazelgeuse might seem intimidating, especially if you’re fighting it for the first time in its story mission, “Beyond the Blasting Scales.” But it can go down very quickly if you employ the right hunting methods. The following is recommended.
When battling a Bazelgeuse, keep your eyes on your feet. Most of Bazelgeuse’s attacks spread a myriad of scales around the floor which the monster can detonate, but you’ll also detonate them with poorly-placed weapon swings. If you can, try to reposition yourself quickly whenever Bazelgeuse swings its head or tail. This might let you find a place without many explosive scales.
- If possible, sever the tail. Bazelgeuse’s tail is quite long and capable of spreading its explosive scales far across the battlefield. When severed, not only does its tail lose a lot of sweeping range, but it also loses a lot of its ability to fire scales. This can make the backside of Bazelgeuse largely safe, so getting that tail off is a good priority.
- Aim for the head. Bazelgeuse’s head takes absolutely massive damage. Once you’ve broken the parts you need to break on the bomber, aim for that skull. The titanic damage numbers will bring the healthy monster down much faster than you might expect. Paralyze and Sleep openings can let you deal hundreds or even thousands with the right weapon setup.
- Utilize Bomb Pods for flinch opportunities. Bazelgeuse will consistently drop Bomb Pods from Clutch Attacks or just from taking large amounts of damage. Bomb Pods don’t hit Bazelgeuse very hard, but will cause it to flinch during almost any animation. This includes dangerous attacks like its Bomb Run or head charges. This will make the monster reset and not drop as many scales around, opening it up for easier punishes. Flash Pods can also work in many of the same scenarios, but they’re not as replaceable.
- Bazelgeuse primarily deals fire damage. Bring armor and skills which boost your Fire Resistance if you don’t want to get blown to smithereens. However, these bombs still hit very hard through your Fire Resistance, so have potions ready.
Bazelgeuse parts are useful for a tanky armor set and explosive weapons across the board. It’ll be important to learn to hunt it if you’re trying to get some of those armor sets for yourself.
Seething Bazelgeuse differences
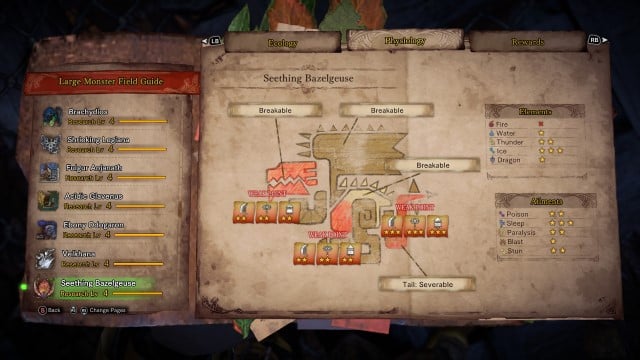
Seething Bazelgeuse is the Master Rank version of Bazelgeuse, and the fight stays largely the same. Its weaknesses, on the other hand, do not. The tail and head switching which one is weaker to damage and a weakness to ice instead of Thunder are the major differences between the High and Master Rank bombers. Seething Bazelgeuse also utilizes much larger purple bombs, which can more easily trip up hunters who aren’t looking for them.
Once you’ve fought enough Bazelgeuse, Seething Bazelgeuse can be a bit of a cake walk. However, the purple bombs it drops can be a huge issue, dealing massive damage at a much larger size than standard bombs. Seething Bazelgeuse also has bombs that explode on their own, meaning avoiding their blast radius is required.
You also must change your gear setup for Seething. It is much weaker to Ice than it is to Thunder, with both Water and Dragon getting the one-star treatment. Seething is much weaker to ailments in general, with it being relatively simple to get two sleeps on it if you’re a dedicated Sleep build. You still shouldn’t bring Blast or Fire weapons if you want to optimize slaying the beast, but Seething still takes so much damage from hits to the tail and head that it largely doesn’t matter.
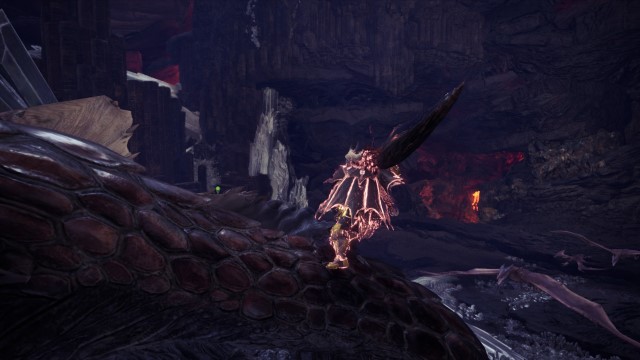
Seething Bazelgeuse’s wings are still weaker to Shot than anything else, but it has a new chest hitbox that you’re expected to work on. A new back break means Insect Glaive users can get an easy free part, though staying above a Bazelgeuse still remains a dangerous endeavor—especially with its new Ultimate Divebomb, which can easily one-tap a lower armor Insect Glaive build caught in an attack.
Seething Bazelgeuse never raids a hunt, so you won’t have to worry about its purple bombs while you hunt something else. This is a breath of fresh air compared to the living hell which was dodging a Bazelgeuse bombing and a Diablos at the same time.


Published: Jan 8, 2024 06:02 pm