There are eight formations in Homeworld 3, and each is potentially useful in its own way. It’s impossible to rank every single one, but it’s worth knowing which formations are best in different situations. This strategy guide selects the top five and explains what each is best for.
I’ve experimented with formations in Homeworld 3 and definitely use some more than others. In fact, in the heat of battle, I tend not to worry so much about formations as they often break up organically anyway. The formations of your fleets, groups, and squads make the most difference when you’re making your initial approaches to targets. The best formation for a given situation depends mostly on the number of ships in the group, the types of fleets in the group, and the type of enemy target(s).
Best formation for large mixed groups in Homeworld 3 – Wedge
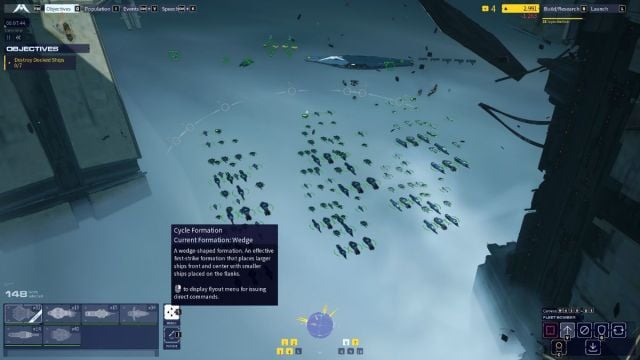
I’ve used the Wedge formation more than any other during my time with Homeworld 3, particularly later in the game when many of the battles are large-scale slugfests. When there are a few hundred ships in play, it doesn’t feel worthwhile to micro-manage a lot, and the Wedge automatically sensibly organizes large mixed fleets. It’s not too stretched out, like the Trail, or too densely packed, like the Wall. Plus, your smaller ships will be covered by their larger wingmates, so they won’t get wiped out at first contact with the enemy.
Best formation for Strikecraft groups in Homeworld 3 – Cross

The game describes the Cross formation as “all-round effective,” and that’s the main reason I’ve used it a lot. But I’d also say it’s particularly useful in the early game when most of your ships are Strikecraft. It’s especially effective for groups of bombers as it allows them to focus fire while performing deadly flybys against large, slow-moving targets. Its only downside is slightly reduced maneuverability, but I didn’t notice any situations where this was a major issue. So, I’d say that in most situations, “if in doubt, go with the Cross” is a good rule of thumb.
Best formation against Capital ships and other large targets in Homeworld 3 — Wall
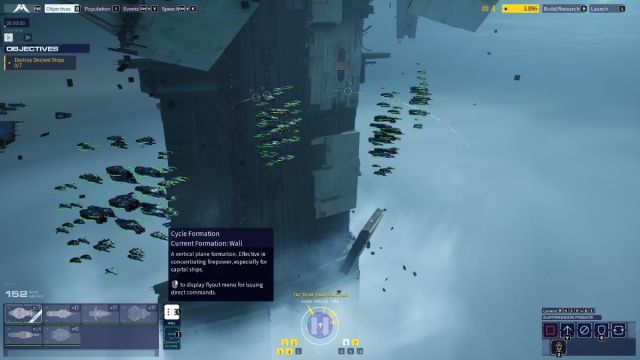
The Wall organizes your units into a densely packed, flat, vertical shape, making it the best formation for concentrating fire on large, slow-moving targets such as Capital ships and mission objectives. But it’s generally not a great formation if you’re under heavy attack, so only use it if you’ve already wiped out most of the enemy ships and turrets nearby or with groups of long-range ships that you can keep out of range of enemy attacks.
Best formation for small mixed groups in Homeworld 3 — Claw
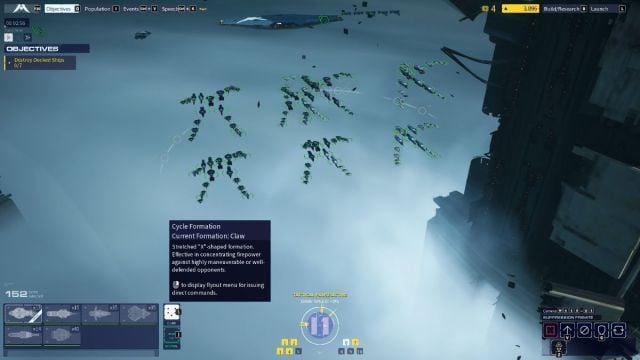
Much like the Cross formation, the Claw arranges your ships into an X shape, only with one subtle difference. While the Cross is a flat X, the Claw positions the center of the X in the rear, with the arms of the X extending forward like a claw. Larger, longer-ranged ships will be placed further back, making this an ideal formation for groups with about a five-to-one ratio between Strikecrafts and larger ships. So, for example, if you want to move a few Corvettes or Frigates into position to attack larger targets but want them protected from enemy Strikecraft, then group them with some fighters and use Claw to set up an “escort” formation.
Best formation against area-of-effect damage in Homeworld 3 — Delta
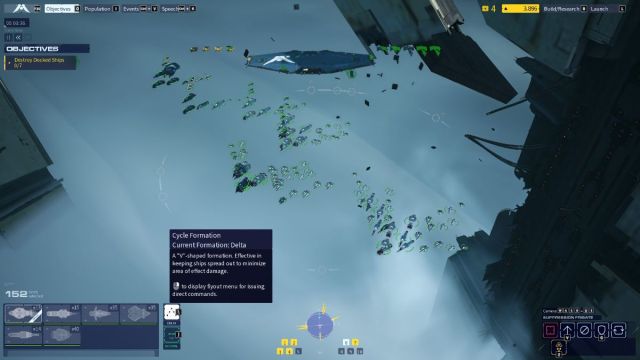
Sometimes, in Homeworld 3, you need to get powerful, short-range ships (i.e. bombers) close to a target, but there’s a lot of explosive flak filling the space in between. That’s where the Delta formation is most useful. It spreads your ships out wide and enables them to move quickly, both in a straight line and on the turn. In some situations, it can be effective to set a bomber group to Delta on approach to minimize the damage from long-range enemy attacks but then to switch to Wall or Cross once you’re within your own attack range to ensure maximum concentration of fire upon the target.
Those are our picks for the five best formations in Homeworld 3. If you’re wondering what happened to the other three (Broad, Sphere, and Trail), I didn’t really find many situations in which they were useful. Broad and Trail were both too spread out, and Sphere just felt like a random shapeless cluster of ships. They might come in handy for organizing and maneuvering your fleet prior to battle, but once enemy contact has been made, my five picks are definitely the most useful.


Published: May 13, 2024 01:08 pm