Finding the Hiddenfolk in Hellblade 2 isn’t easy, and before Senua can continue her search for them, she needs to solve the Trial of Wisdom to continue her search.
This trial is a puzzle consisting of several braziers that, when lit or extinguished, cause the world around her to alter—revealing or blocking pathways. But Senua isn’t working alone. There’s a strange glimmering figure who’ll help her solve this puzzle.
How to solve the Trial of Wisdom brazier puzzle in Hellblade 2
The Trial of Wisdom takes place in Chapter Four, Huldufólk, of Hellblade 2, and starts after you finish the Enter the Caves subchapter.
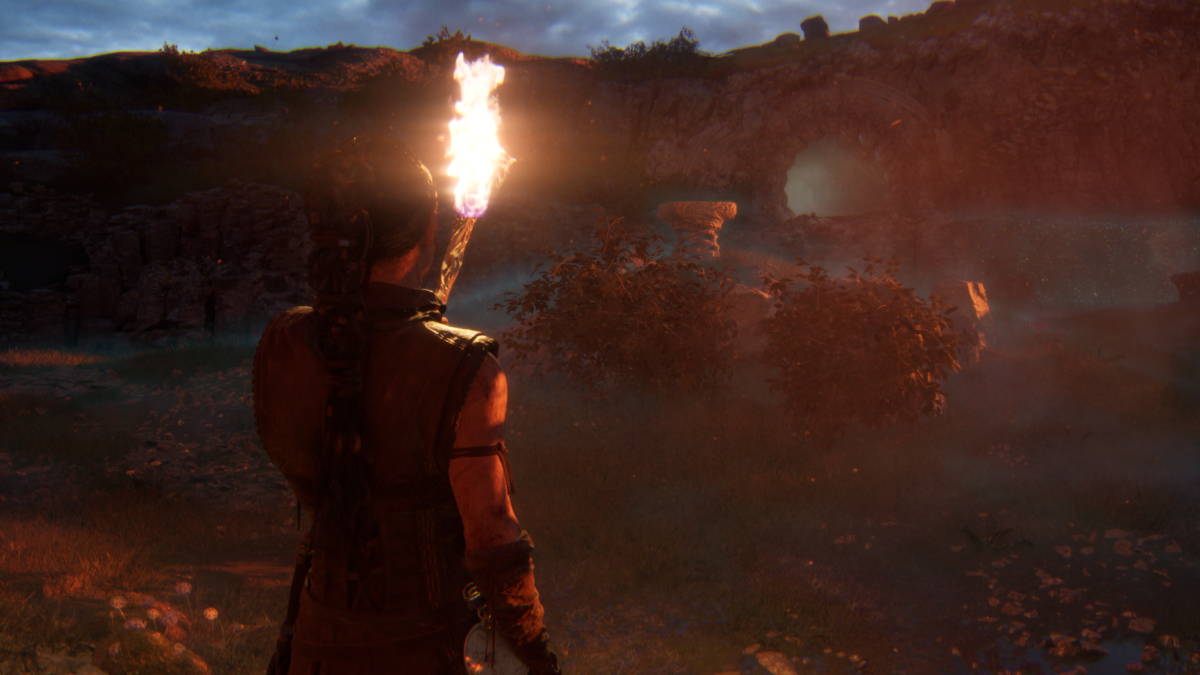
The trial begins after you exit the caves and pick up a lit torch from an enclave of your right. This lights up the area you’re in, revealing a blue glimmering light and a brazier in front of you. You can also see the mysterious shimmering figure in the distance.
You must solve the Trial of Wisdom puzzle to access a cave in the distance and continue your search for the Hiddenfolk. Below, you’ll find a video that shows how I solved the puzzle but I’ll also give you step-by-step guidance.
First things first, light the brazier on the mound (brazier 1) ahead of you, then head toward the waterfall slightly to your right. Cross the dirt bridge, with a slight left (while heading forward) and jump down the ledge. Follow the path ahead of you—it curves right, leading you to a lit brazier (brazier 2) in a dead end. Extinguish the brazier and the rocks on your left should disappear.
Follow the path through the disappeared rocks, walk right around the long rock and then slight left to find another lit brazier (brazier 3). Extinguish this brazier, then turn around and follow the path back to brazier 2.
Light brazier 2 and the rocks on your left will reappear, blocking your access. Follow the rocky wall until you reach another opening, leading back to brazier 3. Light brazier 3. A new, elevated path will now have emerged between braziers 2 and 3.
Leave brazier 3 and slight left to join the new path. Follow it until you reach an alcove in the wall to your right (similar to the one you took the torch from initially). Put your torch in the alcove (despite what the Furies say), then the shimmering figure picks it up on their side. They light a brazier on their side, opening up a new path for you.
Turn around and go back down the path you’re on until you reach brazier 3 again. Extinguish brazier 3 go round the long rock and out the gap that leads to brazier 2. This time you’re not going to brazier 2, however. Instead, once you leave through the opened rocks, turn right and go across the new path to the brazier the figure lit (brazier 4).
Extinguish brazier 4 and go through the tunnel that appears where the dirt slope was nearby. At the other side of the tunnel, you’ll find another alcove. No torch will be there initially, but after a few seconds one will appear. Pick up the torch and go back through the tunnel to brazier 4.
Light brazier 4, head up the reemerged dirt slope, and turn left. Follow the path around until you reach an unlit brazier (brazier 5). Light brazier 5. Once you’ve lit the brazier, follow the path around right to the new path and jump down the edge. You’re almost there!
Follow the dirt bridge back to brazier 1 and light brazier 1.
Straight ahead of you, the rocks disappear, revealing another new path. Follow the path as it winds right and you’ll reach another alcove. Put your torch in the alcove and watch as the mysterious figure picks it up and lights yet another brazier. This one, thankfully, is the last needed. A path will now be available to the cave.
Here’s a much more concise rundown of the above:
- Light the brazier on the mound
- Extinguish brazier 2
- Extinguish brazier 3
- Light brazier 2
- Light brazier 3
- Put your torch in the alcove
- Extinguish brazier 3
- Extinguish brazier 4
- Pick up the torch from the alcove
- Light brazier 4
- Light brazier 5
- Light brazier 1
- Put your torch in the alcove
It’s easier than it sounds, and I highly recommend watching the video above to see it in action. Once you’ve completed the trial, you can continue your search for the Hiddenfolk.


Published: May 21, 2024 03:10 am