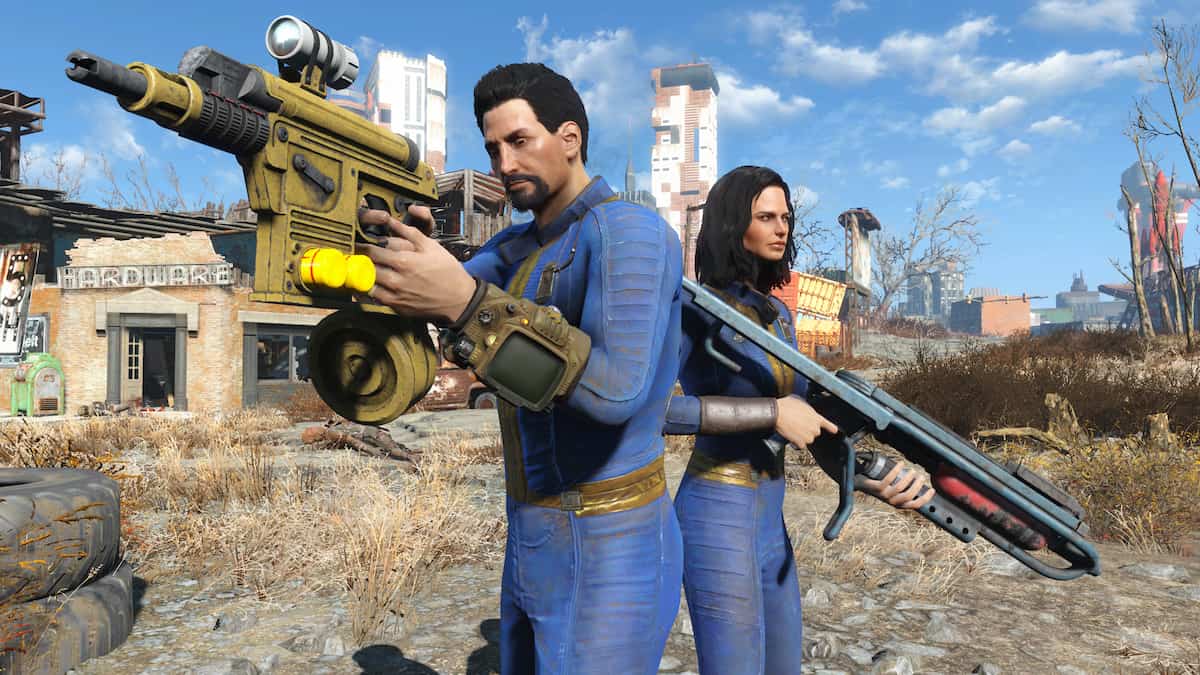
Fresh off the tails of the highly controversial Next Gen update, Bethesda is at it again with a less-than-desirable Fallout 4 update.
In a vacuum (for a person who never has downloaded and never will download a mod), these updates might not be a bad thing. For the rest of us, the updates are breaking our mod lists. This article will cover exactly what has changed in Fallout 4‘s May 13th Next Gen Update 2, and perhaps more importantly—how you can revert those changes to a version of the game that’s compatible with all your favorite mods.
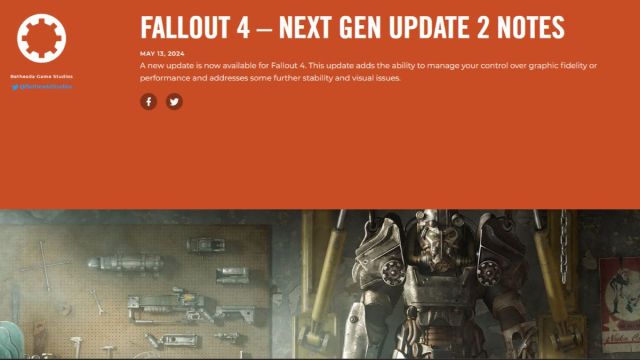
Fallout 4: Next Gen Update 2 patch notes
In the previous update, Bethesda added the ability to choose between Performance Mode and Quality Mode for anyone playing on PS5 or Xbox Series X. The difference is fairly simple: Performance Mode gets you 60 frames per second with less visual fidelity, and Quality Mode gets you 30 frames per second with better visuals. In this patch, that system has gotten more fine-tuning.
You can read Bethesda’s properly vague description of the new console options on its website, or read on to get the information in normal people terms.
PS5 and Xbox Series X changes
One of the most controversial parts of the update (aside from the bugs it added) was the fact that you weren’t allowed to individually control any of your graphics settings on console. With the newest May 13 update, you can now tweak your visual settings and select a target frame-rate independently from one another, allowing you to customize a middle ground between Performance Mode and Quality mode on console.
This means you can opt for a 60 FPS target while still running a high resolution, and the game will automatically adjust your resolution in real time as hardware demands get higher from explosions and such to keep you as close to your target as possible. Does it feel strange that a decade old game can’t automatically run at 60 FPS on next gen consoles? Absolutely. Is it better than the previous binary settings introduced with the first Next Gen Fallout 4 update? Unfortunately, also absolutely.
Bug fixes for all platforms
In addition to adding some more fine-tuned control over graphics/performance settings on console, the May 13 patch also set out to fix some of the bugs that were introduced on the April 25 Next Gen patch. Those fixes include:
- General stability improvements
- Fixed visual issue with certain image spaces
- Auto HDR is re-enabled (Xbox Series S|X)
- Fixed issue where reserved space was not displayed correctly in load order menu (Xbox Series S|X)
- Fixed issue with character name field when in widescreen mode (PC)
- Fixed an issue that occasionally caused bundles to not fully download and could cause a crash
- Fixed an issue with material swaps
- Fixed an issue with load order that would break DLC until a restart after downloading mods (PlayStation 5)
- Fixed an issue that would occasionally cause a crash if you returned to the Main Menu with queued mods still downloading (PlayStation 5)
- Fixed an issue that could cause the Creation Club menu to not appear (Microsoft Store)
- Fixed a crash that could occur when connecting to the network after a suspend/resume with the network disabled (Xbox One)
How to downgrade Fallout 4 to version 1.10.163 on PC
This latest Fallout 4 update brings the PC version of the game to 1.10.984.0, and you can tell that’s a bad thing because the numbers aren’t the same as 1.10.163—which are the numbers you’re going to see on pretty much virtually any mod on Nexus Mods. In short, you’ll need to downgrade the game back to an older version if you want to reap the benefits that come from a decade of hard work from modders.
The steps for downgrading feel intimidating, but it’s actually just a simple copy-and-paste process. There are essentially only two steps: downloading the old game files and replacing the new files with the old ones.
Run the steam console and download the older version
The first thing you need to do is open your Steam console. The console does have its own tab on the Steam app, but the quickest way to access it is by opening the Windows Start Menu, searching “run,” and then pasting steam://open/console.
After you’ve done that, copy and paste these seven lines of code into the console:
- download_depot 377160 377162 5847529232406005096
- download_depot 377160 377161 7497069378349273908
- download_depot 377160 377163 5819088023757897745
- download_depot 377160 377164 2178106366609958945
- download_depot 377160 435870 1691678129192680960
- download_depot 377160 435871 5106118861901111234
- download_depot 377160 435880 1255562923187931216
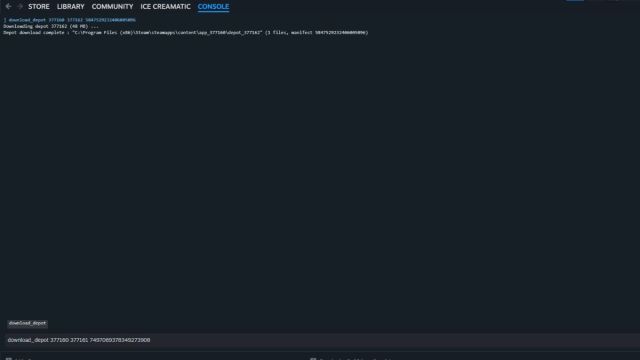
As you paste each line, you will see a prompt stating that the download has started, and another prompt indicating when the download has finished. Some of these are several gigabytes, so it will likely take around 30 minutes to finish all seven. You don’t need to wait for a file to finish downloading before starting the next—feel free to start all seven and then wait it out in one chunk.
Once all seven have finished, you still need to replace the files in your game’s directory with these ones you just downloaded. If you stop here, the downgrade won’t be completed.
Replace game files with the older versions
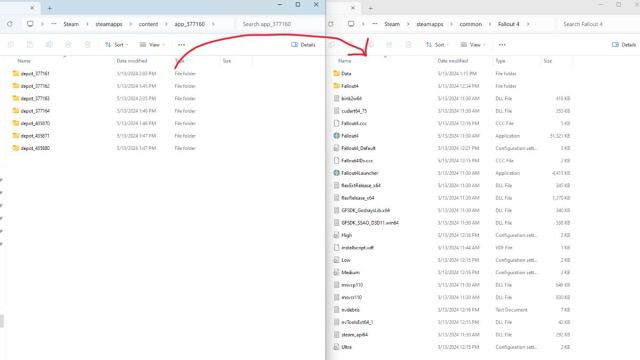
Because Steam has self-preservation instincts, the seven downloads didn’t go straight into your Fallout 4 game directory. Instead, they went to a separate folder within the Steam directory. The exact location is:
- C:\Program Files (x86)\Steam\steamapps\content\app_377160
What you need to do now is copy and paste each of the seven folders into your Fallout 4 download location, which is located at:
- C:\Program Files (x86)\Steam\steamapps\common\Fallout 4
The cleanest way to do this is by opening two separate windows of File Explorer, one for each of the two directories above. Then, click on the first of the seven newly downloaded folders in app_377160, copy all of the files within, and paste them into Steam/steamapps/common/Fallout 4.
When that’s done, your game will officially be downgraded to version 1.10.163, but there’s one last final important step—you need to turn off auto updates for Fallout 4 to prevent this mess from repeating itself. From your Steam Library, right click on Fallout 4, select “Properties,” “Updates,” and change Automatic Updates to “Only update this game when I launch it.”
Because you’ll be running Fallout 4 from the script extender via Vortex or your preferred Mod Manager, Steam won’t ever register that the game has actually been launched, and so it won’t ever update back to 1.10.984.0. On that note: make sure not to ever launch the game directly from Steam, or it will update and you’ll have to repeat the downgrade.


Published: May 13, 2024 02:30 pm