
Avenge the Drowned quest starts as a seemingly simplistic side quest in Baldur’s Gate 3, where you must uncover the beast who killed a Waveservant of Umberlee. But discovering the beast leads to further quests and, most importantly, crucial allies.
When you discover the actual difficulty of Avenge the Drowned in Baldur’s Gate 3, you might want to hold off on completing it until you’re ready to move against Gortash. He’s directly working behind the scenes of this mission. Before you get too far, have plenty of potions, levels, and a long rest. Here’s everything you need to know about how to complete the Avenge the Drowned quest in Baldur’s Gate 3.
How to start the Avenge the Drowned quest in Baldur’s Gate 3
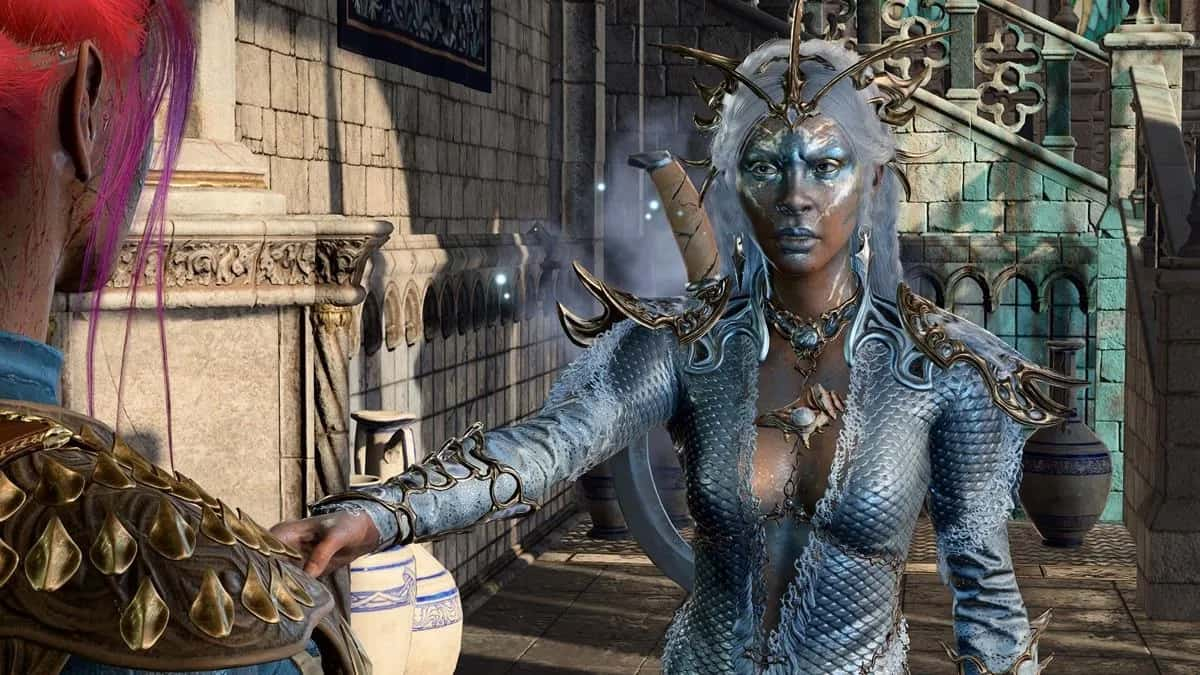
To start the Avenge the Drowed quest in Baldur’s Gate 3, go to the House of the Water Queen in the southwestern part of the Lower City when you get to Baldur’s Gate. She’ll be able to point you in the correct direction, where she says that a giant beast killed one of theirs, Holli, and they died in Grey Harbor. This location is a short distance away. She wants your help to find the one behind the beast and bring it to justice.
The head of this procession, Flood Tide Allandra Grey, holds the victim’s last rites when you walk in. Talking to her leads to her asking you for a donation. If you donate, she tells you that a noxious beast that patrols the waters of Grey Harbor killed Holli. There’s also the chance to use the Speak with Dead spell on Holli’s body to learn more about the beast, making it easier to find.
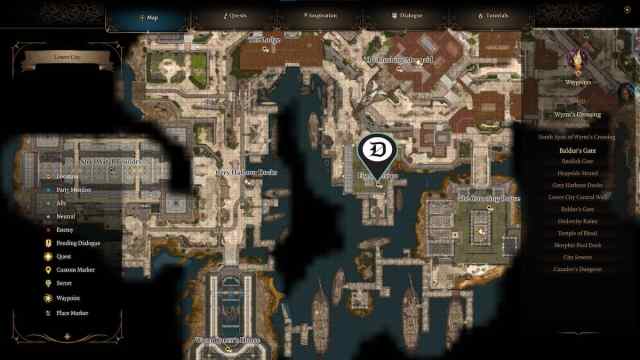
The next step you need to take is to go to Flymm’s Cargo warehouse. It’s not too far from the House of the Water Queen, and you can do this anytime while playing Baldur’s Gate 3. If you’re interested in completing the quest in one swoop, handling any smaller tasks from other characters in the city might be a good idea.
Where to find the Beast in Grey Harbor in Baldur’s Gate 3
As you explore Grey Harbor in Baldur’s Gate 3, they can help narrow down the location for you. One resident fisherman of the harbor will flock to your side and give you information to help you take it down. He says the beast was spotted near Flymm’s Cargo warehouse east of Grey Harbor, so your next priority is to visit that place.
Head down to the depths of the basement to find an underground docking area with a giant submersible next to Redhammer the Deviser, who is ready to pilot it.

Redhammer the Deviser is the beast’s creator and pilot, and he can become a worthwhile ally that can aid you at the end of the game of Baldur’s Gate 3. However, he was the one who hit Holli and admitted to it. Talking to him leads you to learn that Gortash commissioned the device as a transport system. The submersible is responsible for transporting prisoners to and from the Iron Throne, an underwater prison that holds many prisoners. If you’ve been looking for a way to get to the Iron Throne, using the submarine is best, especially if you can convince Redhammer to do it without invoking violence.
You do have an option, though. You can choose to rescue the prisoners in the Iron Throne, or you can choose to turn Redhammer to the House of the Water. They will make short work him, unfortunately, and kill, preventing him from assisting at the end of Baldur’s Gate 3. Instead, you can wait after you’ve gone to the Iron Throne and completed the following quests before turning him over. If you want to complete the Iron Throne quests, which you should because completing these quests will help you in the endgame, continue reading.
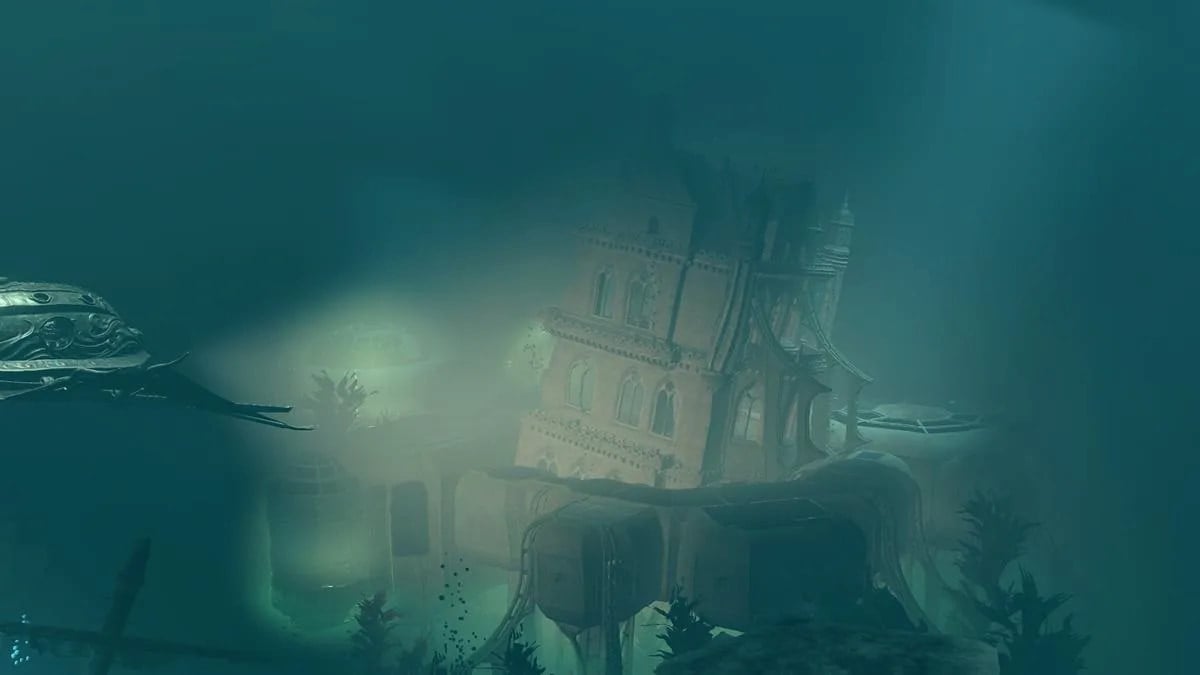
How to complete the Iron Throne in Baldur’s Gate 3
The only way to reach the Iron Throne is to work alongside Redhammer in Baldur’s Gate 3 and take his submarine to the prison. Going to the Iron Throne will incur the wrath of Gortash, so proceed with caution. We recommend that you take some time before deciding to descend to the Iron Throne. This includes double-checking you have a variety of potions available, your party has a full rest, and they’re at the highest level you’re comfortable reaching. Having characters who are level 12 may give you the best advantage.
The next part of this guide details all the prisoners you can save from the Iron Throne to help you in your main mission against the Elder Brain. The amount of turns you have to complete the Iron Throne comes down to the difficulty you’ve set in Baldur’s Gate 3. We only have six turns for our playthrough before everyone on the Iron Throne dies.
How to save all Iron Throne Prisoners in Baldur’s Gate 3
You can rescue multiple prisoners from the Iron Throne: All the Gondians, Duke Ravengard, and Omeleumm. Again, with only six turns to rescue them all, you have precious time to complete this task, and you’ll need all the help you can get. For the first turn, you want to rely on getting your Baldur’s Gate 3 characters in different parts of the facility, rescuing the characters furthest away from the entrance, and then working your way into the interior.
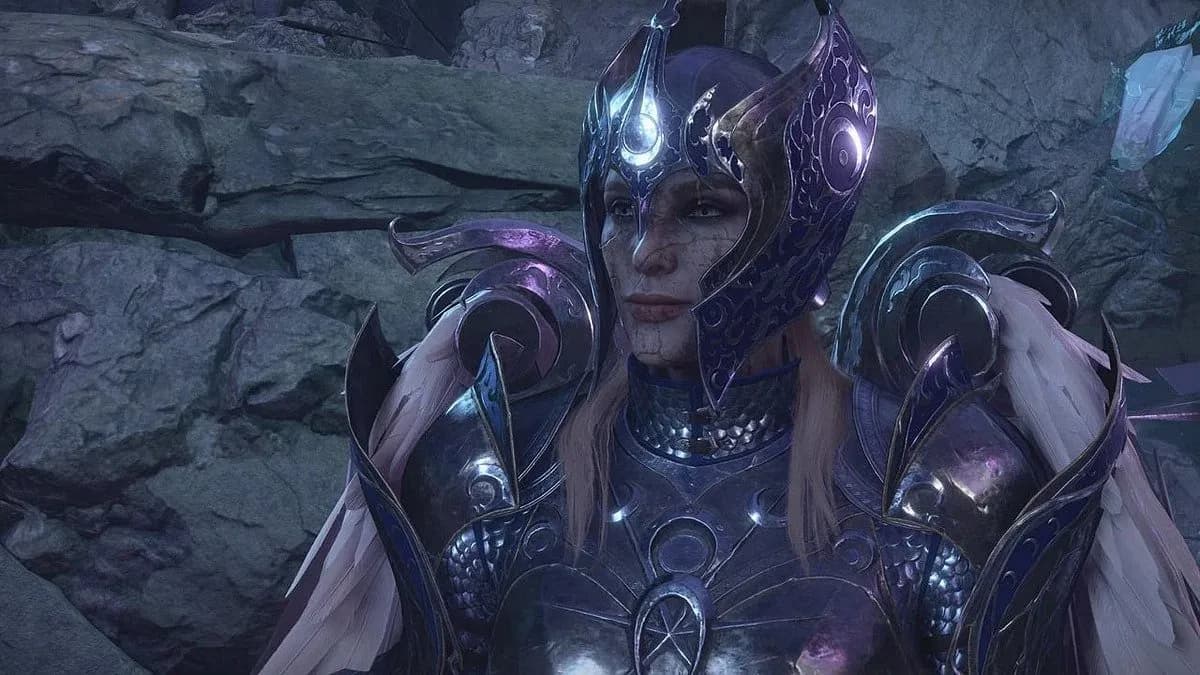
How to save Duke Ravengard in BG3

Since the Grand Duke served his purpose, Gortash imprisons him in the eastern wing of the Iron Throne. Saving him grants you his help along with the Order of the Flaming Fist loyal to the Grand Duke. In addition, your companion Wyll thanks you for saving his father from his untimely end, and you can pursue further romance options with him.
The best way to quickly grab him is to have a character who can use Dimension Door in Baldur’s Gate 3. Dimension Door can teleport more than one person to a different location. For my playthrough, I used Wyll to grab his father and bring him to the entrance. However, because we defied Mizora, Wyll’s patron, she attempts to kill Wyll’s father. However, his death is not required to get Wyll out of his contract. He will be safe if you can get Duke Ravengard to the submarine. Make this a priority for at least one of your party members.
How to save Omeluum in Baldur’s Gate 3
The friendly Mind Flayer from the Underdark is also trapped in here. After your choices with Omeluum concerning your parasite in Act One, it is possible to find him trapped down here with the other prisoners.
You can find him in the southwestern wing of the Iron Throne, and saving him allows him to teleport back to the submersible immediately, so save him first because you can use him to assist in teleporting the Gondians back to the submarine. He’s another body to protect the Gondians in Baldur’s Gate 3, with several defense attacks and good health. He doesn’t have a lot, but he still helps and does some damage.
How to save the Gondians in Baldur’s Gate 3
The Gondians are the most scattered throughout the prison in Iron Throne. You need to devote at least two party members to grabbing them all. One character should follow behind the one you send to Omelumm, and the other needs to head opposite where Duke Ravengard is in the facility. There are several prisoners in this section, which means you’ll want to zip around the far back and begin opening those doors.
The real test is making sure you save every person. Before working through these steps, you may want to create a save on your Baldur’s Gate 3 file. It’s easy for one of the Gondians to fall, but saving each should be a priority.
How to save all prisoners in Iron Throne in Baldur’s Gate 3
It is possible to save everyone in the Iron Throne within six turns. However, you need to make some executive sacrifices and strategic moves, including:
| Steps for The Iron Throne | Description |
|---|---|
| Saving your game | You might die or need to reset if a prisoner gets killed. So, having a pre-challenge save file to load when you mess up is very helpful and makes this challenge less stressful. When you successfully save a prisoner, you can create a separate save file to reload from this point instead of the pre-challenge one if you need it. |
| Devote one character to every section of The Iron Throne | Dedicating a character to each section of the Iron Throne is the best way to get the job done. The fastest character should go after Omeluum because he’s the furthest away, and then they can teleport back to the ship and help out at the starting location. You also want to place one party member in the center who can take down the horde of enemies appearing as each turn happens, preferably a tank. |
| Use Haste and Haste Potions | This spell grants an extra action per turn for three turns, but your Armor Class increases by two, your movement speed doubles, and you gain an Advantage on Dexterity Saving Throws. This is an excellent spell to use if you need to increase the defense of one of your companions or yourself and get that much-needed extra action to either deal with another attack, use a buff or debuff spell, or heal. The downside is you miss a turn after it goes away. |
| Use limited potions | You want to use Potions of Speed, Hill Giant Strength, Barkskin, and any limited arrows you’ve been saving up for this point. This is also a good idea if you find a way to use Darkness to prevent enemies from using ranged attacks for a short time. |
| Bring out summons | Whether it’s spells or scrolls, summon minions, creatures, or balls of fire to help fight and protect you from danger. The more allies you have to defend the weaker prisoners, the higher the chance they have to escape and return to the submarine. |
With all this in mind, you can free the prisoners and hopefully give them enough buffer to escape without getting killed. If not, you can try again.
Should you side with Redhammer or turn him in in Baldur’s Gate 3?

After you save the Iron Throne prisoners and make your way to the surface, unfortunately, you have to make a timely decision. You can side with the Waveservants who tasked you with finding Redhammer, or you can attempt to protect Redhammer after he shares that he regrets what he did for Gortash in Baldur’s Gate 3.
If you hand Redhammer over before completing the Iron Throne, you won’t be able to access it, and you’ll kill Wyll’s father, Duke Ravengard, and all the Gondians. Wyll disapproves of you killing his father, which makes it difficult to romance Wyll. So, it’s easier to side with him initially and then hand him over to be punished when he’s no longer helpful.
Once you return from the Iron Throne, Waveservants await you outside. If you turn Redhammer over to them, they thank you, and the quest is complete. If you side with him, the Waveservants attack you, resulting in an additional battle. Of the two options, saving Redhammer is better for any Baldur’s Gate 3 playthrough. Redhammer becomes an ally that you can use during the final battle and is a pawn in Gortash’s plans.
Regardless of your choice, the Avenge the Drowned quest ends here. Once you’ve completed the Avenge the Drowned quest, you must focus on gaining more allies for the final war against the Mind Flayer army.
Others Asked
What are the consequences of choosing to kill the Nightsong in Baldur's Gate 3?
If you choose to kill the Nightsong, either yourself or by letting Shadowheart do it, Shadowheart becomes possessed by Shar and obtains Dark Justiciar Armor and Shar's Spear of Evening. Her personality changes, she becomes more self-absorbed, and you are locked out of further romance options with her. The death of the Nightsong also causes the death of characters Isobel, Art Cullagh, and Dammon, who are crucial for other party members.
What is the main choice players have to make in the "Hunt the Devil" side quest in Baldur's Gate 3?
Players have to choose between killing either Karlach or Anders.

Where should players start in Baldur's Gate 3 to find the Guildhall?
Players should start in the town of Rivington and begin Act Three to receive a map that helps them find the Guildhall in Baldur's Gate 3.


Published: Oct 17, 2024 03:42 pm