
One of the earliest dungeons in Baldur’s Gate 3 results from the side quest Explore the Ruins, which begins with finding Shadowheart, entering the dungeon, battling foes, and gaining some pretty great loot.
Explore the Ruins objectives and walkthrough
How to start the Explore the Ruins quest
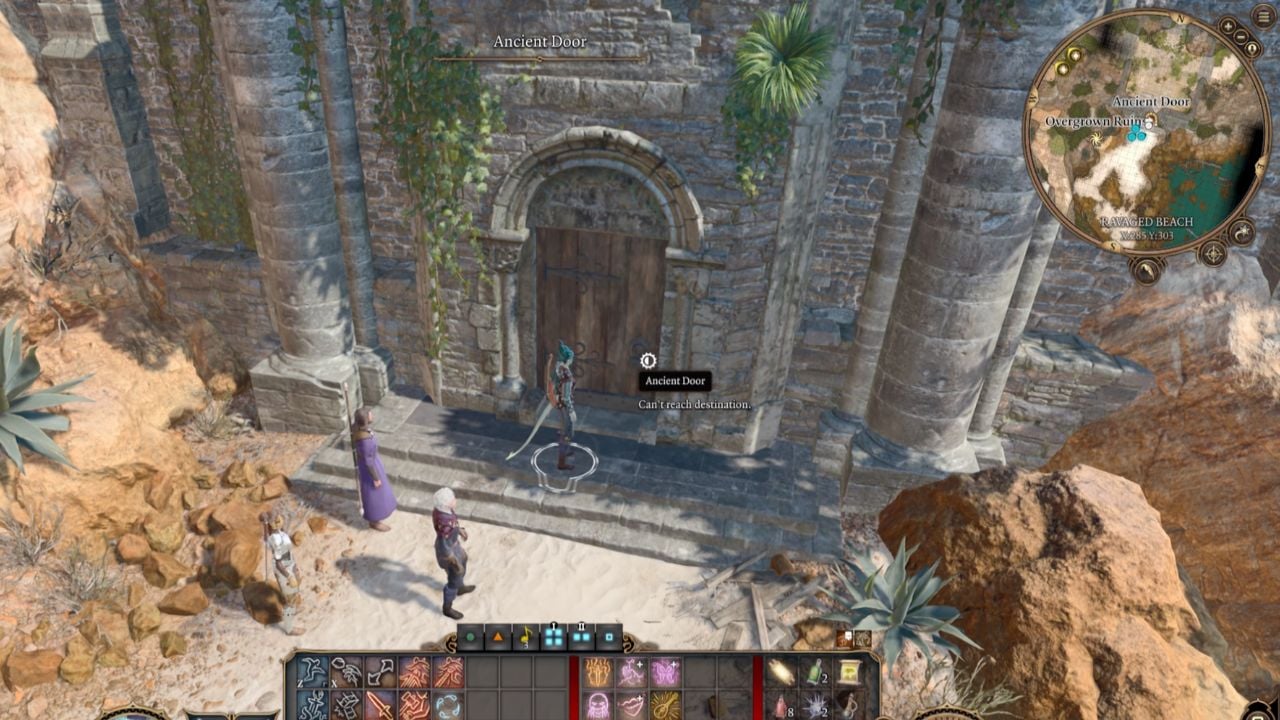
To start the Explore the Ruins quest, you’ll need to find Shadowheart, trying to break down a locked door to the Ruin’s entrance north of the Nautiloud crash at the coordinates X: 285 and Y: 303. However, you will only see her if you can free her from the pod in the prologue.
If you could not free her from the pod, don’t worry; you can still get this quest by talking to the bandits exploring the ruins outside. If you persuade them that the area is unsafe and there are no treasures, they’ll leave, and you can enter the ruins. If not, you will need to kill them.
How to enter the Ruins
To enter the Ruins, you can either head through the Ruin’s courtyard door at X: 285 and Y 367 or through the hatch to the right of the courtyard at X 316: and Y: 362.
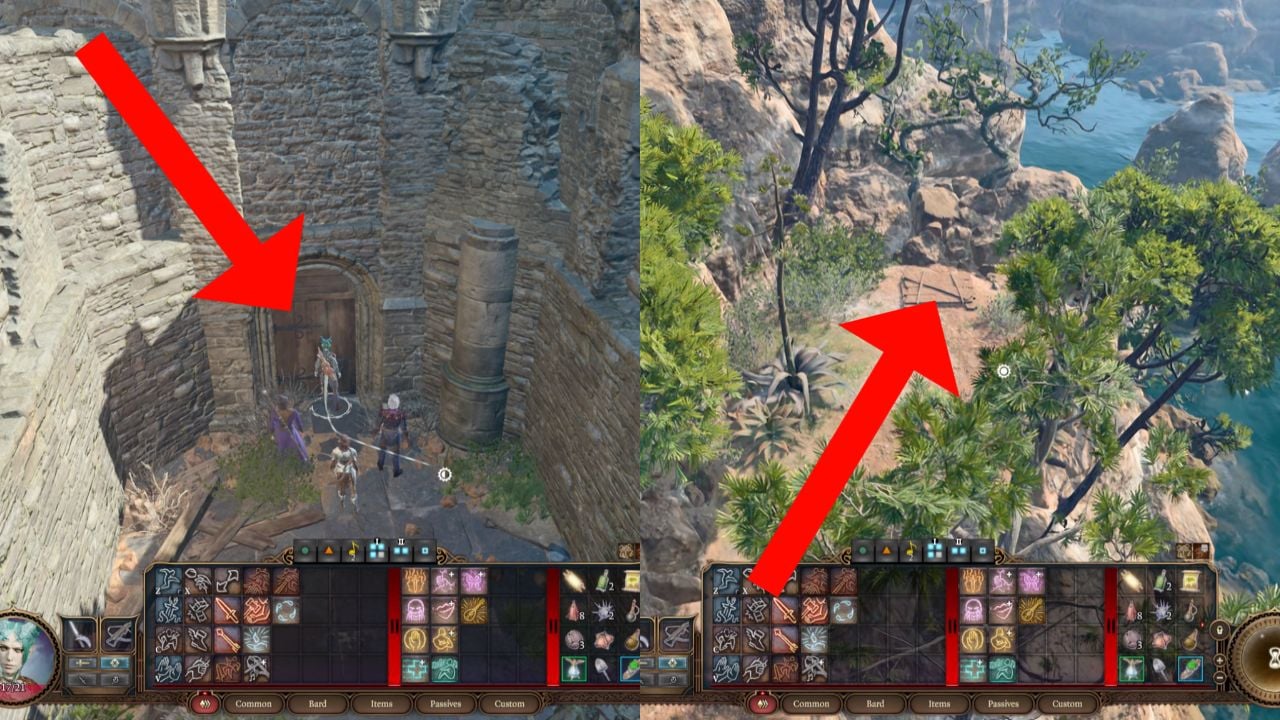
However, the easiest option is to enter through the door of the Ruin’s courtyard. If you pass the Persuasion check, you can enter and battle the bandit inside. If you don’t, you’ll need to get in another way by lockpicking or destroying the door.
Or, if you’re feeling lucky, you can attempt to lockpick the door Shadowheart was trying to break through, as this will lead you directly into the Dank Crypt, and you can skip the bandit slaughter. Unless you’re the Dark Urge, killing them is the only way. The heavy door Shadowheart tries to open requires a roll of 20.
Getting a perfect score is pretty tricky. However, if you have added bonuses like I did as a Bard with Jack-of-all-Trades and a plus two to my Dexterity, you can get that 20 easily. But if you don’t, there are several other options. Or you could try again.

Regardless of how you get inside, you must defeat him before he can warn his comrades in the other room. Once he’s defeated, you’ll find various campfire supplies on the table, such as cheese and sausages, so be sure to pick them up.
Through the door, you will notice a door that cannot be unlocked just yet and explosive barrels if they’re hit by fire. To kill the rest of the bandits, you can either lure them into the room with the barrels, use a fire ability like Fire Bolt, and explode them when the bandits are near to whittle away at their health.
Or, if you’ve picked up Astarion, you can use the shadows to sneak in and perform several back-attacks, killing most of the bandits instantly.
How to get to the Dank Crypt
To get into the Dank Crypt, use the lever at the back of the room with the bandits at X: -173 and Y: -356 to open the locked door in the previous room. However, you must pass a Perception check to see the lever.
If you can’t, you can highlight the lootable objects in the area, and you’ll be able to see the lever that way. By going through the previously locked door at the coordinates X: -177 and Y: -324, you will enter the area known as the Dank Crypt. From here, you have two options: head left or head right.
The first thing you need to do is to head right into the room with many sarcophagi and traps. The main goal in this room is to loot the sarcophagi for items. Unfortunately, there are dozens of traps around the room set off, killing your party almost instantly.
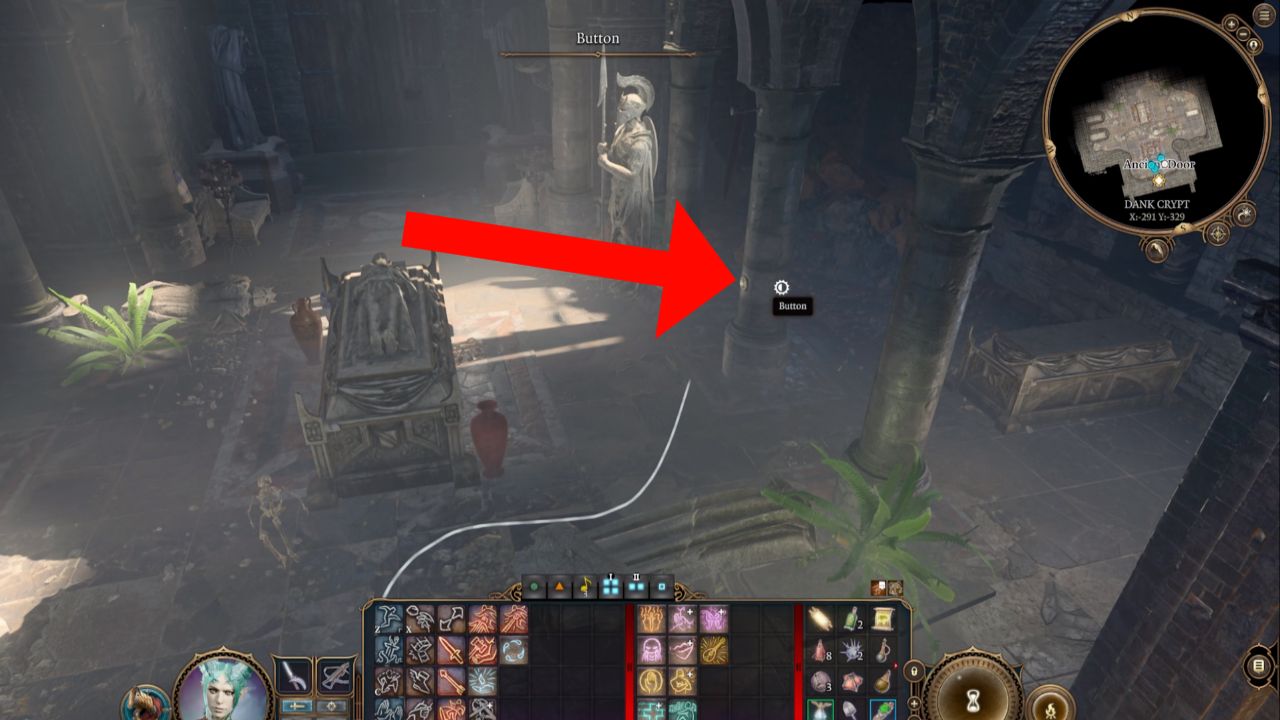
To clear this room, you can deactivate the traps and vents with the disable trap toolkit or simply press the buttons on the columns and walls around the room.
To see these traps and buttons, you must pass a Perception check, which is why Shadowheart is crucial here. Regardless of the dungeon, you should have someone with high Perception because you have a better chance of seeing traps and other interactable objects.
Once all the traps are disabled, you can loot the sarcophagi and enter Jergal’s Statue Room.
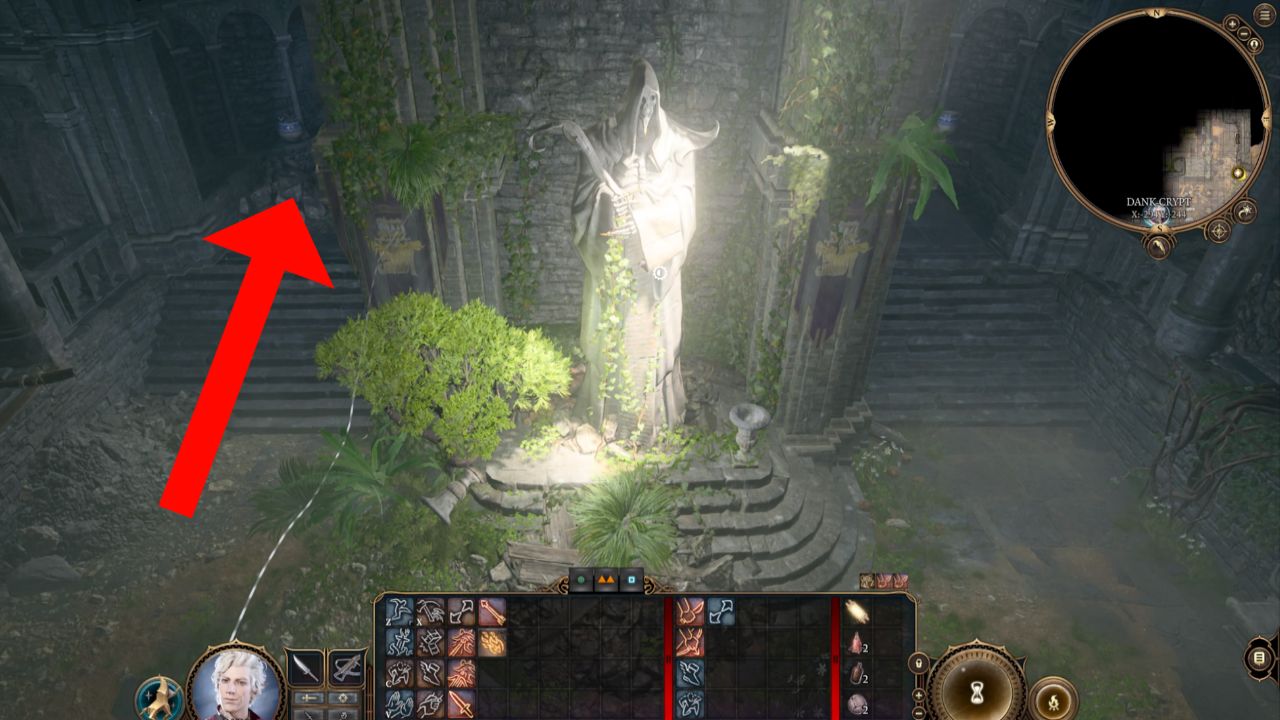
How to get into Jergal’s Statue Room
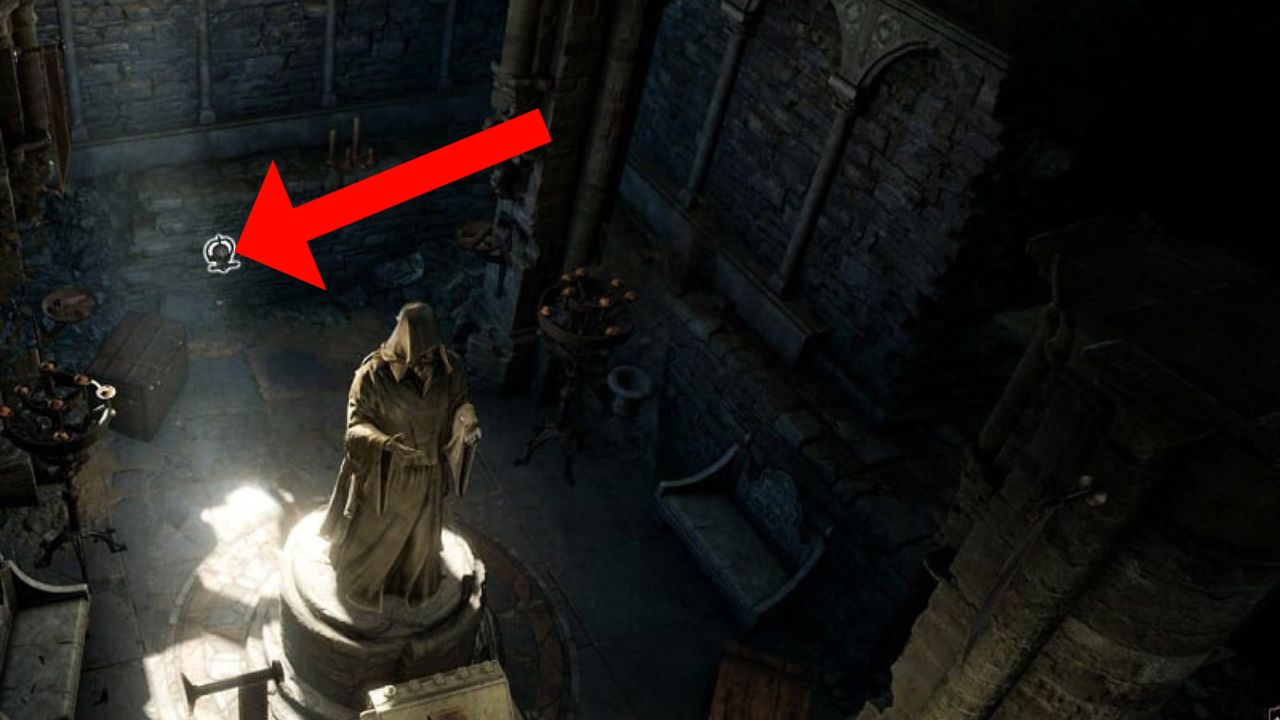
To get into Jergal’s Statue Room, return to the connecting room and go through the Heavy Oak Door at X: -291 and Y:289. This is the “left path” you didn’t take before.
As you explore this room, steal the items and weapons from the skeletons because you will eventually awaken them, and they shouldn’t have anything other than their fists to attack you with.
To the left of Jergal’s giant statue, you will see a darkened area, but when you get close and if you pass another Perception check, you will see a button. By pressing the button, you will open a tomb and awaken the skeletons, which you must now defeat. If you didn’t pass the Perception check, you can still see the button.
You shouldn’t have too much trouble defeating them as they are pretty low-level. Use Shadowheart’s heals and take advantage of Astarion’s sneak attacks or high areas for that long-ranged Advantage.
Once they’re all defeated, return to the chamber room that opened when you pressed the button and interact with the large sarcophagus, which opens to reveal Withers, an undead NPC.
How to complete the Explore the Ruins quest

To complete the Explore the Ruins quest, answer Withers’ philosophical question. Once you’ve answered it, the Explore the Ruins quest will be completed, and you’ll eventually find Withers at your camp.
Explore the Ruins quest rewards
Although you don’t specifically get rewards from completing the Explore the Ruins quest, you will progress Shadowheart’s companion questline and obtain the following items by looting the Wither’s Tomb room:
- Gold
- Oil of Accuracy—Coat your weapon and gain plus two to your attack rolls for 10 rounds.
- Elixir of Fire Resistance—Consuming this will grant you resistance to fire and burn damage.
- A Soul Coin—This can fuel Karlach’s Infernal Engine.
- Fire Amber—An alchemical ingredient that can be used in Alchemist’s Fire.
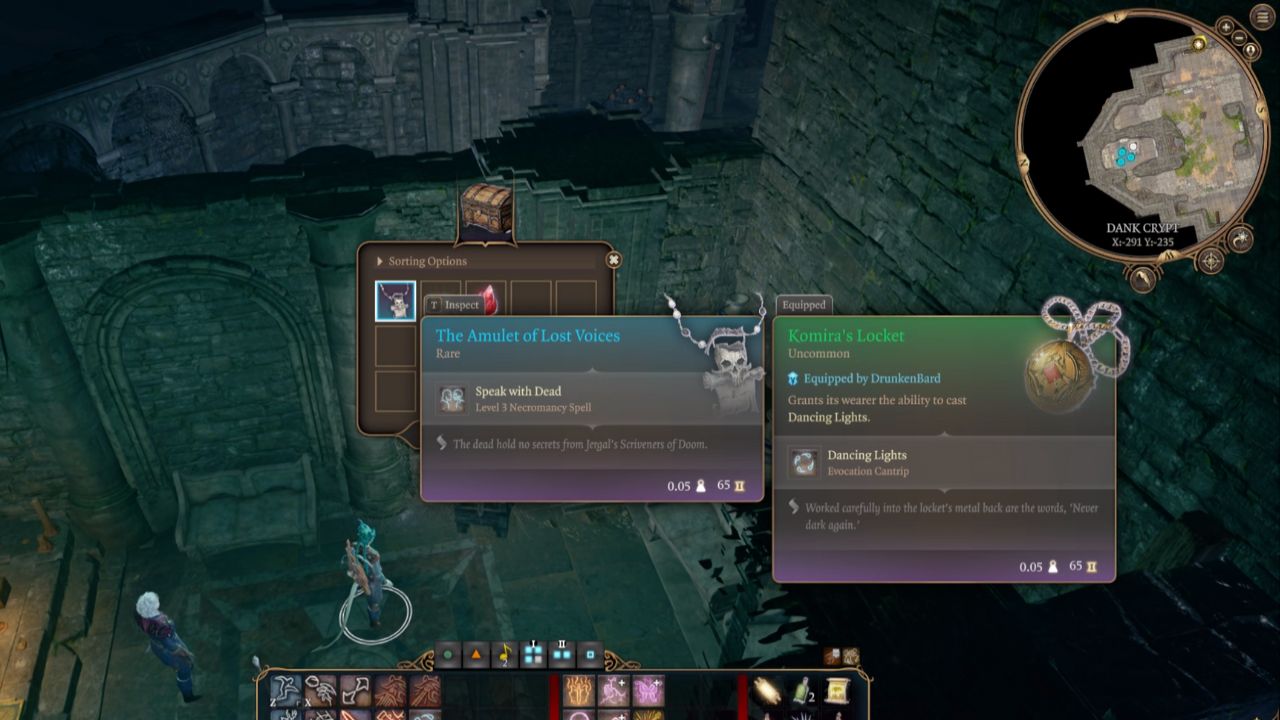
- The Amulet of Lost Voices—This allows you to speak to the dead.
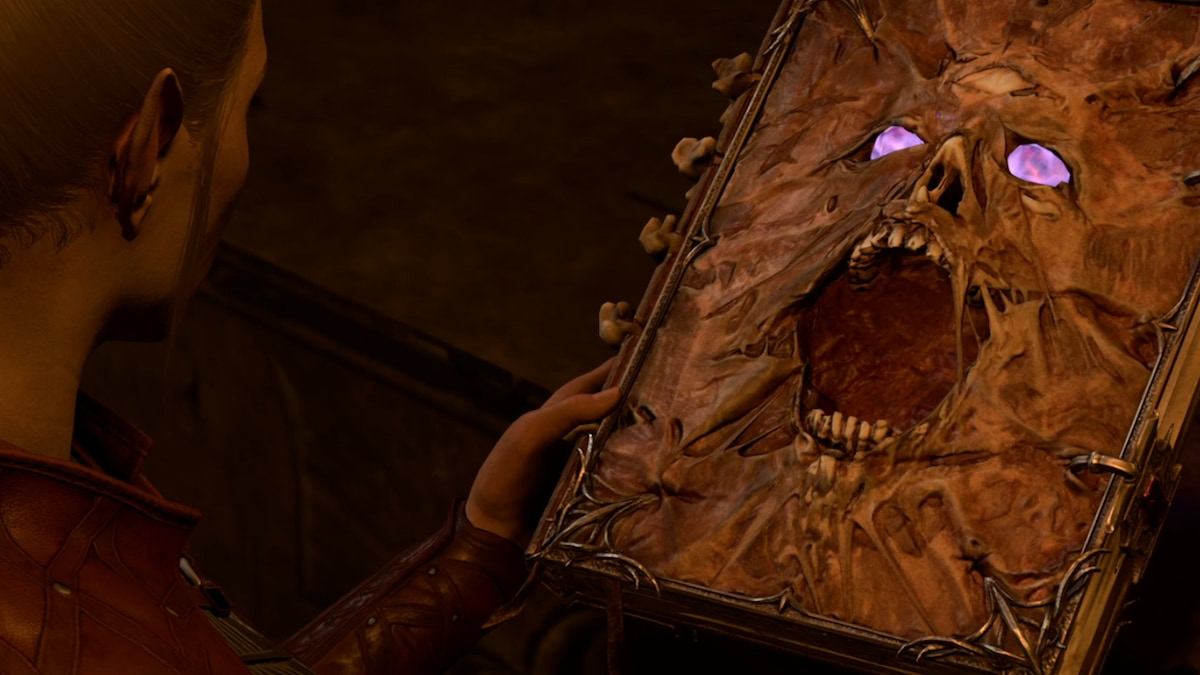
Even though you may have finished this BG3 quest, there are several fun things you can still do in these ruins, including finding the Book of the Dead Gods.
Others Asked
What must players do before they can reach the city of Baldur's Gate in the game?
Players must complete the first two acts of Baldur's Gate 3 before reaching the city of Baldur's Gate.

What area becomes a major questing location in Act Three of Baldur's Gate 3?
The city of Baldur's Gate becomes a major questing area in Act Three of Baldur's Gate 3.
What is the quest in Baldur’s Gate 3 that players find irritating to complete?
The quest is Act Three’s "Find Dribbles the Clown" quest.


Published: Sep 24, 2023 10:41 pm