Breeding creatures can be a tough challenge in Ark: Survival Ascended and should not be taken lightly, though there are considerable benefits to doing so.
On standard servers, wild creatures have a maximum level of 150 prior to taming, but those limits don’t apply to baby creatures, who can start at high levels and reach much higher totals.
That said, it takes time, the right resources, and a lot of patience and dedication to breed creatures in Ark. If that’s something you’re interested in, here’s a full guide covering everything you need to know.
How to breed creatures in Ark: Survival Ascended
The most effective breeding method in Ark: Survival Ascended is to build a breeding pen, which should be big enough to hold two of the creatures you are trying to breed, with walls high enough that they can’t walk out.
For many creatures, a single stone wall is high enough to stop them, but larger creatures will need even bigger obstacles to block them. If you want to be on the safe side by making a pen that works for any creature, I’d advise using a dinosaur gateway for the entrance and exit, with walls that match the height.
Once you’ve built your taming pen, bring the creatures you want to breed inside. For obvious reasons, you need two of the same creature and one of each sex. Once they’re inside, close the door so they can’t get out—this becomes important for the next step.
Hold interact on each of the creatures (E on PC, Y on Xbox, Triangle on PlayStation), and click “Enable Wandering”. This will allow the creatures to move around freely but will also enable mating, as long as they are close enough to each other—which they should be if they’re in a pen.
You can also click the “Allow Mating” option from the select wheel, but for some reason this didn’t work for me. As soon as I tried the wandering method, though, it worked.
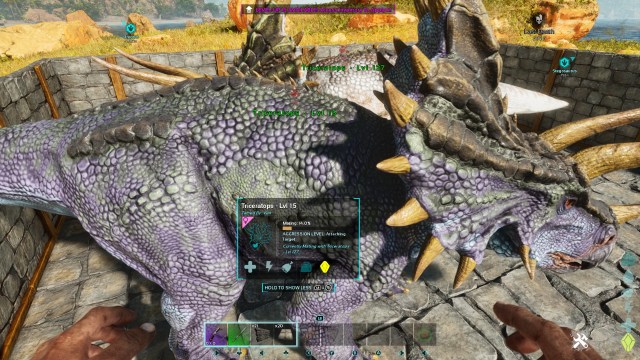
You’ll know when creatures have begun breeding because red love hearts will appear above them and closer inspection of the female will display a bar that displays the mating progress. Once this reaches 100%, she’ll lay an egg.
Pick it up, but be wary that large eggs will encumber you and block you from moving, so be prepared. You’ll should immediately move to the incubation phase unless you have a Refrigerator to store the Fertilized Egg.
If you are taming creatures that give birth to live young, the female creature will instead become pregnant and the gestation period will begin. With these creatures, a major benefit is that you won’t have to incubate their eggs, and you’ll just need to wait for the birth.
How to incubate eggs in Ark: Survival Ascended
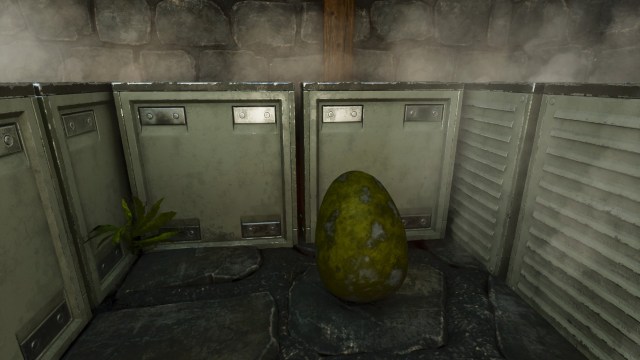
To incubate eggs in Ark: Survival Ascended, you need to ensure the Fertilized Egg is at the correct temperature, otherwise it will die.
The best way to incubate eggs in Ark: Survival Ascended is to use Air Conditioners. These must be powered by a nearby Generator and you’ll likely need several to maintain the right temperature. Although six should be enough, I recommend using eight Air Conditioners to counteract any storms that may occur.
Alternatively, you can use tamed Otters, Dimetrodons, or Kairuku to insulate the Fertilized Egg. If you’re still early on in your game progress, Standing Torches, Campfires, and Stone Fireplaces also work to regulate temperature—though you’ll likely need to continue to switch things on and off.
You’ll know if the temperature is right for the Fertilized Egg by looking at the incubation bar, which will begin to count down from 100 percent. If the temperature is not correct, the lower bar indicating Fertilized Egg Health will increase and, if it reaches maximum, the egg will be destroyed.
If you use Air Conditioners, the process will be automated so you don’t need to worry or keep too close of an eye on the egg, though I’d recommend staying nearby, as the baby creature will soon need looking after.
How to imprint creatures in Ark: Survival Ascended

Baby creatures are born “unclaimed” and you must interact with them to add them to your tames by pressing E on PC, Y on Xbox, or Triangle on PlayStation. Now the baby creature is under your care and the Imprinting process has begun.
Breeding creatures takes dedication and you will need to hand-feed the baby until it is old enough to eat from a nearby food trough. They also have very low health, food, and carrying weight, so you can’t just fill their inventory with food just yet. Once a baby reaches the Juvenile stage, it can eat from nearby troughs.
During the feeding process, the baby will also require care as part of the Imprinting process—which is worthwhile as it provides considerable bonuses to the creature’s stats. There are three types of care, shown below.
- Request for random food item (Berries, meat, kibble, fish, jerky).
- Wants a cuddle (Press the interact button).
- Wants a walk (Get the baby to follow you a short distance).
You can pause the baby’s growth at any stage by downloading mods and using Cryopods to store the creature, which halts its development.







Published: Nov 3, 2023 10:59 am