
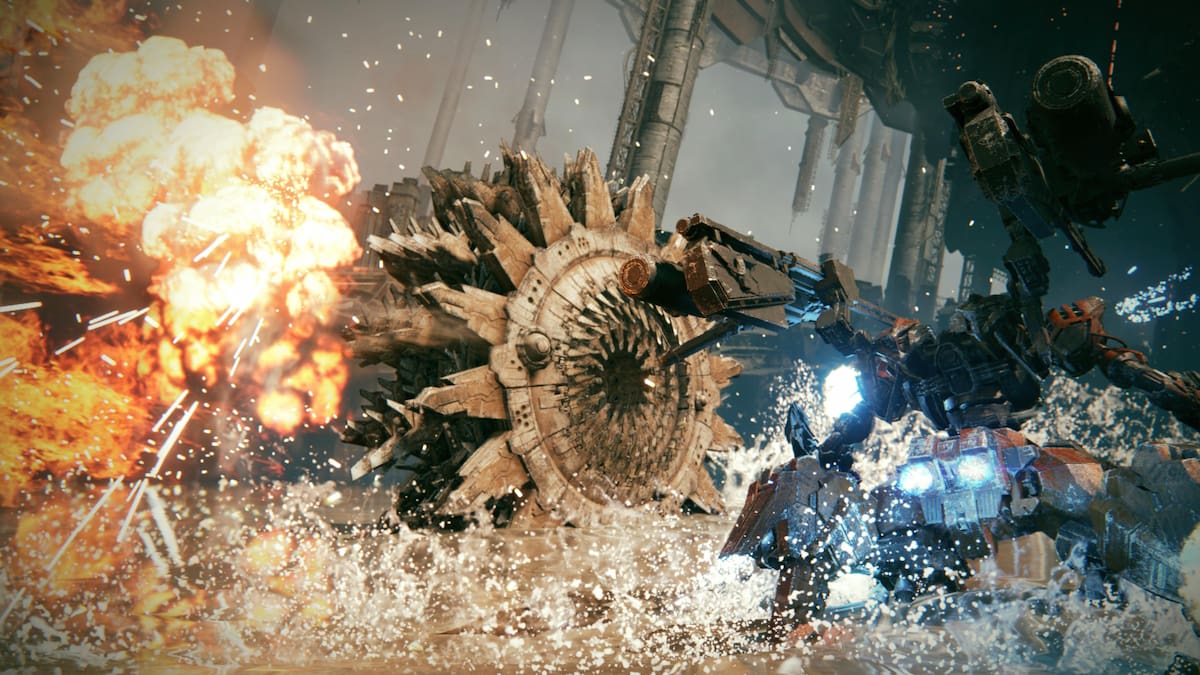
Your first two-vs-one in Armored Core 6 will be a challenge for sure, but we’ve got the perfect build that’s battle-tested and will get you through the gruelling clash.
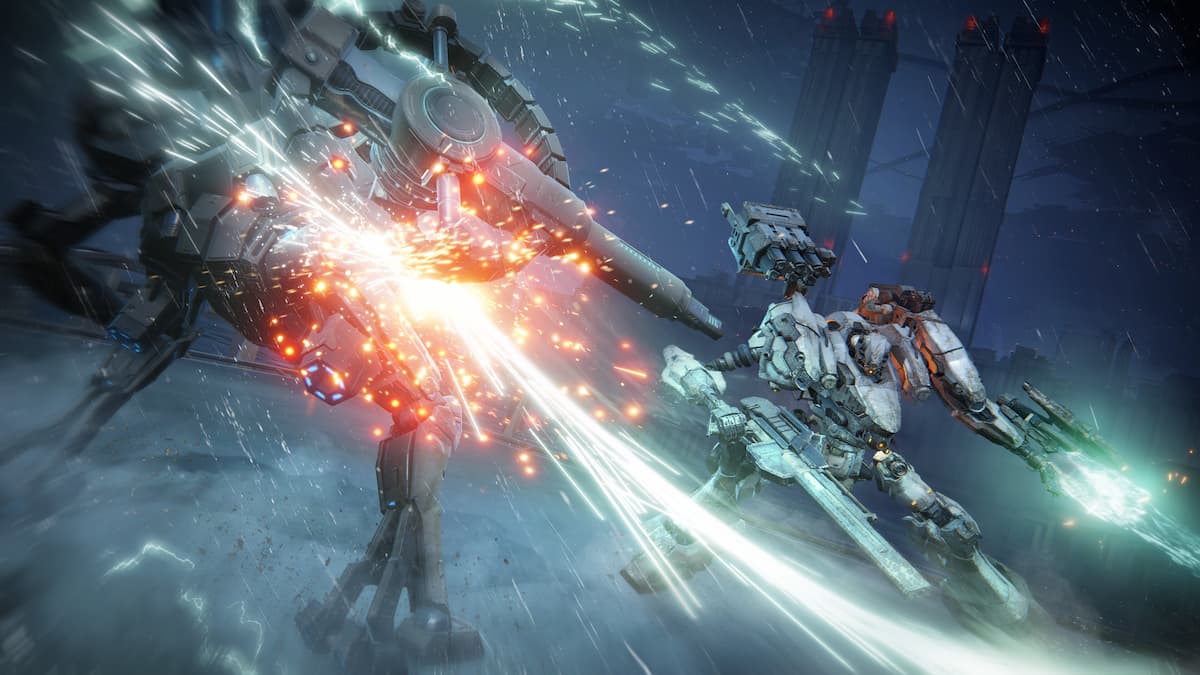
This fight is going to take two key things—toughness and speed. Your enemies are packing some serious heat (a massive laser sword and a shoulder-mounted plasma gun respectively) so you’ll need to be light on your feet but beefy enough to stand a few hits.
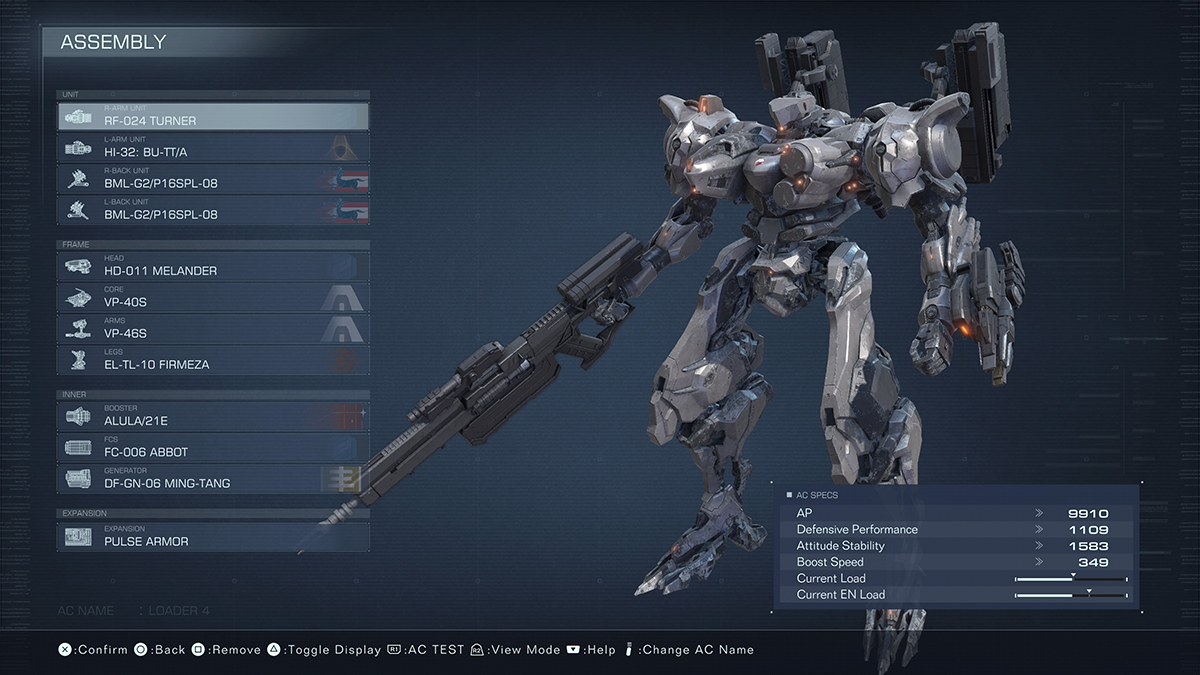
With this build, we’ve finely balanced our AC’s weight and EN load with a focus on lighter, but durable parts. Weapons-wise we went for two classics: the RF-024 Tuner assault rifle and the Hi-32: BU-TT/A pulse blade. We also packed twin BML-G2/P16SPL-08 missile launchers to further manage our weight while keeping lethality.
Right Arm – RF-024 Turner
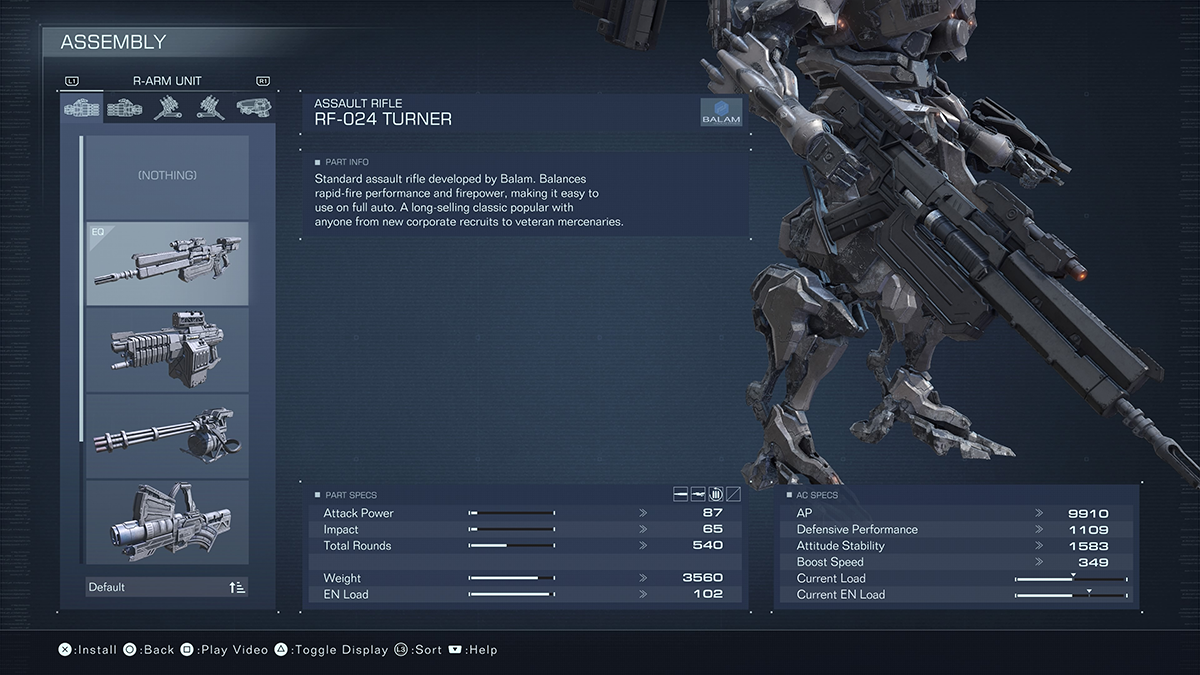
The Turner is one of the starting weapons but remains viable well into the later acts of the mech-fighting title. Sure, you’ll unlock some better equipment, but sometimes the old ways are the best ways. Feel free to swap it out for something else if you like, but we’re big fans of its rate of fire, damage, and weight.
Left Arm – Hi-32: BU-TT/A Pulse Blade
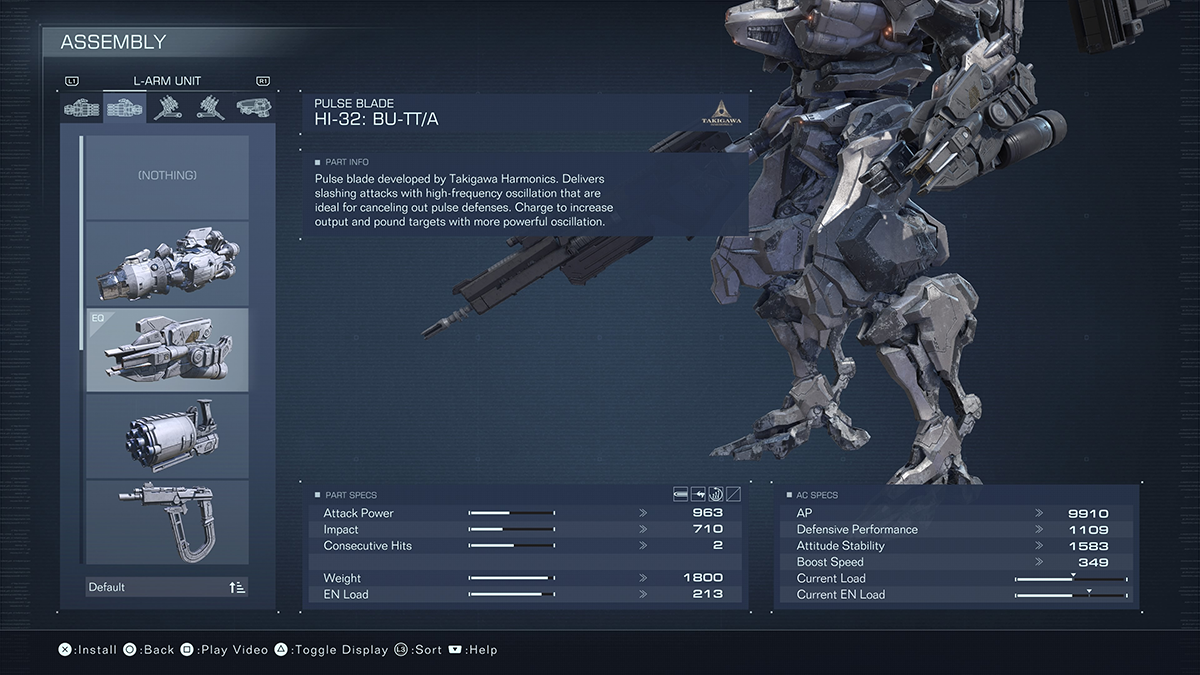
The pulse blade is one of AC6‘s best weapons, not only for the damage it deals but how it pulls your mech towards an enemy like some massive, deadly magnet. This will come especially in handy in this fight as you’ll need to quickly knock out the first AC to make this a one-vs-one.
Shoulders – BML-G2/P16SPL-08
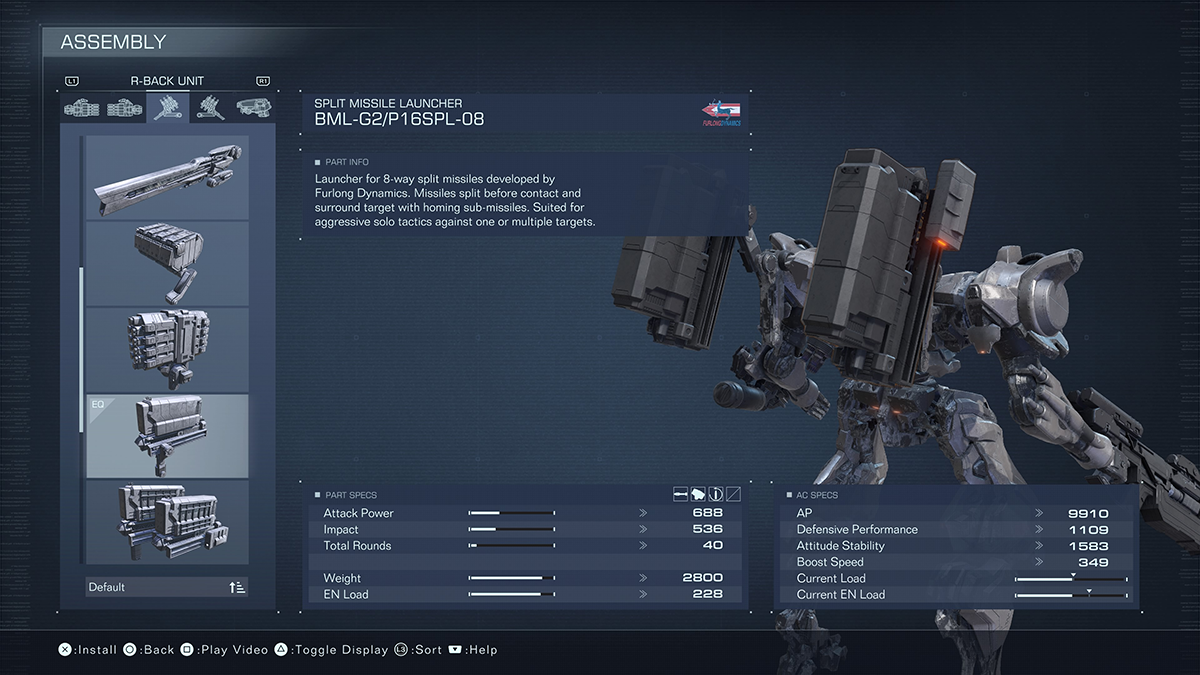
The BML-G2s are ideal for close to medium-range engagements. Their real strength comes with their heatseeking; you won’t need a missile lock in order to get a hit. This fight moves so fast you won’t have time to get a lock-on, so just fire and forget.
The relatively light weight of the BML-G2 compared to other launchers makes this another reason you’ll want to pack them for this particular fight. You’ll keep your damage up, but not at the expense of mobility.
Head – HD-011 Melander
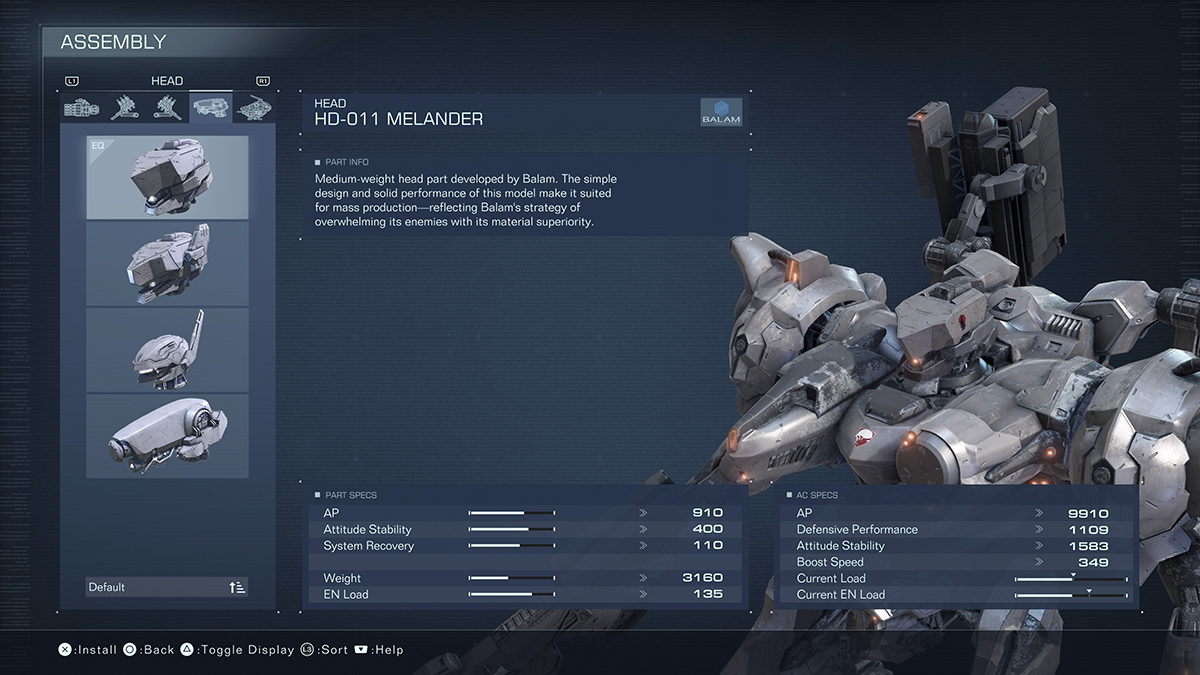
We’re big fans of the Melander parts. We went with a slightly lighter variant for our headpiece. Staying light but tough is key for this fight.
Core – VP-40S
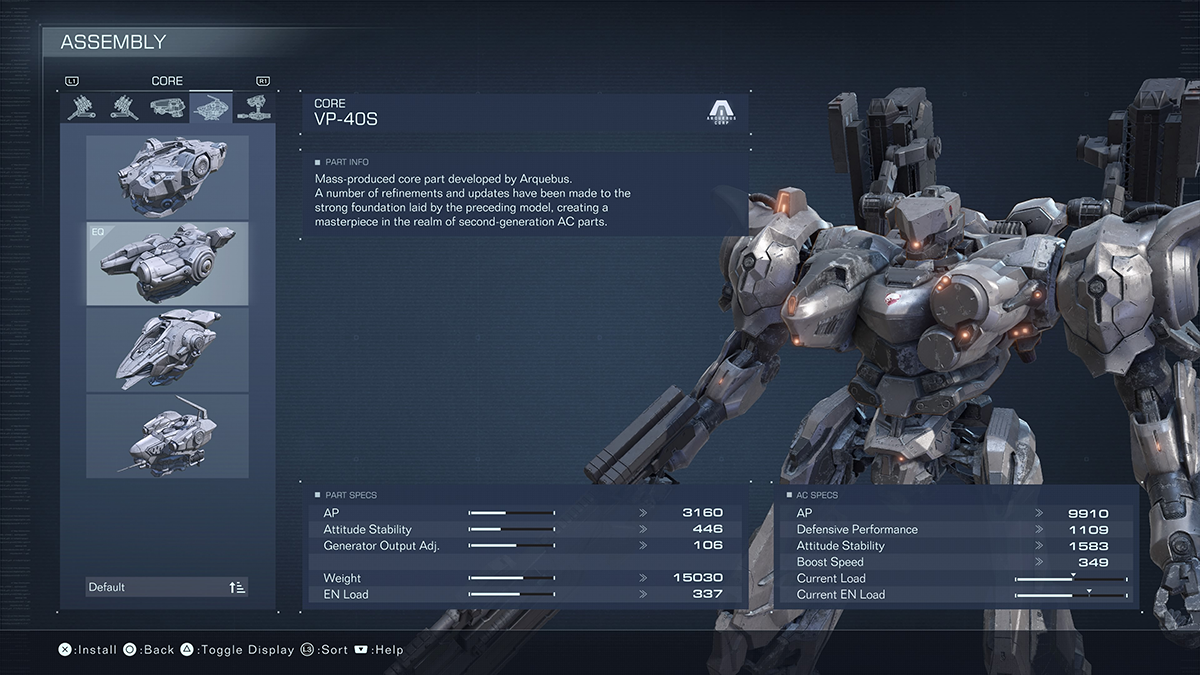
The VP-40S is our go-to core for medium builds. Since we’re adding a lightweight twist to the legs our other parts/weapons will need to stay within our weight/EN threshold.
Arms – VP-46S
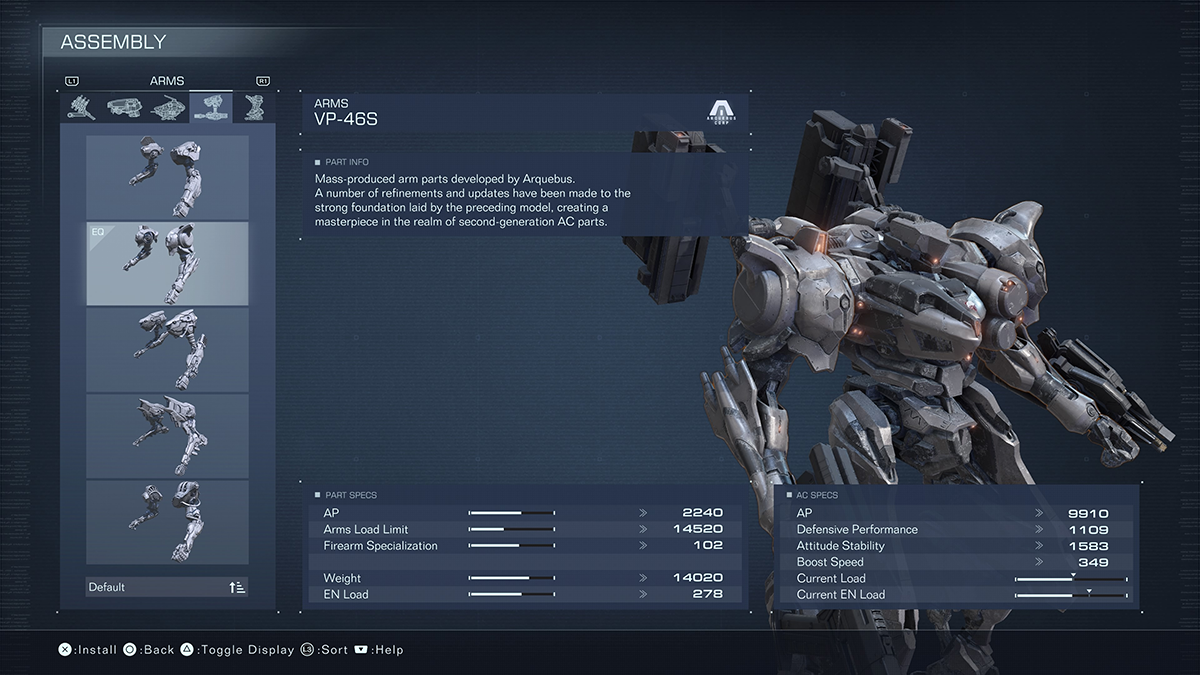
The VP-46S arms fit nicely into our build. They’re sturdy enough to carry our weapons but not so heavy to drag us down. It’s tempting to roll into this fight with heavier firepower, but we always ended up too slow every time we tried.
Legs – EL-TL-10 Firmenza
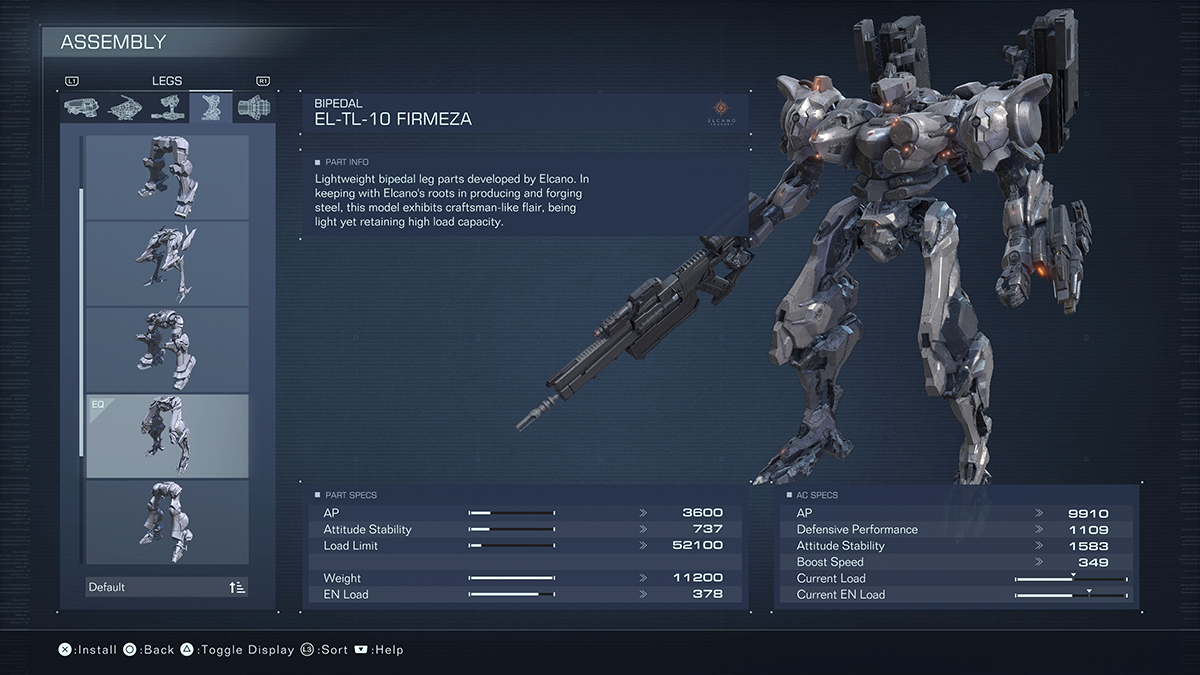
Allow us to introduce the star of this build: the EL-TL-10 Firmenza legs. These lightweight legs will give you the mobility you need to get the upper hand in this fight. The way this build is balanced the majority of your AP will be coming from your core, head, and arms.
Thanks to this fine tuning we’re still fast on our feet but with 10,000 AP. You should be able to dodge most of what they throw at you but you’ll be tough enough to absorb a few hits in case they get a lucky shot or two in.
Booster – ALULA/21E
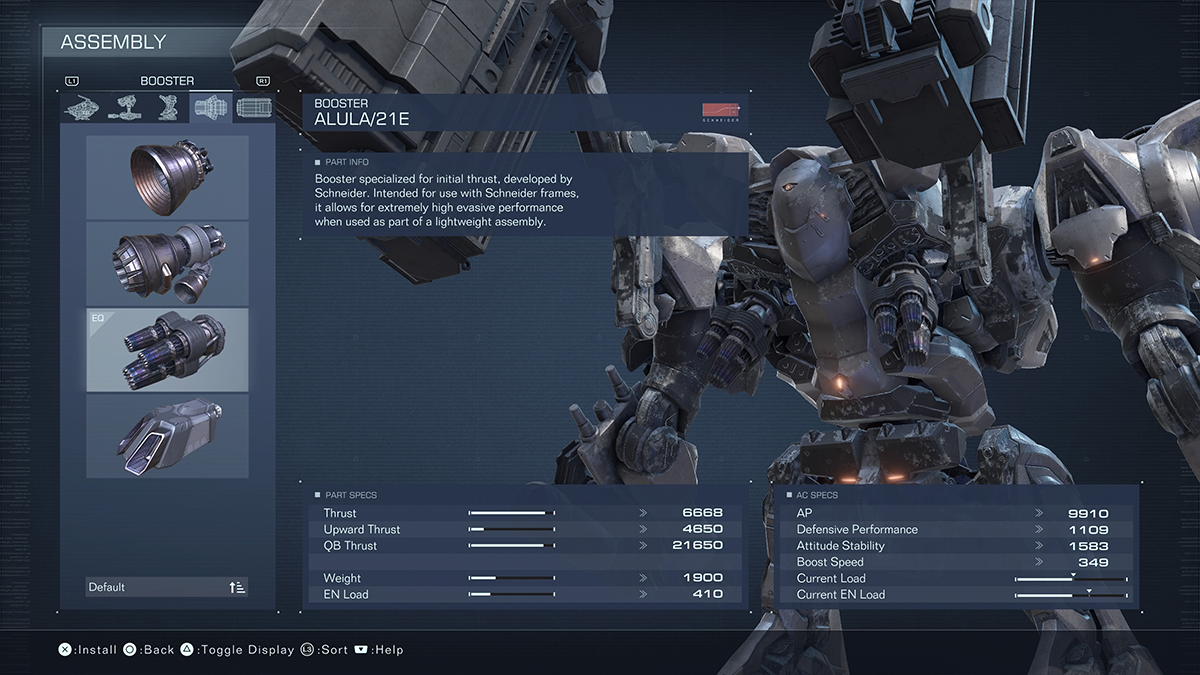
We have nothing but good things to say about the ALULAs. They’re our default boosters for most engagements since they give even medium-weight builds that snappy dodge ability. You’ll easily be able to stay one step ahead of incoming enemy fire.
FCS – FC-006 ABBOT
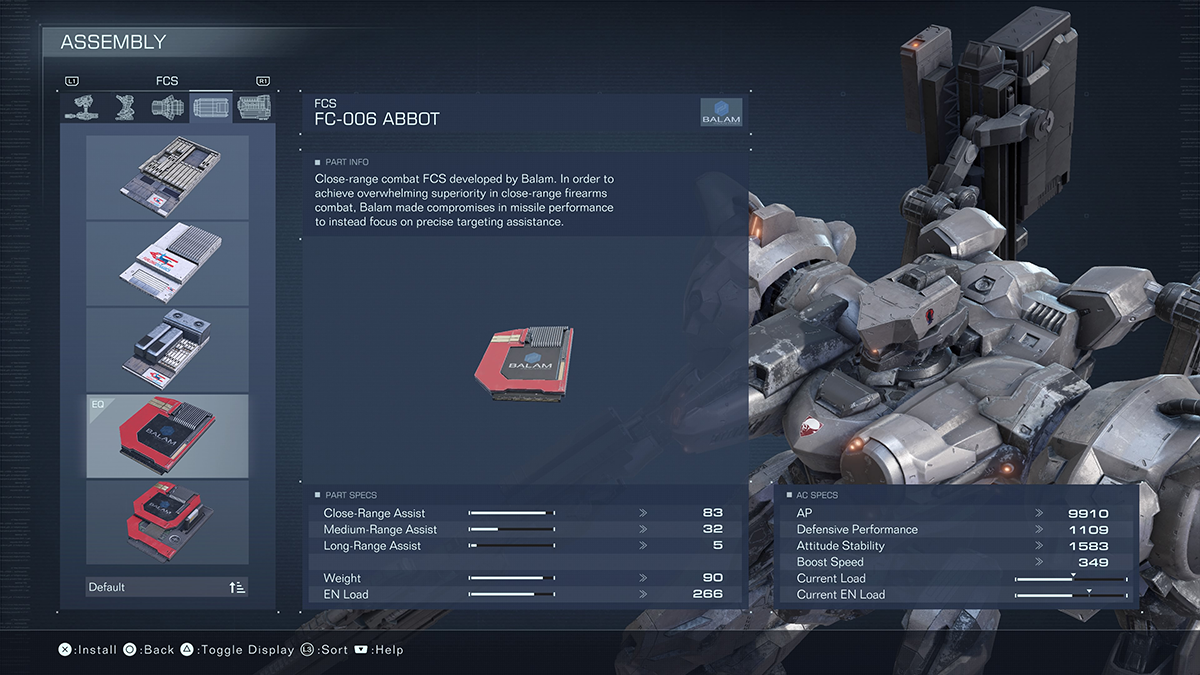
Sometimes you’ve got to get a little too close for comfort. The refueling base boss fight is one of those times. The ABBOT fire control system will max out your close-range assist, making sure those quick shots from your BML-G2s hit their mark.
Generator – DF-GN-06 Ming-Tang
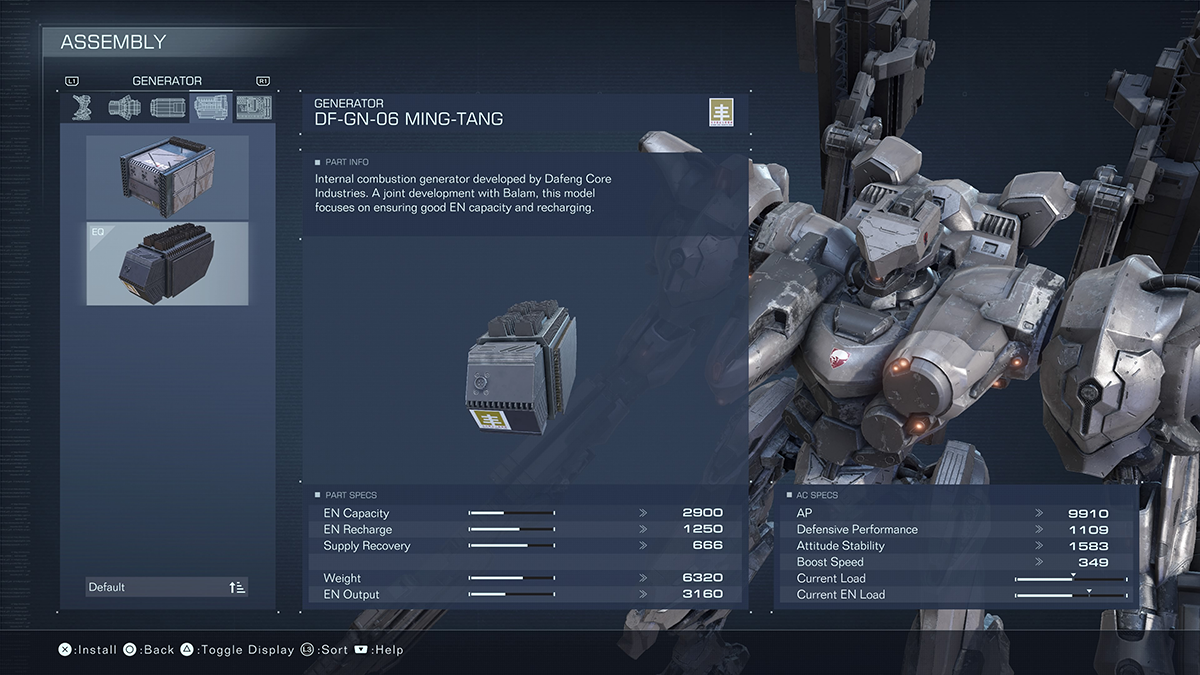
The Ming-Tang is a lighter generator but still packs a ton of capacity, recharge, and recovery. All things we’ll need in this fight. To win you need to use your dodge boost almost constantly. Running out in this fight means getting either blasted with plasma or skewered by a laser sword.
Expansion – Pulse Armor
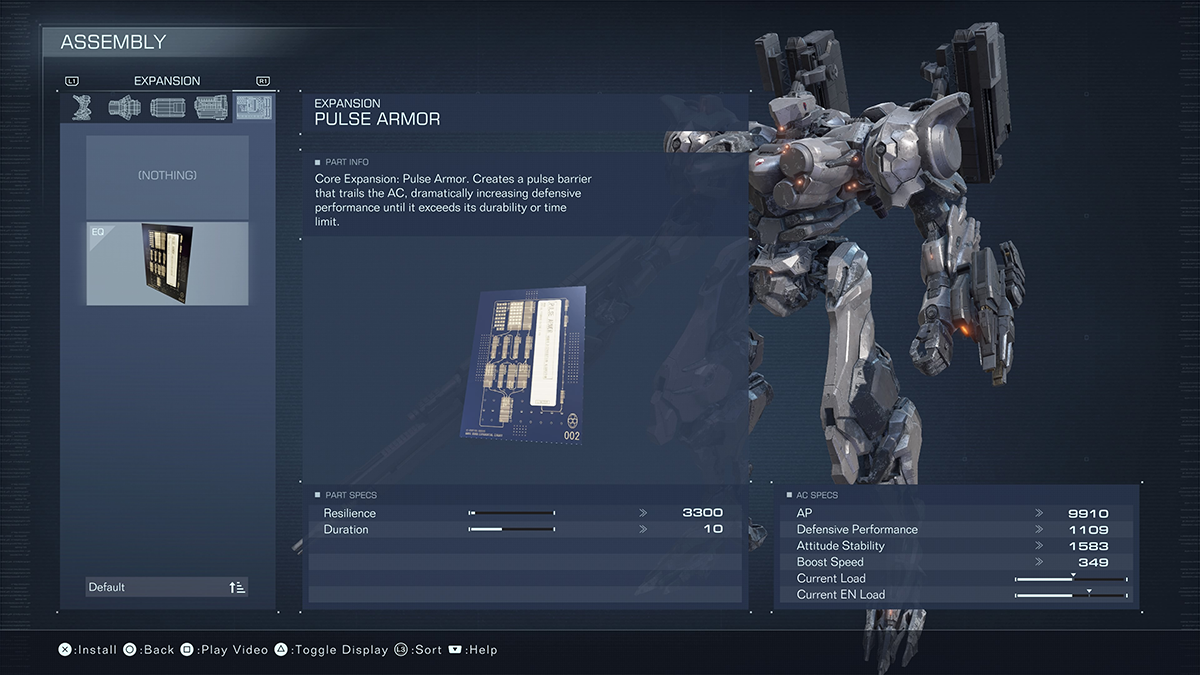
Finally, equip the pulse armor. You shouldn’t need it given how quick you’ll be with this build, but you never know. At its base level, it offers a one-time use that can be handy in a tight spot. The shield it creates will absorb some of the damage coming your way, but only for a few seconds.


Published: Aug 28, 2023 01:06 am