
Redfall is a first-person shooter developed by Arkane Austin and published by Bethesda. In Redfall, you will have to fight off a number of types of vampires while you struggle to survive and take back the city from these supernatural monstrosities. To do so effectively, you will need a place to rest and recuperate between battles and that’s where safehouses come in. These locations are present in multiple areas around the city.
Safehouses are safe zones where you can rest and catch your breath and locations that you hold to take control of the overall area. Holding these locations ensures that the forces of the supernatural and the cults will not be able to assault you back. There are a total of 13 safehouses in the game that are spread out across two main areas.
- Burial Point: The bigger of the two areas, populated by some of the stronger supernatural residents you will fight. This area contains eight safehouses.
- Redfall Commons: The main area of the game that holds most of the residential locations on the map. This area contains the remaining five safehouses.
Each area has its own share of safehouses and enough challenges to overcome before you secure them. To make it easier, we have listed out all of the safehouse locations depending on the area you are currently in.
Related: Full mission list for Redfall
Burial Point safehouses
Burial Point is the bigger of the two main areas in the game and as such, it holds the majority of the safehouses in the game. You will find eight of the 13 safehouses here and this is where you find each of them.
Ashumet Springs

The safehouse in Ashumet Springs is relatively easy to find. Head to Burial Point and keep going south, all the way to the southern edge of the map. You will know you have come close to the safehouse when you start encountering hostiles nearby, marked by a campfire. Take care of them and then look around till you find a garage nearby.
There’s no way to enter it normally, so make sure you have a rewire kit on you. Use it either on the main door or the side door of the garage to open it and get in. Once you’re in the garage, turn on the generator and this safehouse should be yours.
Brighton Bay
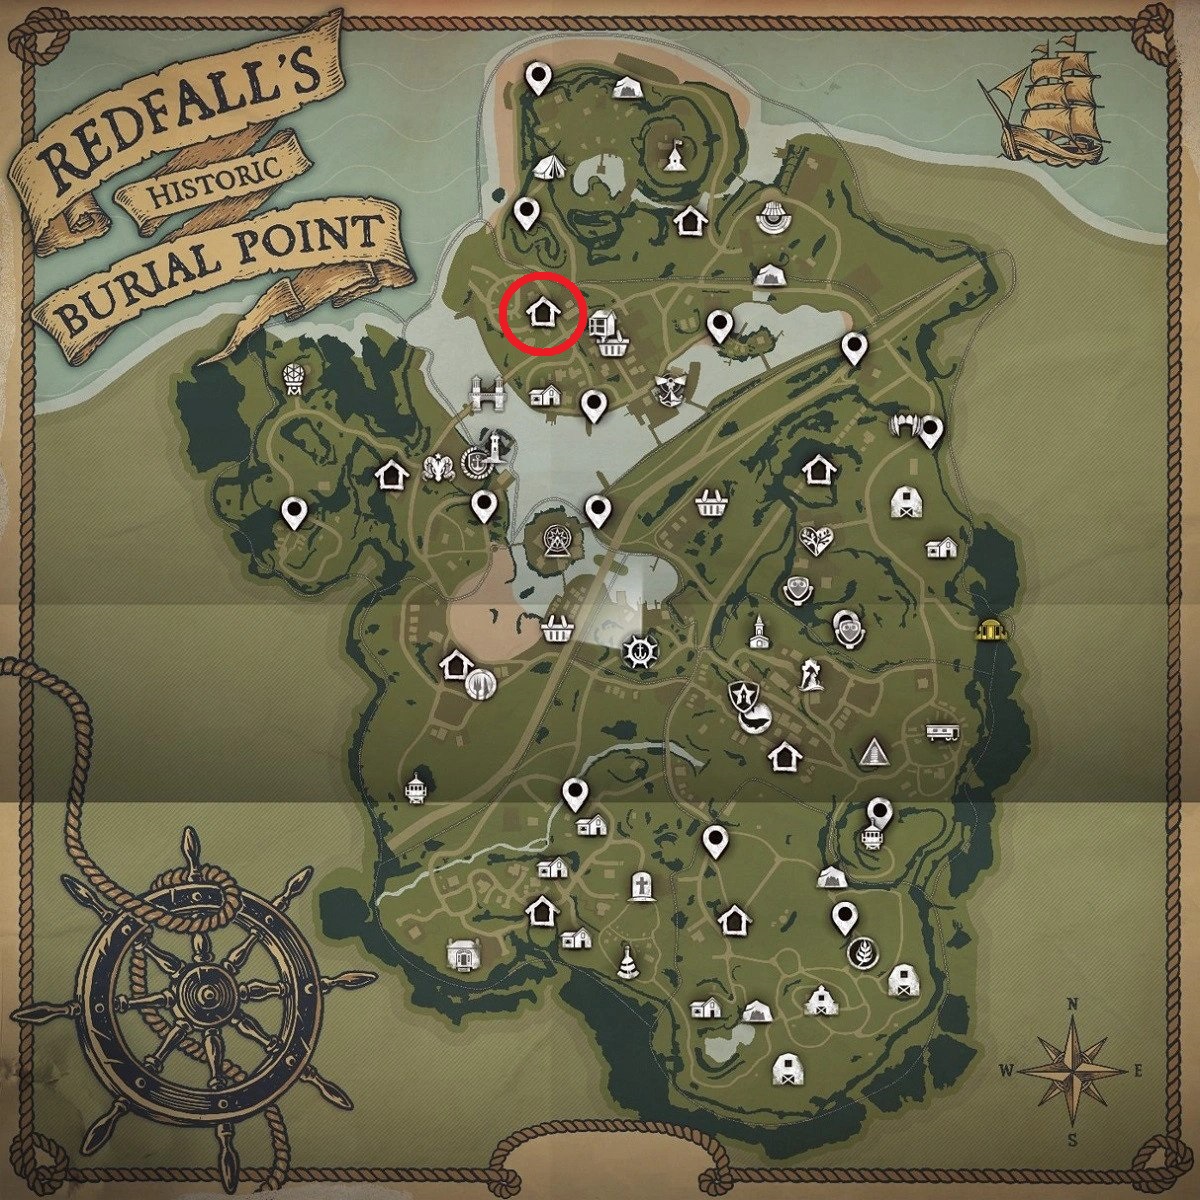
The Brighton Bay safehouse is found near the northwestern part of Burial Point. Keep going towards the edge of the map till you reach close to the Direcliff Border. Look around the area till you find an abandoned house with a generator outside right next to it. When you go to turn it on, you will notice that the generator has no key.
To find the key, you have to go into the house. If you look around, you’ll find a blood trail. Follow the trail up the stairs and it will lead you into a room that holds the key. Take the key back into the generator to activate it and unlock the safehouse.
Chickering
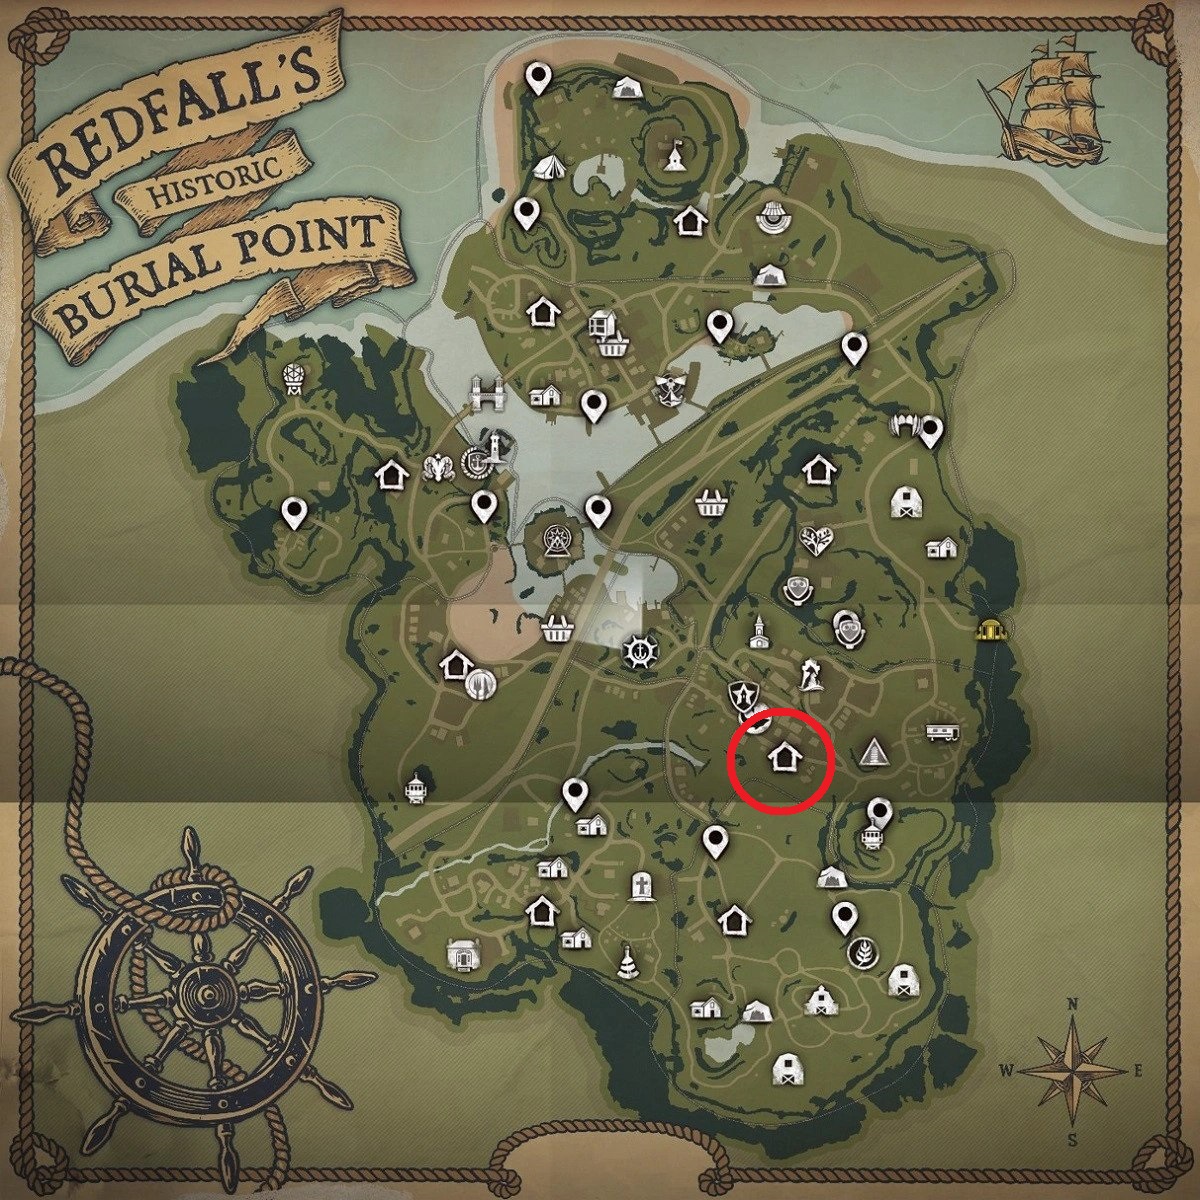
The safehouse in Chickering can be found near the southern edge of Burial Point. When you get there, you should notice the safehouse but it doesn’t house a generator anywhere. To find the generator, look for the cable nearby. If you follow the length of the cable, you will end up going to the house next door which houses the generator.
Like the previous one, this generator has no key either, so go into the house. You will find the key on the counter nearby. Pick it up and activate the generator to unlock this safehouse.
Direcliff

The Direcliff safehouse is found all the way to the north of Burial Point. Head to the northern edge till you come across a river that flows through the northern area. Follow it till you find an electric power plant. Look around till you find the entrance and head in. There will be hostiles here so be ready for a fight. Once you take them out, head through the power plant.
The generator you’re looking for will be somewhere in the middle of the power plant. This one has no key requirements, simply turn it on to activate it and get the safehouse.
Founder’s Knoll
This safehouse is located in Founder’s Knoll, a location in the east of Burial Point. Go to the middle of the region where the main road passes through and you should see a tunnel nearby. Enter this tunnel and follow the path as deep as you can go. At the very end, you should come across an open door with a lot of hostiles inside this room.
Kill all the enemies and look around for the generator. Once you find it, switch it on to acquire this safehouse as your own.
Haven’s Lot
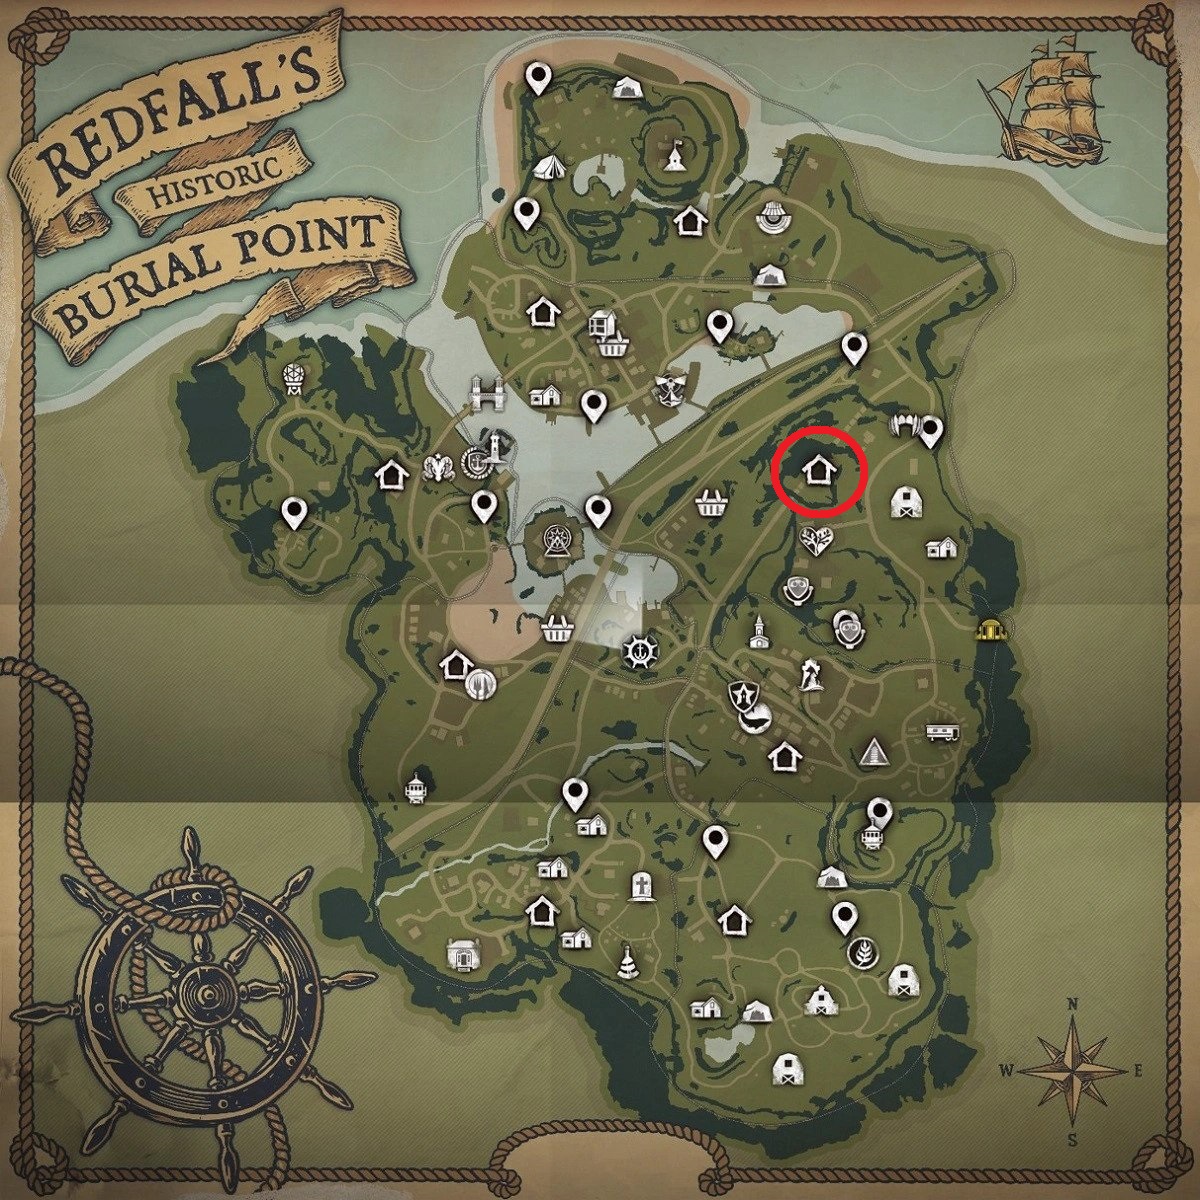
Head to the western part of Burial Point to find the Haven’s Lot safehouse. Once you’re in the Haven’s Lot region, head to the middle of the area where you will encounter several hostiles. From here, take the road southeast to find the safehouse, covered in red mist and more enemy creatures. Take them out first and then simply activate the generator to acquire the safehouse.
Howl’s Neck
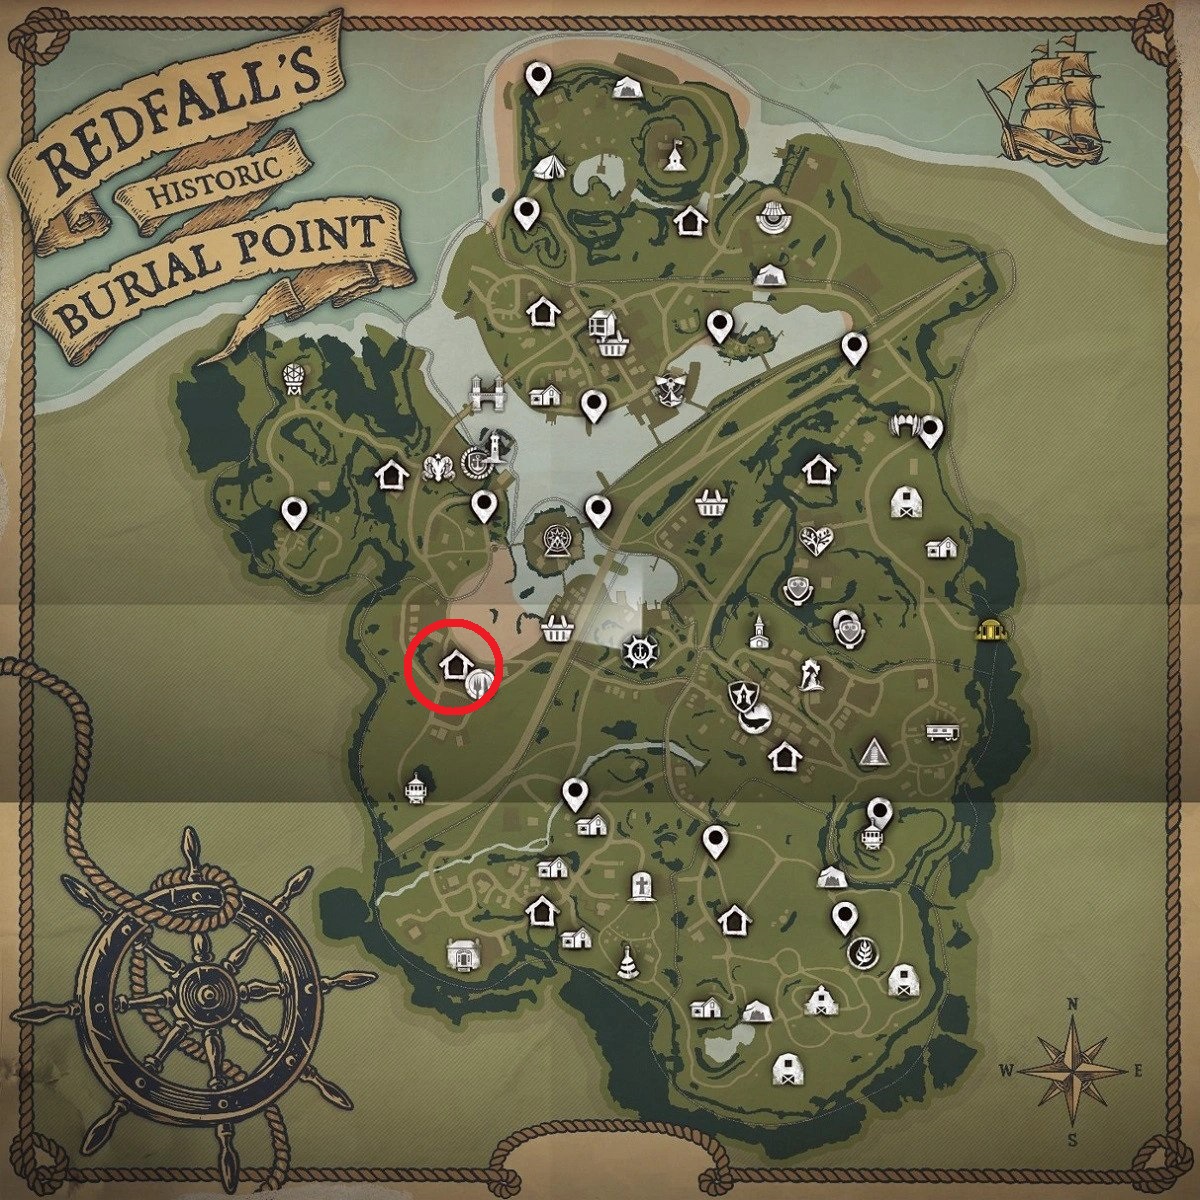
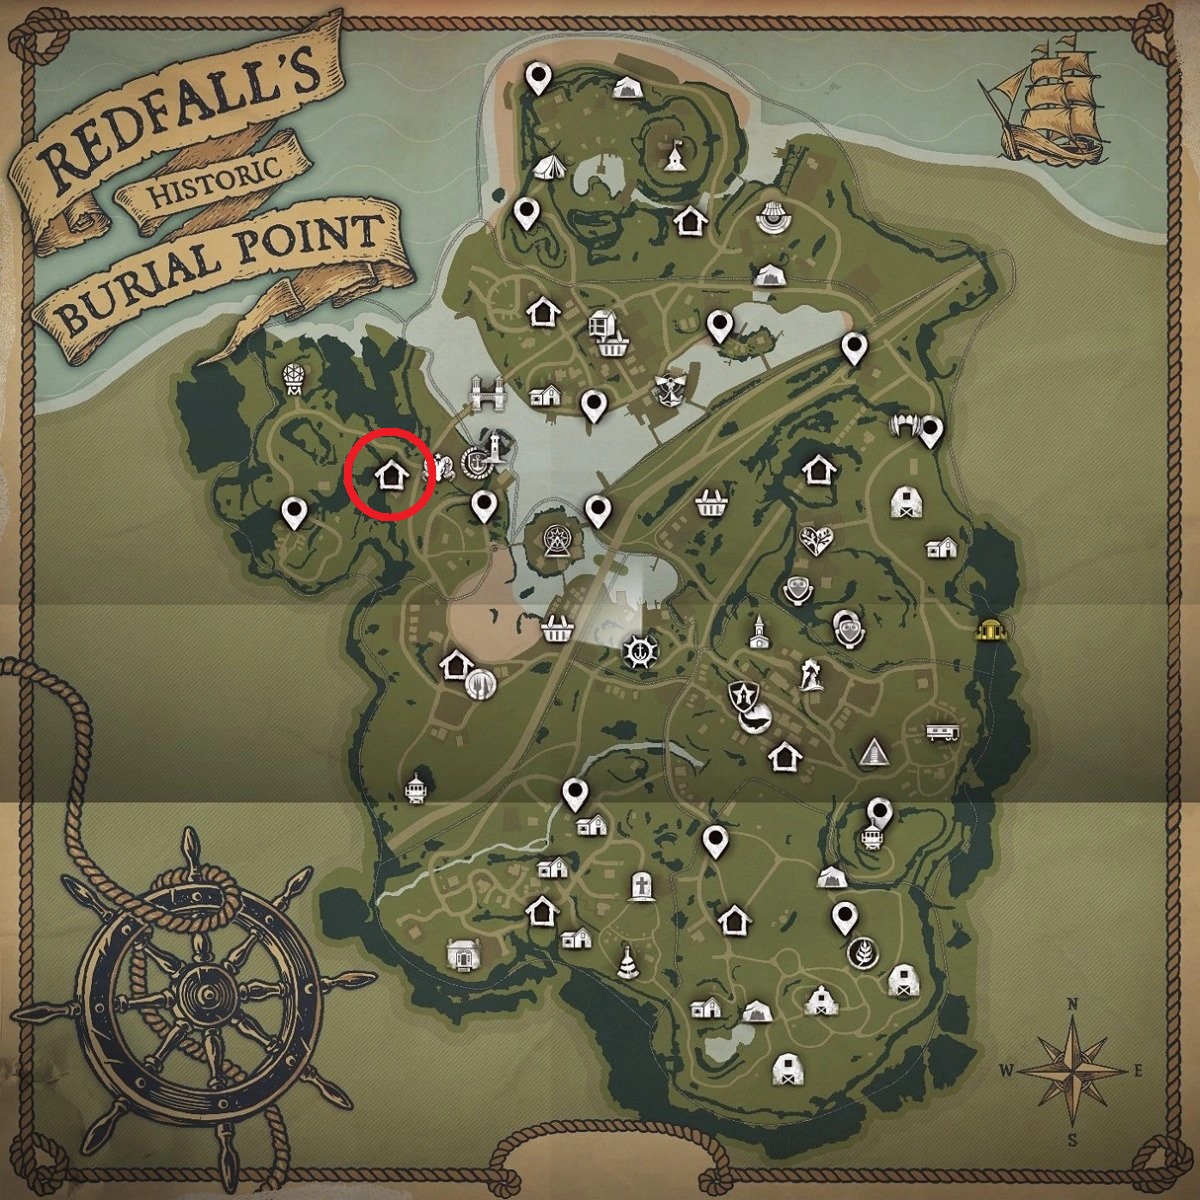
The southwest part of Burial Point is where you will find Howl’s Neck. Make your way to the center of the region to find the safehouse and the generator. Once you find the safehouse, however, you will notice that the generator is not near it. You will have to follow the cable to find the location of the generator. You will eventually find it outside Jolly’s Seaside Corner.
You will need a key for this generator so enter the building and make your way upstairs. Head past the praying cultists and make your way to the bathroom. You should find the key on the floor here that you can use to activate the generator and make this safehouse yours.
Winslow Fields
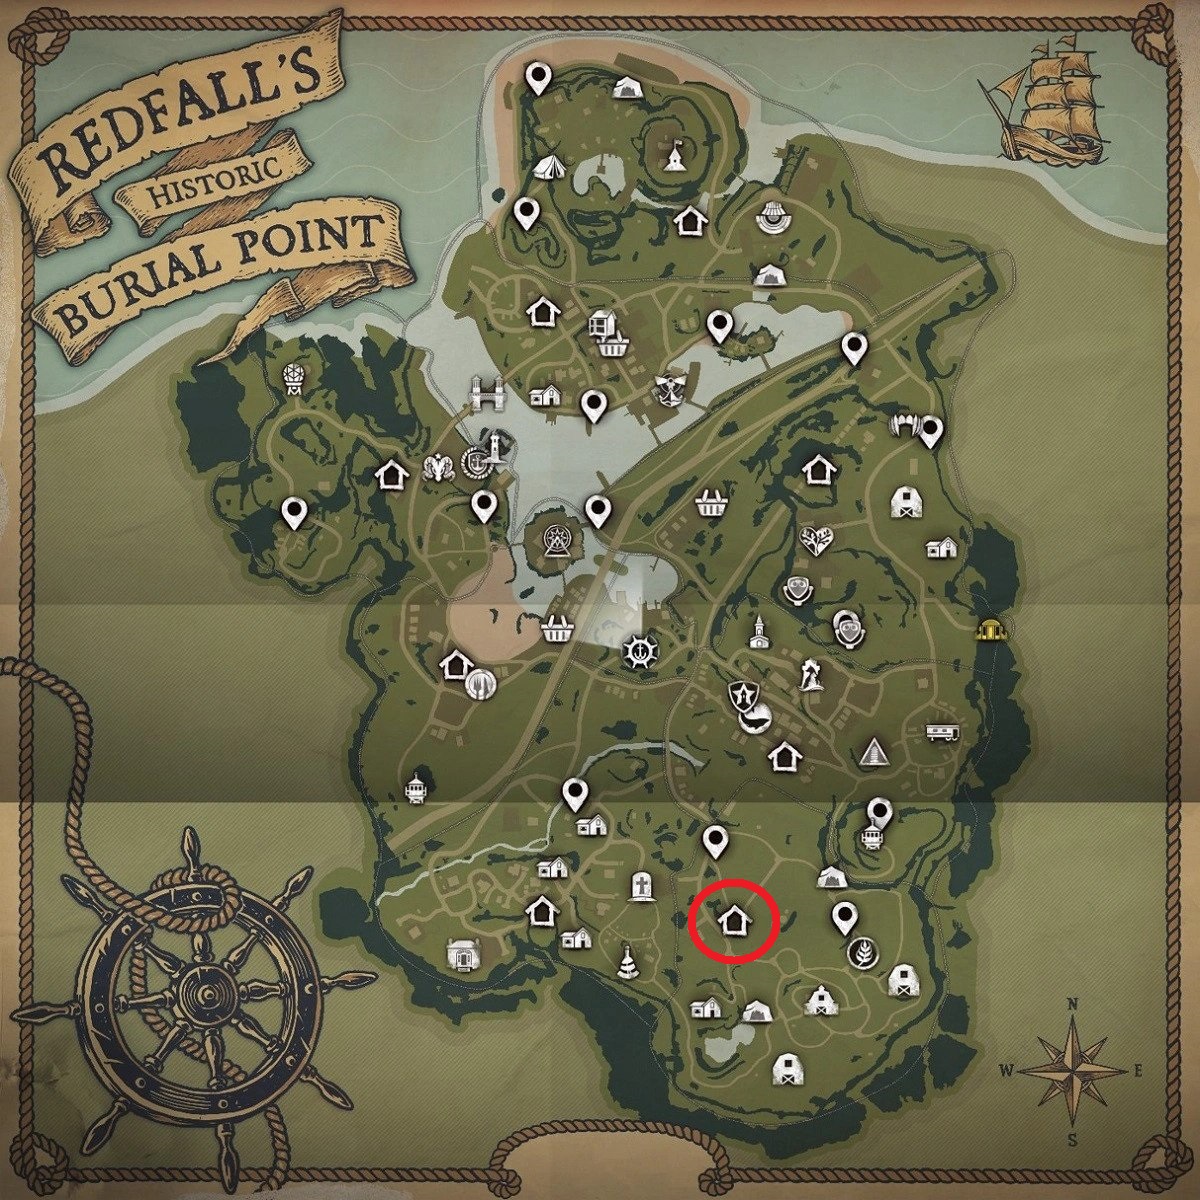
The southeasternmost region in Burial Point is where you will find Winslow Fields. The safehouse here can be found by going to the middle of the region and then taking the road northwest. You will have to fight off several hostiles before you can safely get here. Once you clear out all of the enemies, the toughest part is over.
Now just walk into the safehouse, which is the nearby shed, and turn on the generator to capture this location as your own.
Redfall Commons safehouses
Redfall Commons is the smaller of the two areas and holds the remaining five of the 13 safehouses in the game. This is a relatively easier location to control, so we recommend starting off by securing the safehouses in Redfall Commons first.
Basswood
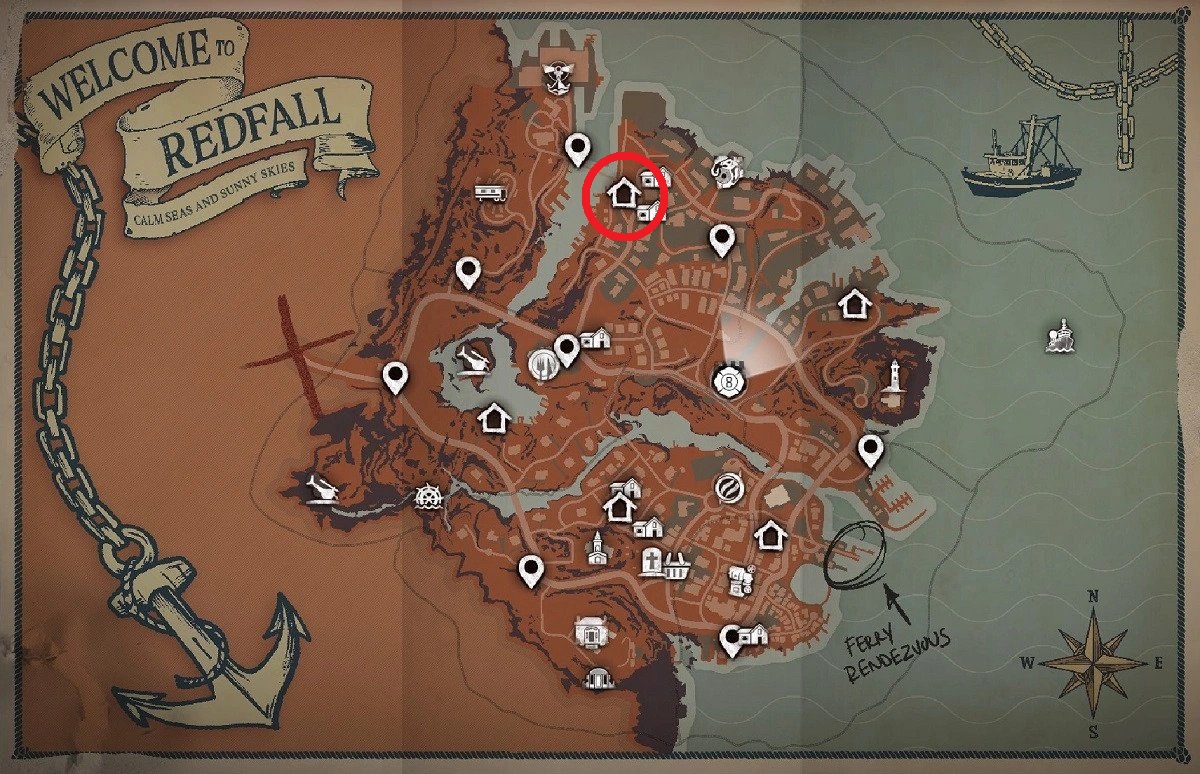
All the way to the north of the Redfall Commons area is where you will find Basswood. The safehouse here is behind an auto-repair shop on one of the shores of the dried river that runs through the region. The generator to power up the safehouse is not too hard to find, however, this one needs a key and that might be a little trickier to find.
Instead of scouring the region, check the keyhole of the door on the car nearby to find the key. Take it out with a rewire kit and use it on the generator to turn it on and activate the safehouse.
Heritage Rock
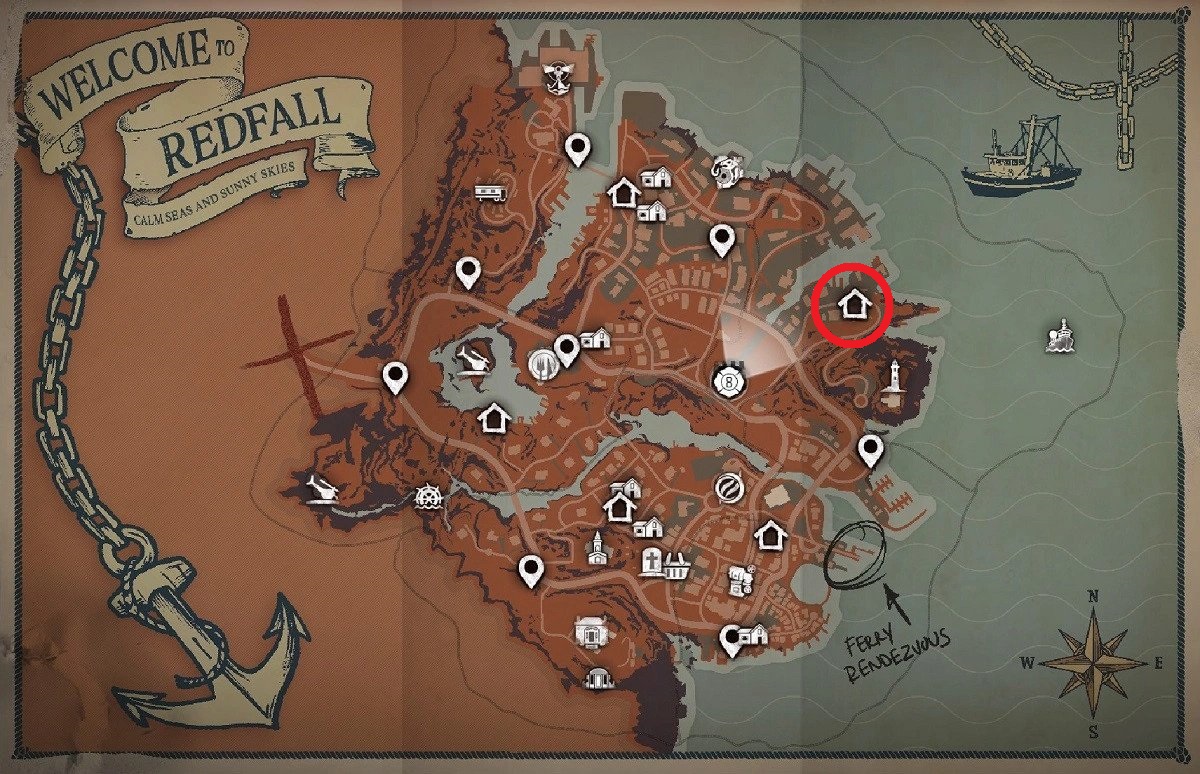
Heritage Rock is the northeasternmost region of the Redfall Commons. Finding the safehouse here isn’t too difficult but the challenge lies in traversing through the region since it is covered in red mist. If you approach the area from the southern end, you should see a building that you can scale. Get to the top and jump to the building to the right of this one to find the generator.
Drop down and turn it on to activate the safehouse and get rid of the red mist.
Old Town
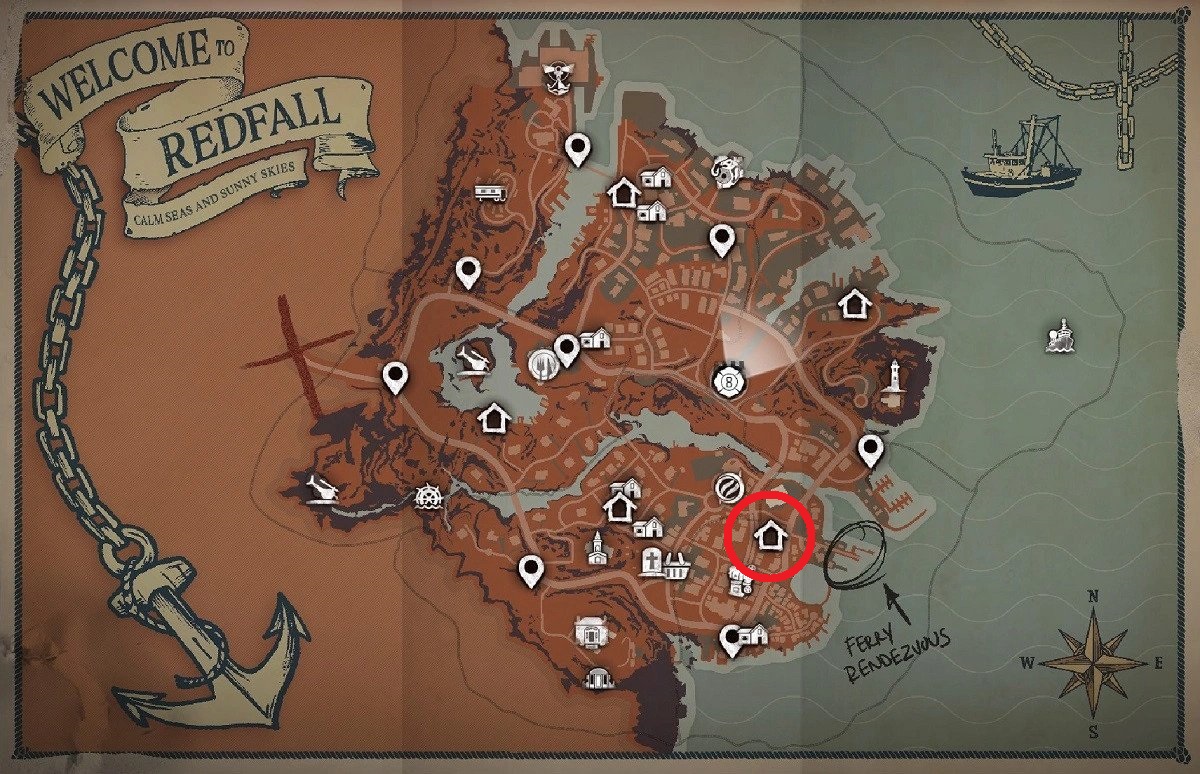
The Old Town safehouse is the one in the southeasternmost section of the Redfall Commons area. Finding this safehouse will take you to the middle of the region, close to the Ferry Rendezvous nearby. It might be a little tricky to find but you will know for sure you have reached it when you get to an alleyway guarded by a couple of Watchers.
Defeat them and head deeper into the alleyway to find the generator. Turn it on to activate the safehouse.
Sedgewick

The Sedgewick safehouse is the middle safehouse in the Redfall Commons area. First head to the cemetery in the area and move towards the middle part of the region. When you come across the Creelman Residence, look across the street to find the safehouse. This one is protected by a turret so make sure you stay safe while you take it out.
Destroying the turret will also blow up the nearby trap, allowing you access to the garage where you will find the generator. Turn on the generator to acquire the safehouse.
Shadetree Heights
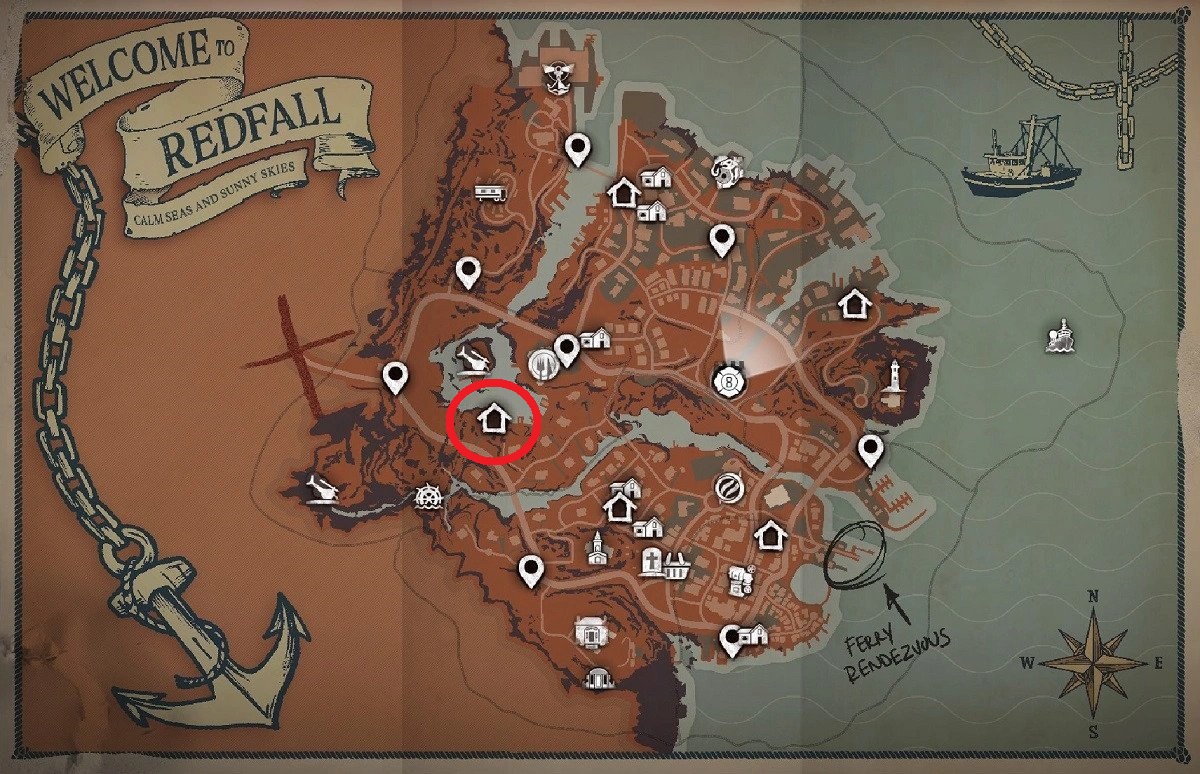
The Shadetree Heights safehouse is the westernmost safehouse in the Redfall Commons area. To find it, go to the nearby crash site and walk to the southeast. Head across the old lake and you should find an old house surrounded by enemies. Once you dispatch all of them, go around the house to find the garage nearby.
Make sure you have a rewire kit and use it on the panel on the side of the garage, then lockpick the door to get in and find the generator. Turn it on to activate the safehouse.


Published: May 16, 2023 07:43 am