
Honkai: Star Rail features several kinds of quests to complete, including missions like the Adventurous Moles one. It’ll be initiated by Hook and her crazy escapades once again.
The Adventurous Moles is a part of Hook’s second Companion quest. But before anything else, you’ll have to actually unlock it, and for that, there will be some preliminary steps to complete.
Related: Best ways to get Trailblaze EXP and raise Trailblaze level in Honkai: Star Rail
You might encounter some more hurdles before clearing it too, as some areas won’t be highlighted on the map and you’ll have to look by yourself.
Here is how to unlock and complete the Adventurous Moles quest in Honkai: Star Rail.
The Adventurous Moles Quest guide in Honkai: Star Rail
To unlock the Adventurous Moles Companion quest in Honkai: Star Rail, you need to complete her first quest, Hook’s Treasure, which is part of the Slices of Life Before the Furnace Chapter.
Requirements to unlock the Adventurous Moles Adventure Mission
It’ll unlock after completing the first required quest: Old Foreman’s Treasure, upon reaching Trailblaze level 16 and receiving a message of Julian on your phone. It’ll take you to a peculiar investigation to help Hook.
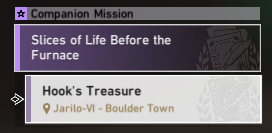
Then, a couple more levels down the road, you’ll automatically receive a message from Hook and she’ll guide you through the Hook’s Treasure Companion Quest.
Once you’ve completed this second quest, it won’t be over. You’ll have to progress further into the game, until you reach Trailblaze level 29. Only then, you’ll automatically unlock the Adventurous Moles quest in Honkai.
How to complete the Adventurous Moles quest in Honkai: Star Rail
Although the Adventurous Moles quest isn’t part of the main story, it’s important to complete since it rewards players with Stellar Jade, used to get Special Rail Passes. In it, you’ll have to find several treasures, and your map won’t help you, this time. Here are their locations.
- First treasure location
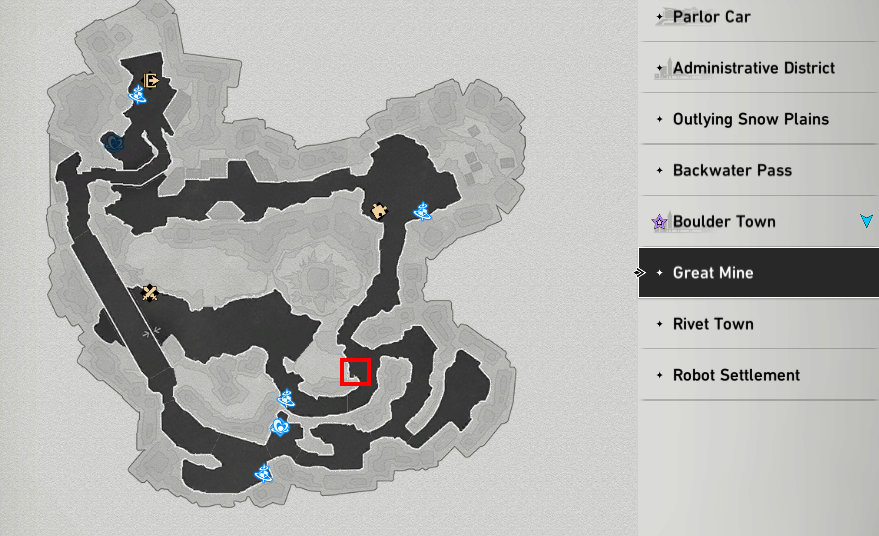
The first part of missing pages can be found in the Great Mine, East to the Overlook Space Anchor. Then, you’ll be able to get the Miner’s Lamp following the map’s instructions. You’ll get a Bountiful Treasure chest in the process.
- Second treasure location

This one can be found in the Southeast corner of the Backwater Pass, in Jarilo-VI. The pages will simply sit on a bench. Once it’s done, you’ll find the chest near the table behind the bench. By lifting up the seat that’s put upside down and lay it flat on the ground, the chest will appear.
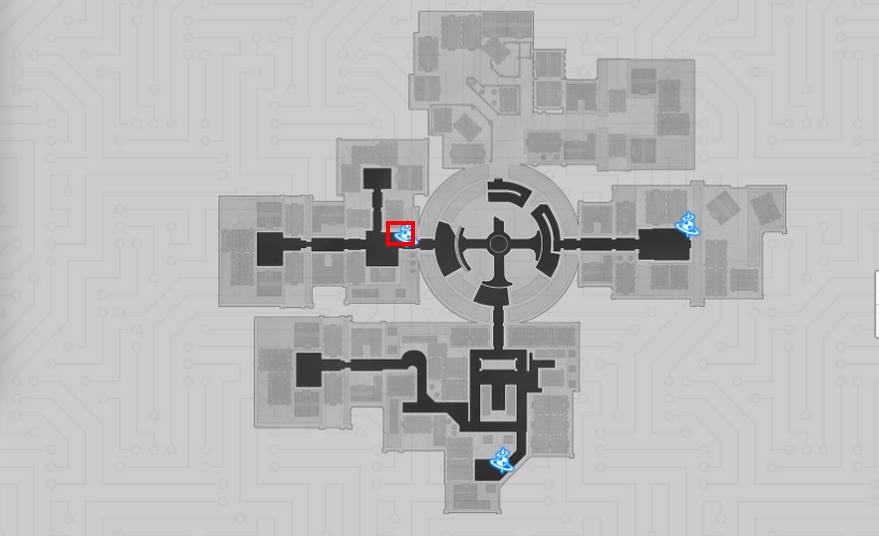
- Third treasure location
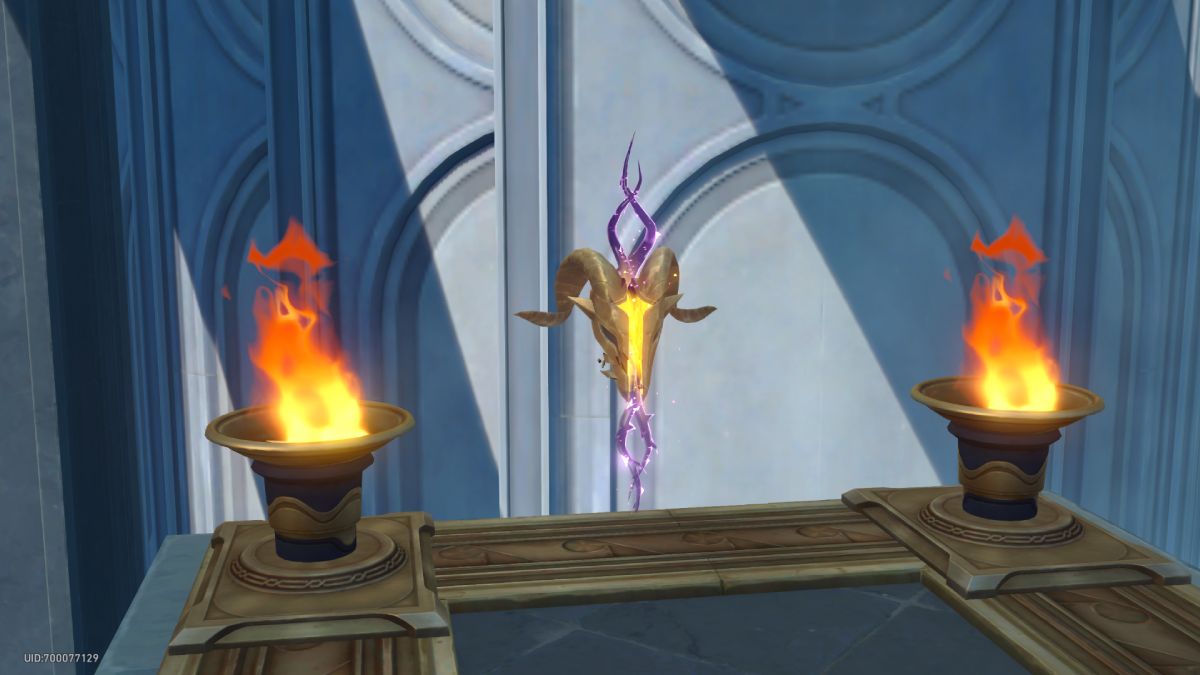
This third treasure won’t be hard to reach. You can teleport near it and directly go near the table inside the gate, and Investigate it. Once you’ve picked up the pages, you can step near the containers and choose to “Pick up the crate in the middle” to trigger the appearance of yet another chest.
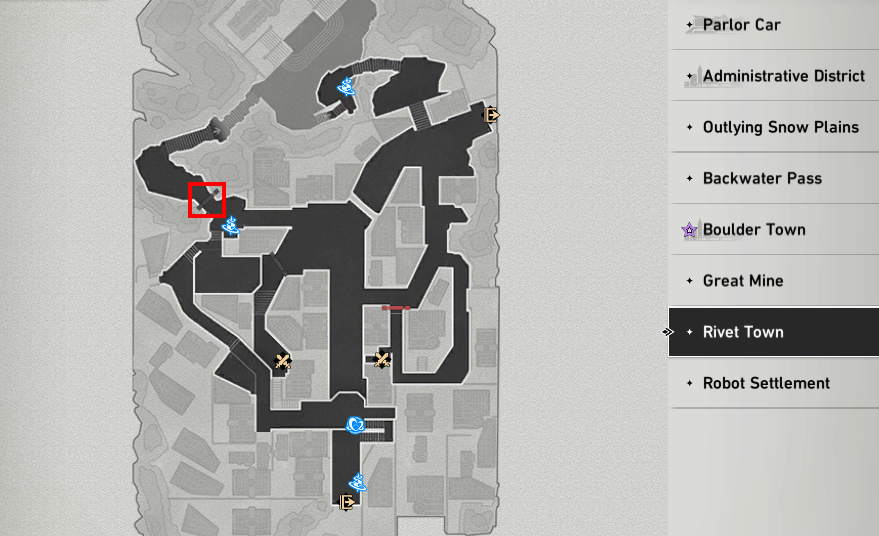
- Fourth treasure location
The last treasure chest will be found in Jarilo-IV’s Silvermane Guard Restricted Zone, this time. And you won’t have to run for long either. Teleport close to the area framed in red and head to the corner with boxes.
Collect the form and go back to the Space Anchor to Interact with a hand on a wall’s paper. This is the last set of pages. The treasure is hidden near the form, on the boxes: you’ll be able to choose to “Pick up the nearby gun” and then “Put it on the gun rack.” Repeat the process on other boxes with barbed fences to make the last chest appear.


Published: Apr 28, 2023 09:23 am